Quick answer
Install the 10th Gen Accord Stage 1 Shift Kit by replacing the shifter base bushings and cable bushings first, then fitting the upgraded centering spring, and finish by checking cable alignment and shift feel before reinstalling trim. Work on a level surface and confirm each bushing seats fully before moving to the next step.
What the Stage 1 kit changes and why order matters
The Stage 1 kit targets compliance in the shifter assembly rather than shortening the throw. Its three parts work together: stiffer shifter base bushings reduce movement at the shifter housing, spherical cable bushings remove play at the cable ends, and the upgraded centering spring tightens the neutral gate. Installing the bushings before the spring lets you feel each change and catch a misaligned cable before the console goes back together.
Because the kit does not include a short shifter or a different shift lever, do not expect a shorter throw after installation. The gain is a stiffer, snappier feel with less slop, which is why the kit is positioned as an affordable starting point for tuners rather than a full shifter replacement.
Fitment checks before you start
Confirm your car is a 10th Gen Accord and that the kit is intended for your shifter configuration. The catalog does not list separate option types or transmission variants for this kit, so verify the part numbers on the shifter base and cable ends against what arrived before disassembly. If your Accord has an aftermarket shifter assembly already installed, check that the base bushing locations and cable end geometry match the kit rather than assuming compatibility.
Set aside enough time to work slowly and have a trim removal tool, a socket set, and a clean tray for fasteners. The kit is a small set of parts, but the surrounding console and cable access determine how long the job takes.
When this kit is the right call, and when it is not
Choose the Stage 1 kit if your 10th Gen Accord shifts but feels vague or rubbery and you want a firmer, more direct feel without changing the lever. It is also a sensible first shifter upgrade because the parts are contained and the install is reversible.
Skip it if you mainly want a shorter throw; that requires a short shifter or a different lever, which this kit does not supply. Also skip it if your cables or shifter mechanism are damaged, because stiffer bushings will not fix worn or broken components.
Stage 1 shift kit installation steps
- Disconnect the battery and remove console trim: With the car off and on a level surface, disconnect the negative battery terminal, then remove the shift knob and surrounding console trim using a trim tool. Common mistake: prying trim at the wrong clip points and cracking the plastic; check for hidden fasteners before pulling. Keep removed fasteners in labeled bags so reassembly does not stall.
- Expose the shifter base and cable ends: Remove the remaining trim and insulation needed to reach the shifter base bushings and the cable end connections. Checkpoint: photograph the cable routing and bushing orientation before removing anything. A photo of the original cable routing prevents reversed or strained cables later.
- Replace the shifter base bushings: Support the shifter assembly, remove the original base bushings, and fit the compliance-reducing bushings from the kit. Common mistake: tightening the base fasteners before all bushings are seated, which leaves the shifter housing misaligned. Hand-tighten first, then torque once every bushing is fully seated.
- Install the spherical cable bushings: Remove the original cable end bushings and press the spherical bushings into the cable ends, then reconnect the cables to the shifter. Checkpoint: confirm each spherical bushing is fully seated and the cable moves freely through its arc without binding. If a cable binds, stop and reseat the bushing rather than forcing the linkage.
- Fit the upgraded centering spring: Remove the original centering spring and install the upgraded spring from the kit, following the orientation you photographed. Common mistake: fitting the spring backwards, which can bias the shifter away from neutral. With the cables still disconnected, the lever should return to center smoothly by hand.
- Reconnect and check cable alignment: Reconnect the cables and cycle the shifter through every gear position before reinstalling trim. Checkpoint: each gear should engage without extra force and the lever should self-center in neutral. If a gear is hard to find, recheck cable adjustment before assuming a defective part.
- Reinstall trim and road-test: Reinstall the console trim and shift knob, reconnect the battery, and test the shifter with the engine off, then on a short low-speed drive. Common mistake: skipping the engine-off check and discovering a misaligned cable only after full reassembly. Recheck fastener torque after the first drive, since new bushings can settle.
Product facts
-
10th Gen Accord Stage 1 Shift Kit: The kit couples compliance-reducing shifter base bushings with spherical shifter cable bushings and an upgraded centering spring. Each part addresses a different source of play, so installing all three gives a stiffer, snappier shift than replacing only one.
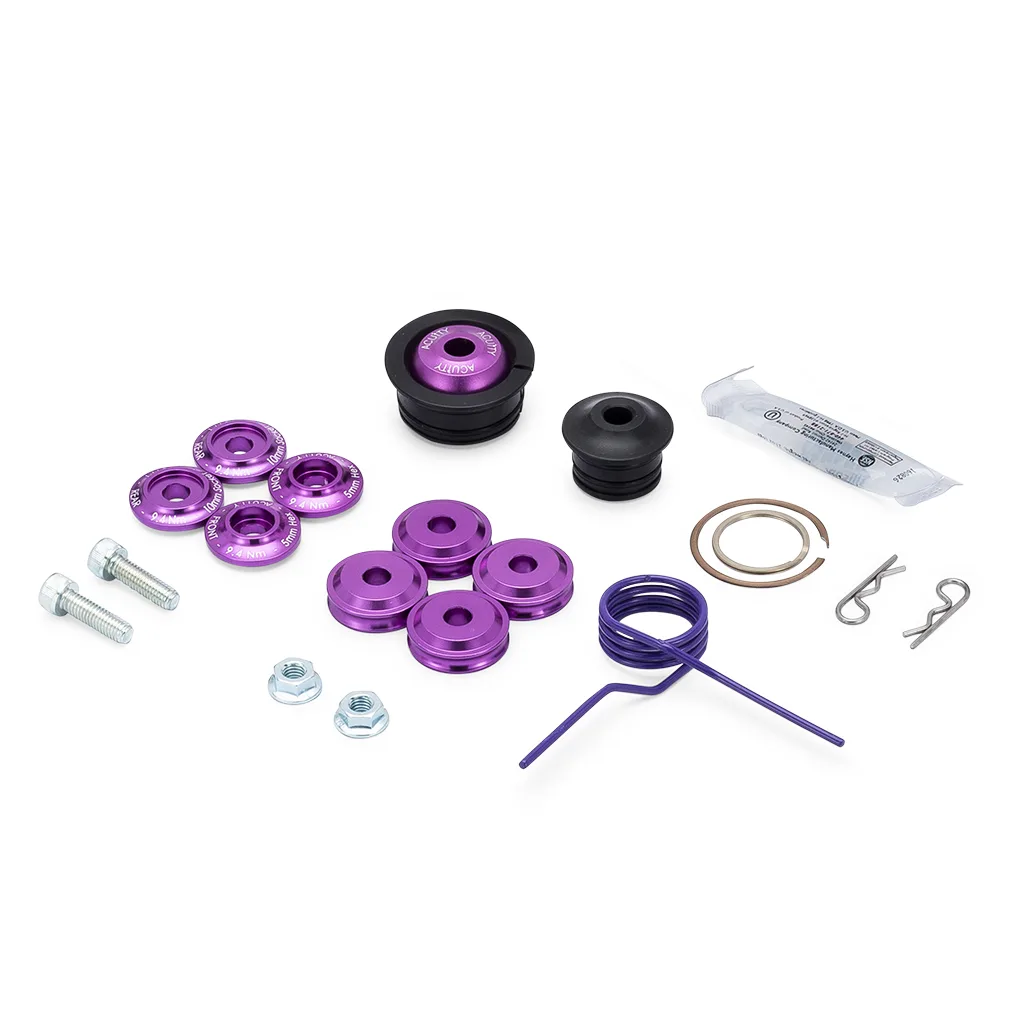
10th Gen Accord Stage 1 Shift Kit