Quick answer
Install the 10th Gen Accord Stage 2 Shift Kit by first replacing the shifter base bushings, then the short throw adapter, centering spring, rocker, and finally the shift linkage bushings—torquing the base bolts to the factory spec and giving the new bushings a 300–500 mile gentle break-in before judging the feel.
Why the order matters on a 10th Gen Accord
The Stage 2 kit changes both the shifter assembly and the cable end. If you install the linkage bushings before the base bushings and short throw adapter, you will preload the cables against a shifter that is still moving around, which can make the centering spring feel off and the throws inconsistent. Work from the shifter base outward so each component is seated before the next one adds resistance.
The short throw adapter also changes the geometry of the shift rod, so the centering spring and rocker should go in after the adapter is secure. That way you can confirm the neutral position without fighting a misaligned rod.
Tools and parts to have ready
You will need a trim removal tool, a 10mm socket, a 12mm socket, a torque wrench that reads low values, and a clean work surface. The kit includes the Shifter Rocker Upgrade (1932), Short Throw Adapter (1923), Shifter Centering Spring Upgrade (1918), Shifter Base Bushings (1930), and Shift Linkage Bushing Upgrade (1881).
Do not guess torque values for the shifter base bolts. Use the factory service information for your model year; if you do not have it, tighten the base bolts evenly in a cross pattern until snug and then verify with the factory spec before road testing. The kit does not supply torque specs, so treat that as a step you must source separately.
What to expect after the install
ACUITY states that after installing this kit you should notice a substantial change in shifting feel. Expect a more direct, mechanical shift with less compliance from the factory rubber bushings. The trade-off is more noise and vibration transferred into the cabin, especially from the linkage bushings, which is normal for a performance-oriented setup.
Do not judge the final feel in the first few miles. New polyurethane and stiffer bushings need a break-in period before they settle into their final position and the centering spring feels consistent.
Step-by-step install and break-in
- 1. Disconnect the battery and remove the center console trim: Use a trim removal tool to pop the shifter surround and unclip the console panels. Common mistake: prying with a metal tool and cracking the trim clips. Checkpoint: keep all clips in a bag so none go missing.
- 2. Remove the factory shifter base and install the Shifter Base Bushings (1930): Unbolt the shifter base with a 10mm socket, then press the new base bushings into the mounting points. Common mistake: over-tightening the base bolts and crushing the bushings. Checkpoint: torque the base bolts to the factory spec for your 10th Gen Accord, not a generic value. If you cannot find the factory torque spec, stop and source it before tightening.
- 3. Install the Short Throw Adapter (1923): Fit the adapter onto the shift rod and secure it per the included instructions. Common mistake: installing the adapter before the base bushings are seated, which misaligns the rod. Checkpoint: confirm the adapter is fully seated and the retaining hardware is tight before moving on.
- 4. Install the Shifter Centering Spring Upgrade (1918) and Shifter Rocker Upgrade (1932): Replace the factory centering spring and rocker with the upgraded parts, then cycle the shifter through the gears by hand. Common mistake: binding the spring during reassembly. Checkpoint: the shifter should return to center smoothly from every gear before you reinstall the console. If the shifter does not self-center, recheck the spring orientation before driving.
- 5. Install the Shift Linkage Bushing Upgrade (1881): Access the cable end at the transmission and replace the factory linkage bushing. Common mistake: forcing the bushing and tearing the outer lip. Checkpoint: the cable should move freely with no binding through the full shift range.
- 6. Reassemble and perform the break-in: Reinstall the console trim, reconnect the battery, and drive gently for the first 300–500 miles, avoiding aggressive high-rpm shifts. Common mistake: judging the kit in the first 50 miles when the bushings are still settling. Checkpoint: after break-in, recheck the shifter base bolts and linkage hardware for loosening. Re-torque the base bolts after the break-in period; new bushings can compress slightly.
Kit contents at a glance
-
10th Gen Accord Stage 2 Shift Kit: The Stage 2 kit bundles the Shifter Rocker Upgrade (1932), Short Throw Adapter (1923), Shifter Centering Spring Upgrade (1918), Shifter Base Bushings (1930), and Shift Linkage Bushing Upgrade (1881). Having all five parts in one box means you can plan a single install session and avoid mixing Stage 1 and Stage 2 components.
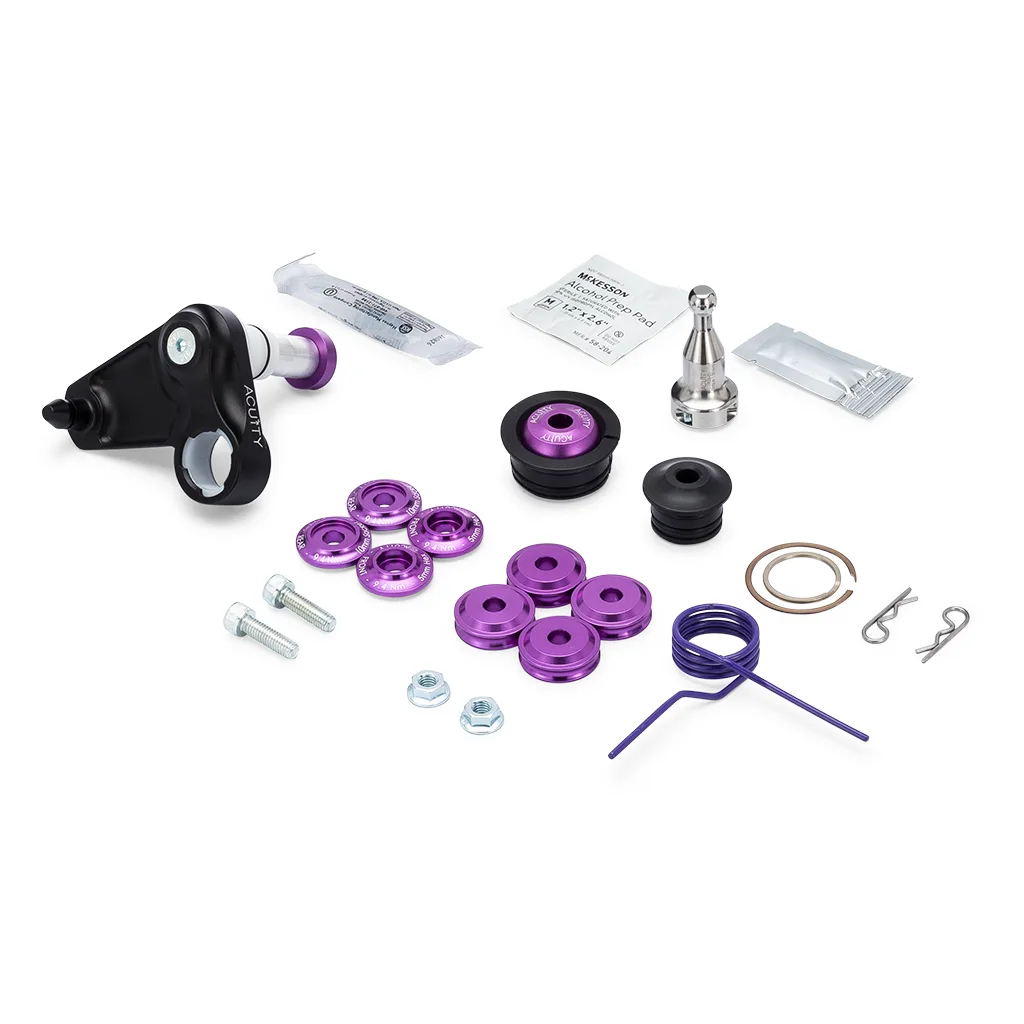
10th Gen Accord Stage 2 Shift Kit