Quick Answer
The 30MF Rosan Gladiator Class Up Armor is a straightforward add-on kit that transforms your base figure into a gladiator-themed warrior. Focus on proper part alignment and seam cleanup to get the best look.
Understanding the Armor Set
The Class Up Armor Rosan Gladiator is designed specifically for the 30MF series, adding shoulder armor, a helmet, a skirt piece, and weapon details. It does not include a base figure, so you'll need a compatible 30MF body to attach it to.
This kit uses snap-fit assembly with no glue required, but some parts may need light sanding for a perfect fit. The plastic is standard Bandai quality, easy to cut and sand.
Customization Potential
Because the armor is part of the 30MF system, you can mix and match with other 30MF armor sets or paint it for a unique look. The gladiator theme works well with metallic or weathered finishes.
Keep in mind that the armor pieces are designed for a specific body type, so they may not fit other model kit lines without modification.
Build Steps for the 30MF Rosan Gladiator Armor
- Prepare Your Tools and Workspace: Gather side cutters, a hobby knife, sanding sticks (400-600 grit), and a clean cutting mat. Ensure you have a compatible 30MF base figure ready. Using dull cutters can stress the plastic and cause white stress marks.
- Cut Parts from the Runners: Cut each part away from the runner using side cutters, leaving a small nub. Then carefully trim the nub flush with a hobby knife. Cut too close to the part and you risk gouging the plastic; leave a 1-2 mm nub for safety.
- Sand and Clean the Parts: Lightly sand the cut nubs with 400-grit sandpaper, then smooth with 600-grit. Wipe dust away with a soft cloth or brush. Skipping sanding can leave visible nub marks that ruin the clean gladiator look.
- Test Fit the Armor Pieces: Dry-fit each armor piece onto your 30MF figure without forcing. Check alignment of the shoulder pads, helmet, and skirt armor. If a piece feels tight, sand the connection point slightly rather than forcing it—this prevents cracks.
- Assemble the Armor: Snap the armor pieces into place. For a more secure fit on moving joints, you can apply a tiny drop of plastic cement or blue tack. Avoid glue on snap-fit connections unless you plan to pose the figure permanently; it makes future disassembly difficult.
- Final Pose and Display: Pose your completed Rosan Gladiator on a stand or diorama. Adjust the armor to sit naturally without gaps. Check that the skirt armor doesn't restrict leg movement if you want dynamic poses.
Product Details
-
30MF CLASS UP ARMOR ROSAN GLADIATOR: This is an official Bandai Hobby product for the 30MF series, including class-up armor pieces themed around a Rosan Gladiator. It's a licensed, high-quality add-on that expands your 30MF figure's display options without needing glue or paint.
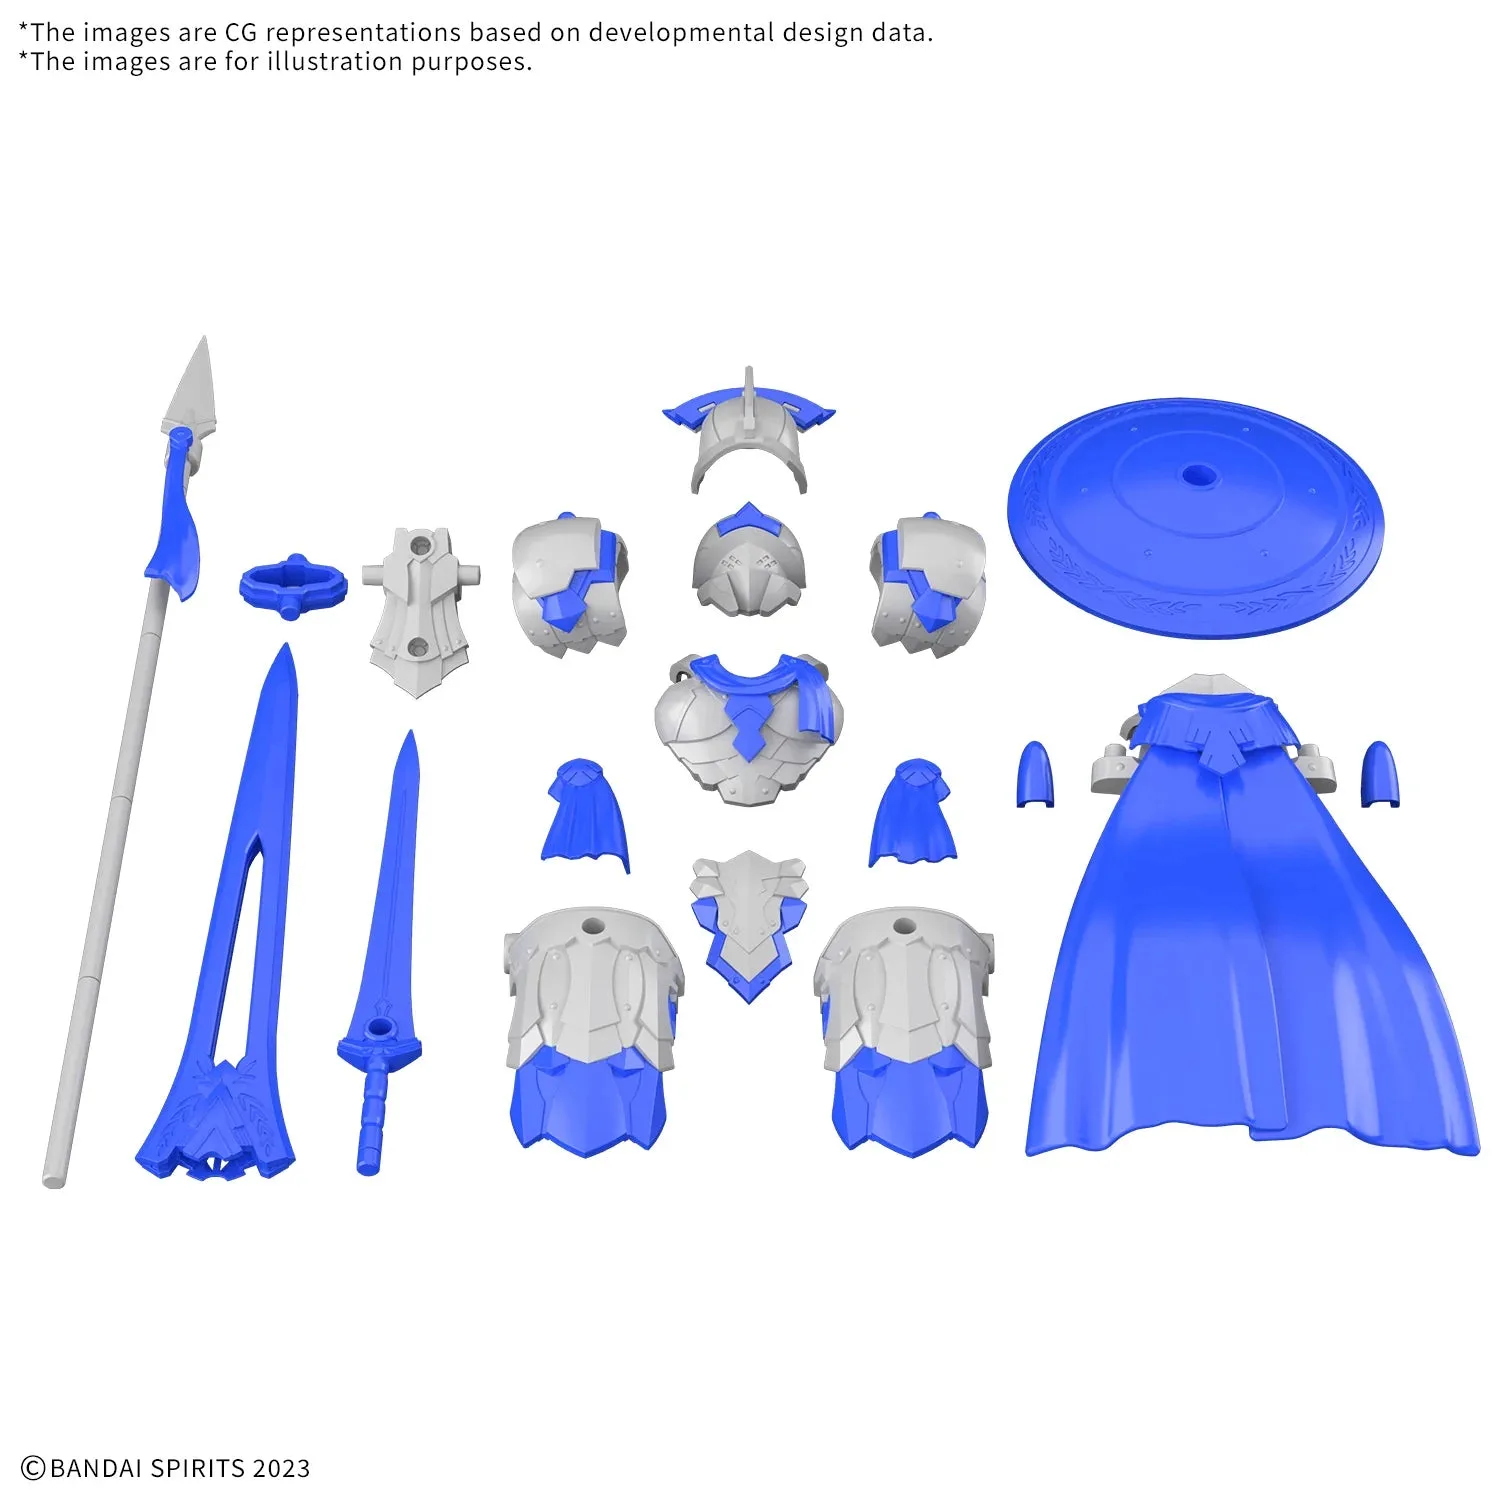
30MF CLASS UP ARMOR ROSAN GLADIATOR