What the ProtoShield V3 Adds to Your Arduino Mega 2560
The Arduino MEGA Compatible ProtoShield V3 is a prototyping expansion board that sits directly on top of your Arduino Mega 2560. It breaks out all 70 Mega pins to single-row edge headers, giving you easy access for wiring and soldering. The shield includes a removable mini breadboard (170 tie points) for quick circuit experiments and a soldering area for permanent component mounting.
This guide covers the essential setup steps and compatibility details you need to start prototyping with the ProtoShield V3 and your Arduino Mega.
ProtoShield V3 Key Specifications
-
Arduino MEGA Compatible ProtoShield V3 Prototype Expansion Board + Mini Bread Board: Fits Arduino Mega 2560 — all 70 pins broken out to edge headers Ensures full pin access for your prototyping, including the extended digital and power/analogue headers.
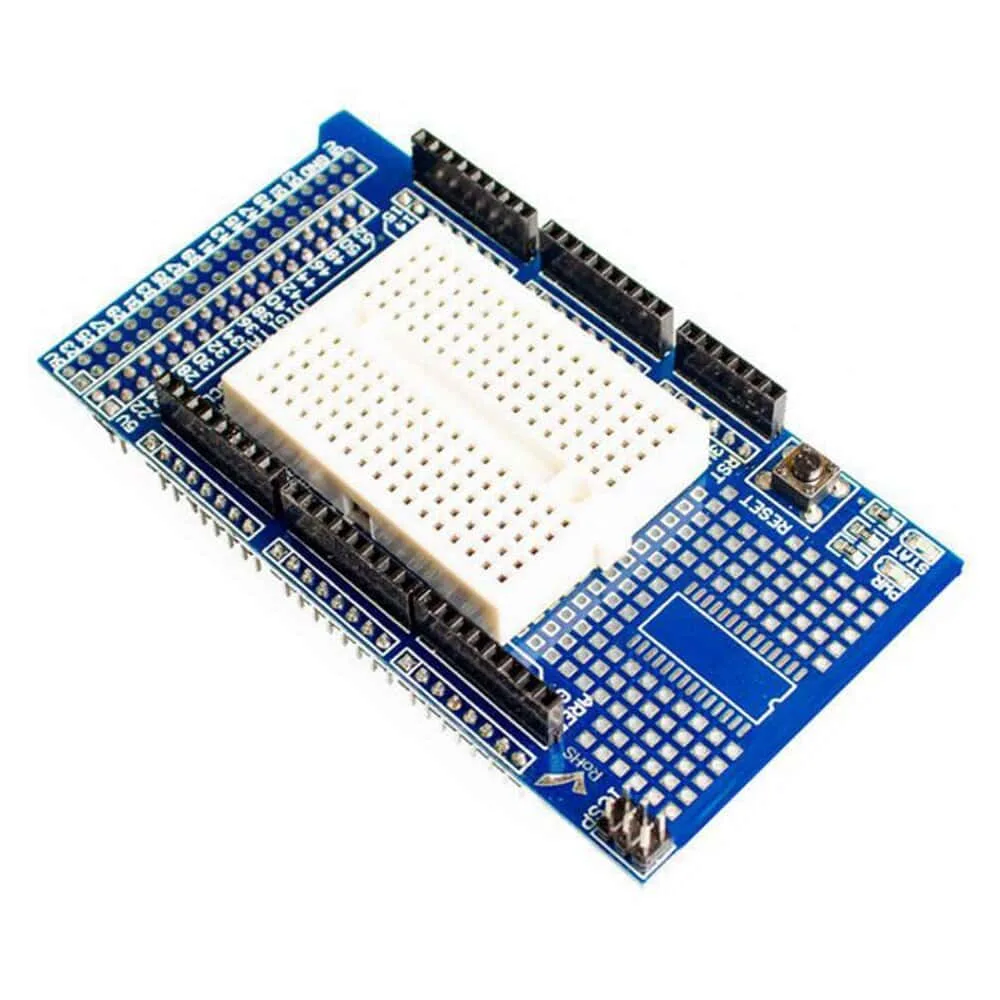
Arduino MEGA Compatible ProtoShield V3 Prototype Expansion Board + Mini Bread Board
-
Arduino MEGA Compatible ProtoShield V3 Prototype Expansion Board + Mini Bread Board: Removable mini breadboard included — 170 tie points for rapid prototyping Lets you test circuits without soldering; the breadboard can be repositioned or removed as needed.
-
Arduino MEGA Compatible ProtoShield V3 Prototype Expansion Board + Mini Bread Board: Labelled power rails — 5V, 3.3V, and GND clearly marked Simplifies connecting power to your prototype components without guessing which rail is which.
-
Arduino MEGA Compatible ProtoShield V3 Prototype Expansion Board + Mini Bread Board: Reset button and power LEDs — accessible from the shield top surface Lets you reset the Mega and see power status without reaching underneath the shield.
Compatibility: Mega 2560 Only
The ProtoShield V3 is designed specifically for the Arduino Mega 2560 R3 and R2 header layouts. It does not fit the Arduino Uno — the Uno ProtoShield is a separate product with different pin spacing. If you are using a Mega 2560, this shield will plug directly onto the header pins without any adapter.
The supplied information confirms the shield fits the Mega 2560 R3 and R2, including the extended digital pin header and the power/analogue headers. Always verify your board revision before purchase.
Setting Up the ProtoShield V3 on Your Mega 2560
Follow these steps to mount and start using the ProtoShield V3 with your Arduino Mega 2560.
- 1. Align the shield with the Mega headers: Place the ProtoShield V3 on top of your Mega 2560 so the 70 edge header pins align with the female headers on the Mega. The shield should sit flush without forcing.
- 2. Press down gently to seat the shield: Apply even pressure to push the shield onto the Mega headers. The shield carries a reset button and power LEDs that should be accessible from the top.
- 3. Attach the mini breadboard (optional): The mini breadboard attaches over the soldering area via adhesive pads. You can reposition or remove it later. Use it for temporary component connections without soldering.
- 4. Connect power to the labelled rails: Use the 5V, 3.3V, and GND rails marked on the shield to supply power to your prototype. These rails are connected to the corresponding Mega pins.
- 5. Begin prototyping: Wire your sensors, LEDs, or other components to the edge headers or breadboard. For permanent builds, solder components directly to the prototyping area.
Practical Considerations for Your ProtoShield Build
The mini breadboard is ideal for testing circuit ideas before soldering. Its 170 tie points are enough for small sensor or LED experiments. If you need more space, you can remove the breadboard and solder components directly into the prototyping area.
The shield's labelled power rails help avoid wiring mistakes, but always double-check your connections before powering the board. The ProtoShield V3 is best suited for Mega prototyping, sensor wiring experiments during development, and any Mega project needing a stable breadboard surface without wires dangling off the board.
Note that the supplied information does not include specific operating instructions or voltage/current limits beyond the 5V and 3.3V rail labels. For detailed electrical specifications, refer to the Arduino Mega 2560 documentation.