Quick answer
Replace a beadlock ring when you find cracks, deep gouges, a bent or warped sealing surface, or repeated air leaks at the bead. If the ring is sound, you can often reuse it with fresh hardware and a new seal. Always follow the wheel maker's torque sequence and spec, and check the ring's flatness before reinstalling.
A beadlock ring is a wear part, not a permanent fixture. It takes the hits from rocks, sand, and trail debris while clamping the tire bead to the wheel, so it slowly loses its flat, even sealing surface. Knowing when to replace it keeps you from chasing slow leaks or risking a bead failure far from help.
This guide walks through the signs of beadlock ring wear, how to inspect a ring properly, and an ordered replacement process you can follow in a garage or driveway. It also covers hardware, sealing, and torque checkpoints so the new ring seats correctly the first time.
Signs a beadlock ring needs replacing
Start with a visual and hands-on inspection. Cracks, especially near bolt holes, are a clear replacement trigger. So are deep gouges or flattened spots along the clamping edge, because those areas can no longer press the tire bead evenly. Run a straightedge across the ring's sealing face; if you can see daylight under it or feel a rock, the ring is warped and should be replaced rather than straightened.
Function matters as much as appearance. If a tire keeps losing air at the bead after you have cleaned and reseated it, or if you keep snugging bolts to stop a leak, the ring may be the problem. Bent or stretched hardware, elongated bolt holes, and a ring that no longer sits flush on the wheel are also signs it is time to replace the ring and inspect the wheel.
- Check the ring on a clean, flat surface, not while it is still mounted on the vehicle.
- Photograph the bolt pattern and ring orientation before removal so reassembly is easier.
- If the wheel itself is cracked, dented, or has damaged threads, replacing only the ring will not fix the leak.
Inspect the ring and hardware before you buy
Once the ring is off, clean it with a mild cleaner and a soft brush, then dry it completely. Inspect both the outer face and the inner clamping surface. Look for hairline cracks around every bolt hole, because that is where stress concentrates. Check the ring's flatness with a straightedge in several directions. A ring that rocks or shows a consistent gap is not going to seal reliably.
Inspect the bolts, washers, and threaded inserts at the same time. Replace any bolt with stretched threads, rounded heads, or corrosion pitting. If the wheel uses threaded inserts, confirm they are intact and seated. Reusing damaged hardware with a new ring is a common way to create a leak you will fight later.
- Match the replacement ring to the exact wheel model and size, not just the bolt count.
- If the ring is a factory replacement for your wheel, confirm the finish and size option before ordering.
- Keep a spare set of hardware on hand if you frequently remove and reinstall the ring.
Remove the old ring safely
Deflate the tire completely before loosening any beadlock bolts. A beadlock ring holds significant clamping force, and releasing it under pressure can send hardware or the ring itself moving unexpectedly. Support the wheel so it cannot tip, then loosen the bolts in a star or crisscross pattern, a quarter to a half turn at a time, until tension is released evenly.
Do not pry the ring off with a screwdriver against the sealing surface. If the ring is stuck to the tire or wheel, work around the circumference with a plastic or brass scraper and gentle taps. Once the ring is free, set it aside and clean the wheel's bead seat and the tire bead. Any old sealant, dirt, or rubber residue left behind will cause a leak with the new ring.
- Never loosen beadlock bolts with the tire inflated.
- Keep bolts and washers in a tray so you do not lose or mix them.
- If the ring will not release, stop and check for a bolt you missed rather than forcing it.
Install the new ring and torque it correctly
Seat the tire bead on the wheel, then position the new ring so its bolt holes align with the wheel. Start all bolts by hand to avoid cross-threading. Tighten them in the manufacturer's recommended pattern in stages, such as snug, then partial torque, then final torque, rather than taking one bolt to full spec at a time. This keeps the ring flat and spreads clamping force evenly.
Use the torque spec published for your specific wheel and hardware. Beadlock ring torque specs vary by wheel model, bolt size, and manufacturer, so do not borrow a number from a different wheel. If your wheel maker does not publish a spec for your exact setup, contact them before tightening. After the first heat cycle or a short drive, recheck torque with a calibrated wrench.
- Tighten in stages and in a crisscross pattern to avoid warping the ring.
- Use a calibrated torque wrench, not an impact gun, for final torque.
- Recheck torque after the first drive or heat cycle, then periodically after that.
Seal, inflate, and check for leaks
With the ring torqued, inflate the tire to its normal pressure and listen for leaks at the bead. Spray a soapy water solution around the ring and bead seat; bubbles show where air is escaping. If you find a leak, do not simply tighten bolts further. Deflate, break the bead, and check for a pinched tire bead, debris, or a ring that is not seated flat.
Once the tire holds pressure, recheck torque after the first heat cycle, since the ring and hardware can settle. Record the date and the torque spec you used so future maintenance is consistent. If a leak persists after a correct install with a sound ring and clean surfaces, inspect the wheel for damage or have a tire shop evaluate the assembly.
- A soapy water test is faster and more reliable than guessing by feel.
- Do not over-torque to chase a leak; that can warp the ring or damage threads.
- If the leak continues, stop and inspect the wheel and tire bead before reinstalling.
Beadlock ring replacement steps
- Deflate and support the wheel: Remove all air pressure before touching a beadlock bolt, and set the wheel on a stable surface so it cannot tip while you work. Checkpoint: confirm 0 psi and a stable wheel before loosening anything.
- Loosen bolts in a crisscross pattern: Work around the ring in a star pattern, turning each bolt a quarter to a half turn at a time until tension is released evenly. Mistake to avoid: backing one bolt all the way out first, which can warp the ring.
- Remove the ring and clean the bead seat: Lift the ring off without prying on the sealing surface, then clean old sealant, dirt, and rubber residue from the wheel and tire bead. Checkpoint: a clean, dry bead seat is what lets the new ring seal.
- Inspect the new ring and hardware: Check the replacement ring for cracks, flatness, and correct size, and use fresh bolts and washers if the old ones show stretch, corrosion, or rounded heads. Mistake to avoid: reusing damaged hardware with a new ring.
- Seat the ring and start bolts by hand: Align the ring on the wheel, thread every bolt by hand to prevent cross-threading, then snug them in the manufacturer's pattern. Checkpoint: all bolts should turn freely by hand before you apply torque.
- Torque in stages to the correct spec: Use the torque spec for your exact wheel and hardware, tightening in stages and in a crisscross pattern with a calibrated wrench. Mistake to avoid: using an impact gun or a torque number borrowed from a different wheel.
- Inflate, leak-test, and recheck torque: Inflate to normal pressure, test the bead with soapy water, and recheck torque after the first heat cycle or short drive. Next step: if a leak persists, deflate and inspect the bead and wheel rather than adding more torque.
Replacement ring and wheel examples from Method Race Wheels
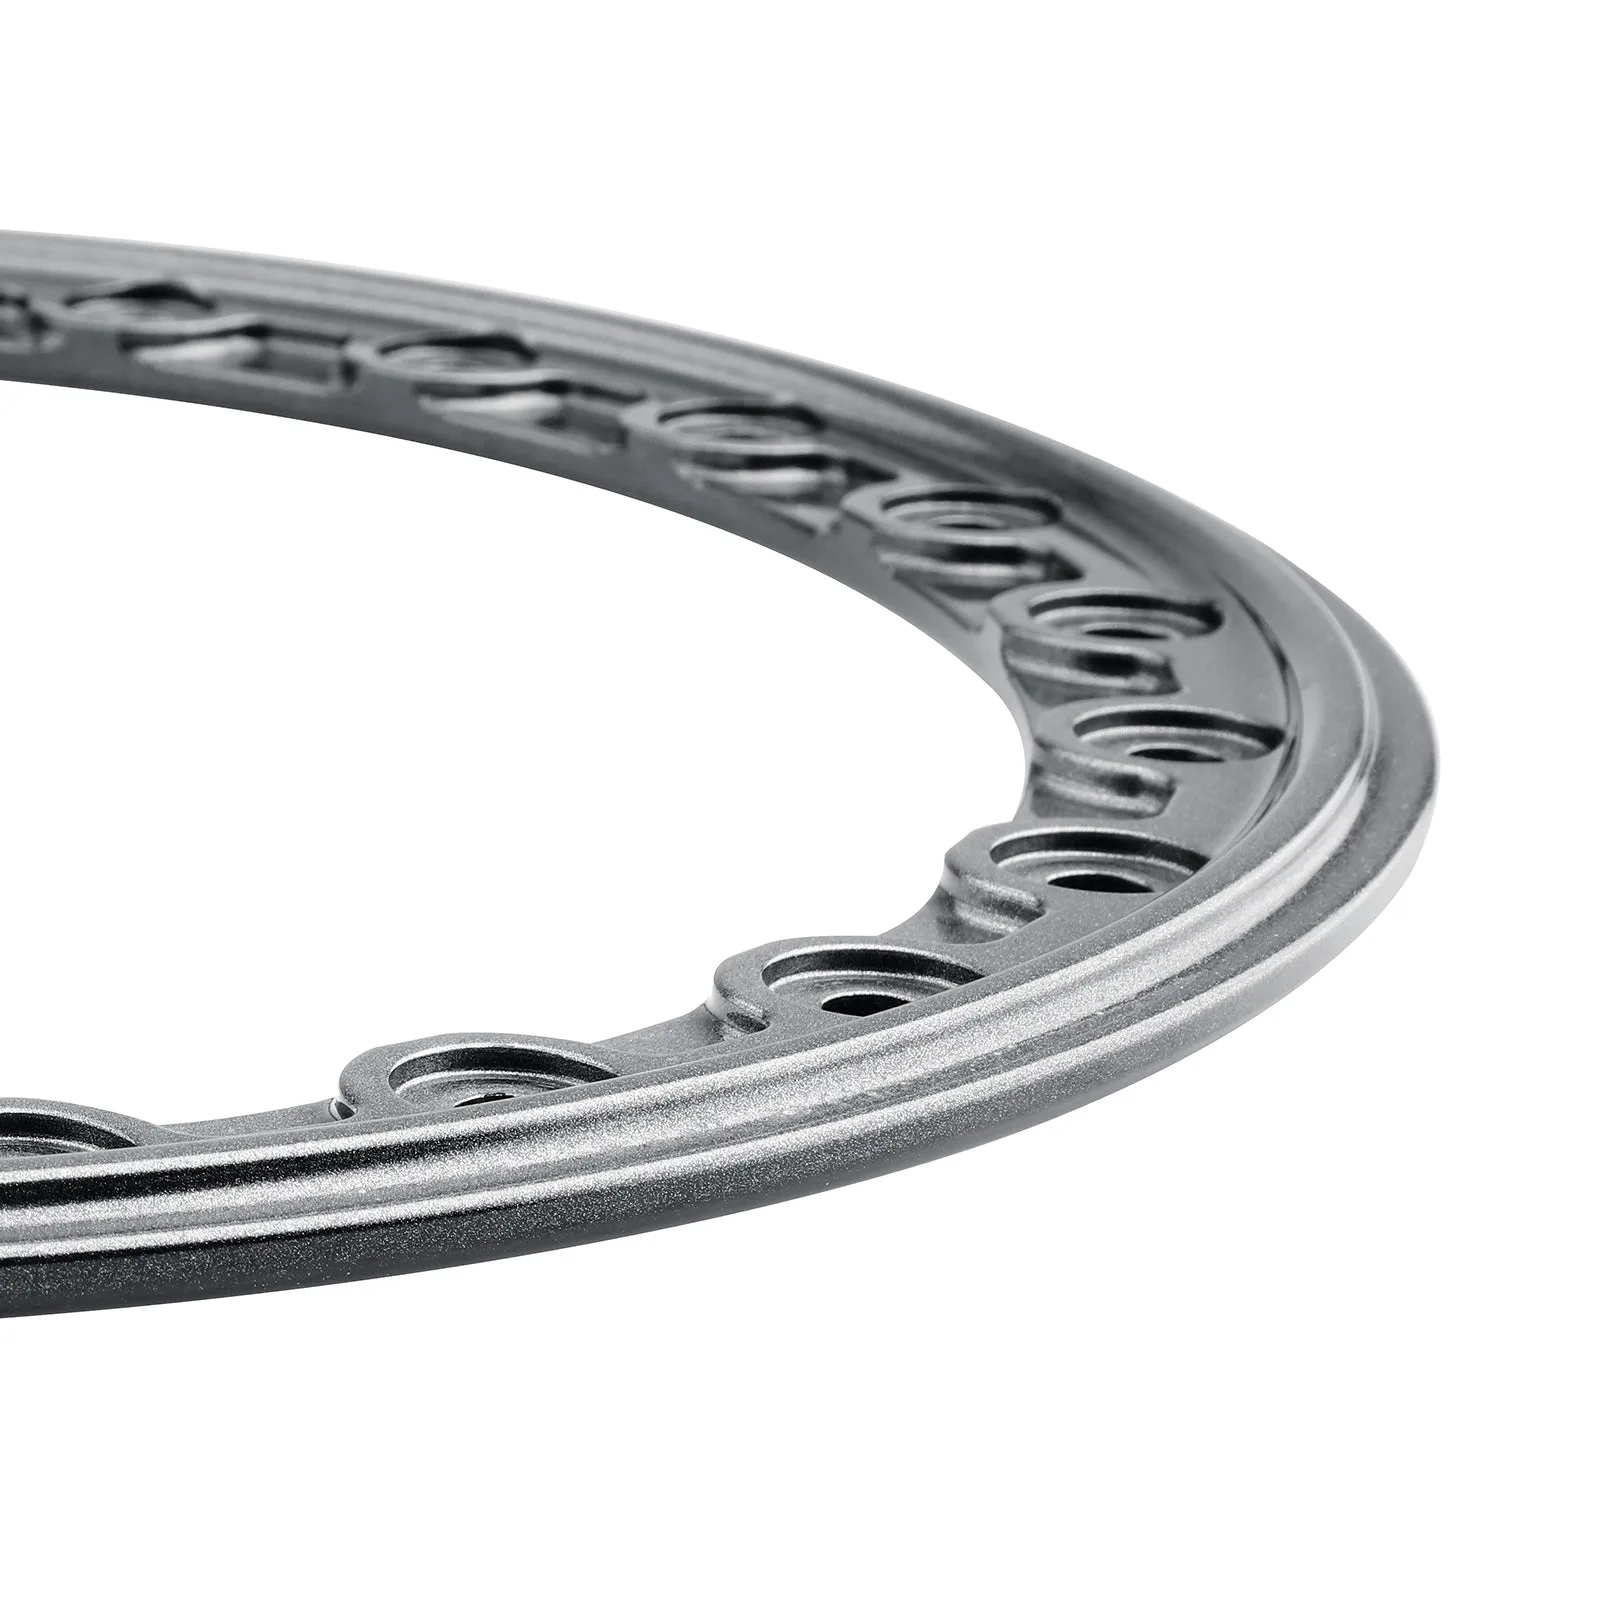
- V.7 Beadlock Ring | Gloss Graphite: The V.7 Beadlock Ring in Gloss Graphite is a replacement ring originally found on the 415 UTV Beadlock, offered by Method Race Wheels as an accessory for compatible beadlock applications, with a 15-inch V.7 Beadlock Ring option (BR-DB15-7-G). If you run a compatible Method beadlock and damage the ring, this is a direct replacement option rather than a universal part, so confirm your wheel model and size before ordering.
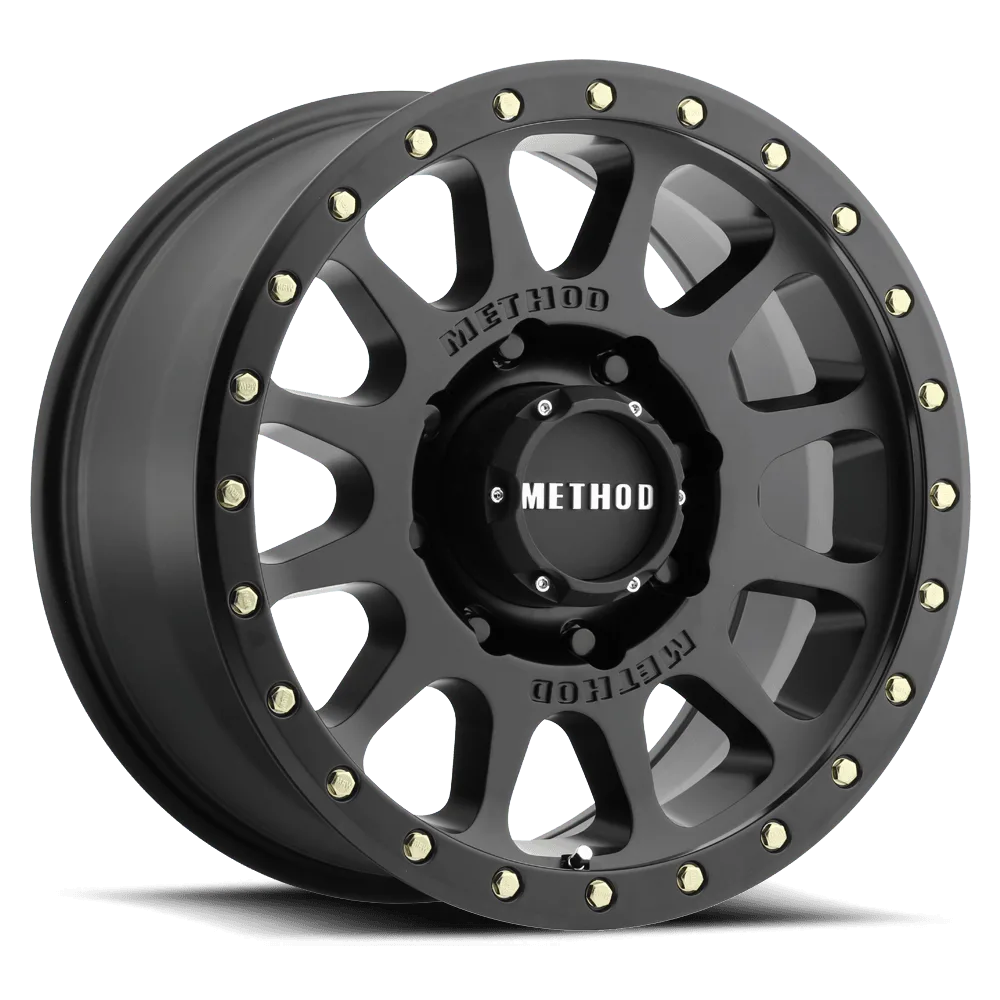
- 305-HD | Matte Black: The 305-HD NV Wheel features an iconic 12 window design with a debossed Method logo on either side of the center cap, a lip undercut that simulates a true beadlock wheel, replaceable lip bolts with optional colors available, and a Heavy Duty (HD) load rating of 4,500 lbs. This is a standard wheel with a simulated beadlock look, not a true beadlock. It uses replaceable lip bolts, so if you like the beadlock appearance without ring maintenance, this is the type of wheel to compare against a real beadlock setup.
A beadlock ring is a wear item, so treat replacement as routine maintenance rather than a repair of last resort. Inspect the ring and hardware, clean the bead seat, and torque in stages to the spec for your exact wheel. If you are unsure whether your ring or wheel is still serviceable, have a qualified shop inspect the assembly before you head out.