Quick answer
Choose the left-oriented Classic Staircase III set when your staircase ascends from left to right as you face the wall; choose right when it ascends from right to left. The set is designed to follow the natural diagonal of your stairs, so orientation should match your stair direction, not personal preference alone.
Why orientation matters for staircase gallery walls
Staircase walls have a built-in diagonal line created by the handrail and step edges. A gallery set that follows that line looks intentional; one that fights it feels off. The Classic Staircase III is an organic-style arrangement, meaning the frames step up or down in a loose sequence. Left and right versions mirror that sequence so the visual flow matches your staircase.
Before you commit, stand at the bottom of your stairs and look up at the wall. Note whether the wall rises to the right or to the left. That single observation determines which set to order.
When the template decides for you
The Classic Staircase III includes a printed professional hanging template. The template is designed for one orientation, so it will only align correctly if you have the matching left or right set. If you already own a set and the template seems to run opposite your stairs, you likely have the wrong orientation for that wall. In that case, you can either exchange the set or use the template on a different staircase wall that matches its direction. Do not try to flip the template—the spacing and frame sizes are arranged for one flow.
Step-by-step placement and hanging
- 1. Confirm your staircase direction: Stand at the bottom of the stairs facing the wall. If the steps rise from left to right, order the left-oriented set. If they rise from right to left, order the right-oriented set. Checkpoint: the set’s diagonal should echo the handrail, not cut across it.
- 2. Unpack and identify the template: Lay out all frames and the printed template. The template is labeled for left or right; confirm it matches your set before hanging anything. Mistake to avoid: assuming the template is reversible—it is not.
- 3. Position the template on the wall: Use painter’s tape to secure the template at a comfortable viewing height, typically with the center of the arrangement around 60 inches from the floor at the midpoint of the stairs. Step back and check the flow from both the bottom and top of the staircase. Checkpoint: view from both directions—what looks right from below may look off from above.
- 4. Mark and drill anchor points: Use a level to confirm the template is straight, then mark nail or screw positions through the template holes. Drill or hammer accordingly, using appropriate hardware for your wall type. Mistake to avoid: skipping the level—stairs create an optical slant that can make a crooked template look straight.
- 5. Hang the largest frame first: Start with the 16" x 20" frame as your anchor, then work outward to smaller frames following the template sequence. Checkpoint: the large frame should sit at the visual center of the arrangement, not at the edge.
- 6. Remove the template and fine-tune: Gently tear away the template and adjust any frame that sits off the mark. Step back to check the overall diagonal flow against your staircase. Final check: the arrangement should lead the eye up or down the stairs, not sideways.
Product facts
-
Bobby Berk - Classic Staircase III - Black (Left - No Mat): The Classic Staircase III gallery wall set includes a printed professional hanging template and one large 16" x 20" classic wood frame. The template removes guesswork for spacing, but only if you have the correct left or right orientation for your staircase.
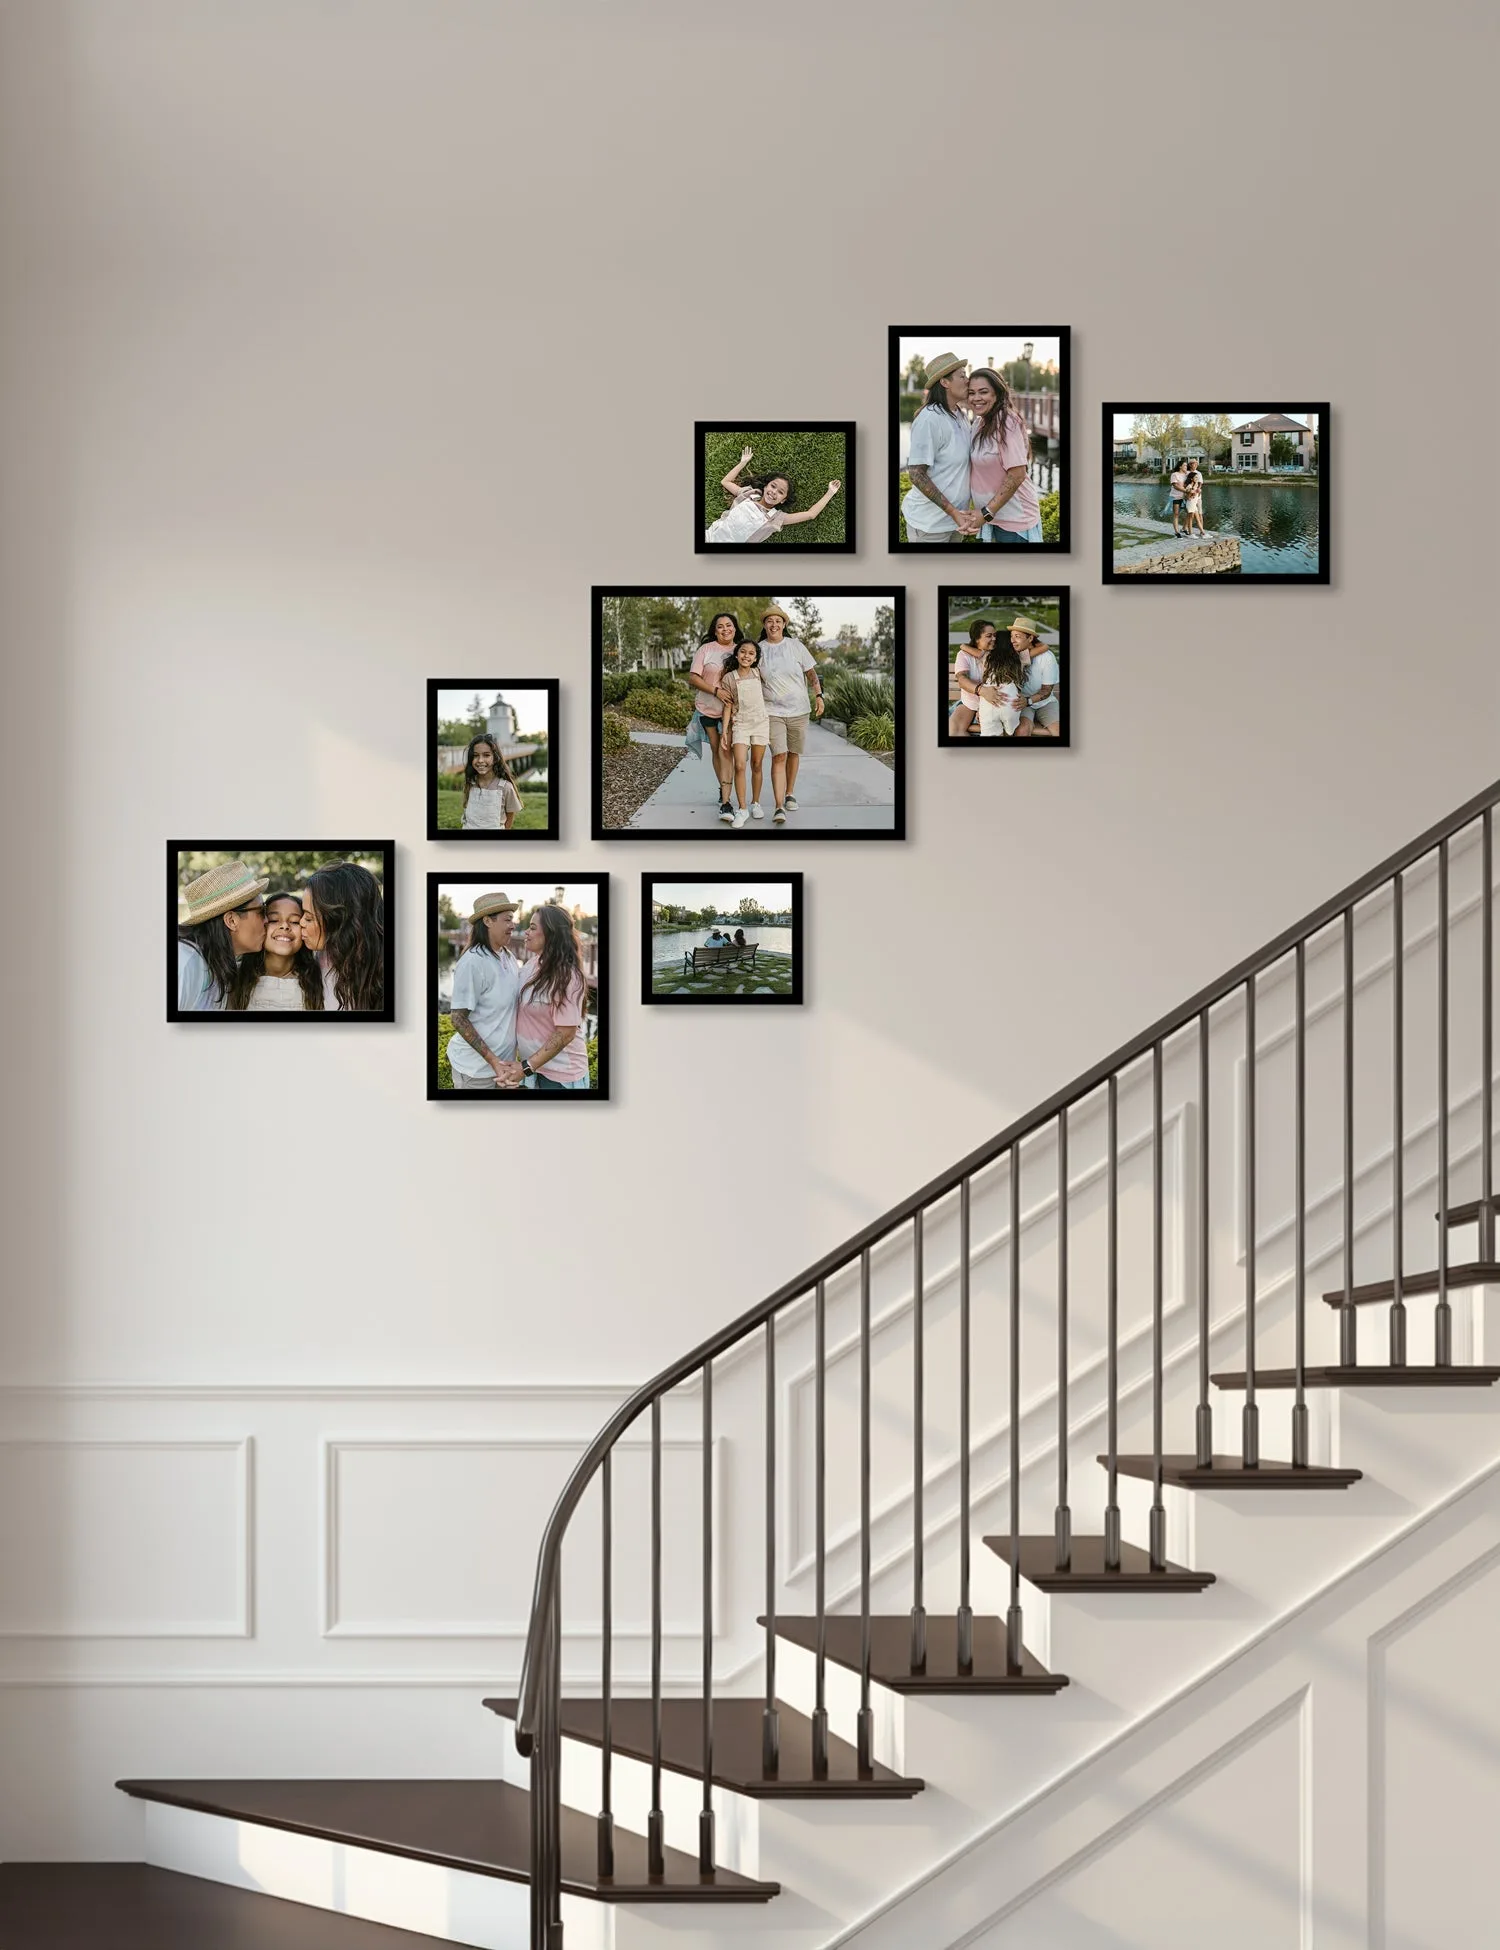
Bobby Berk - Classic Staircase III - Black (Left - No Mat)