Quick answer
Set up the Browning Dark Ops Pro X 1080 by preparing the card and batteries first, then mounting it at a slight downward angle about 10–15 feet from your target, and finally fine-tuning the IR power and trigger settings before you walk away.
Why placement matters more than megapixels
The Dark Ops Pro X 1080 uses an invisible infrared flash, which is a real advantage for skittish game or unwanted visitors. But that advantage only pays off if the camera has a clear line of sight and a stable mount. A camera pointed at waving grass or mounted loosely will produce blurry or empty frames no matter how good the trigger speed is.
Think of placement as three separate decisions: distance to the subject, height and angle, and what is behind the target. Get those right and the default settings will usually do the rest.
When to adjust the IR flash power
The adjustable IR flash power is one of the more useful controls on this model, but it is also easy to leave at full power and wash out close subjects. If your target is consistently within 15–20 feet, lowering the IR power can reduce overexposure and give you more detail in the animal's coat or a person's clothing. For longer distances, raise it. Check a few test images at night before committing to a setting.
Step-by-step setup and placement
- Prepare the card and batteries before you leave: Format a compatible SD card in the camera and insert fresh batteries. Power on and confirm the 1.5-inch screen shows the correct date and time. Common mistake: formatting the card in a computer instead of the camera, which can cause write errors. Check the screen for a card error before you mount the camera.
- Scout the location and clear the field of view: Look for a tree or post that faces your target area and is about 10–15 feet away. Clear grass, twigs, and leaves from the immediate foreground. Common mistake: mounting too close to tall grass that waves in the wind and triggers false captures. If you cannot clear the foreground, move the camera rather than trimming every visit.
- Mount at the right height and angle: Use the all-steel adjustable tree mount bracket to attach the camera about 3–4 feet above the ground, angled slightly downward toward the trail or bait site. Common mistake: mounting too high and pointing straight out, which misses animals close to the camera. A slight downward angle covers more ground at the typical 10–15 foot distance.
- Set trigger and IR settings for the location: Start with the default trigger settings, then adjust the IR flash power based on distance: lower it for close targets, raise it for longer distances. Common mistake: leaving IR at full power for a camera aimed at a close trail, which washes out night images. Take one night test shot before you leave the site.
- Walk-test and confirm framing: Walk through the target area at normal pace and check that the camera triggers and frames you fully. Use the color screen to confirm the view. Common mistake: assuming the aim is correct without a test walk. A quick walk-test catches aim errors that are hard to fix from the photos alone.
Product facts that affect setup
-
Browning Trail Camera - Dark Ops Pro X 1080: The 2023 Dark Ops HD Pro X 1080 has a 0.15-second trigger speed and an all-steel adjustable tree mount bracket. The fast trigger helps catch moving game, and the steel bracket lets you set a firm angle without shimming with sticks or straps.
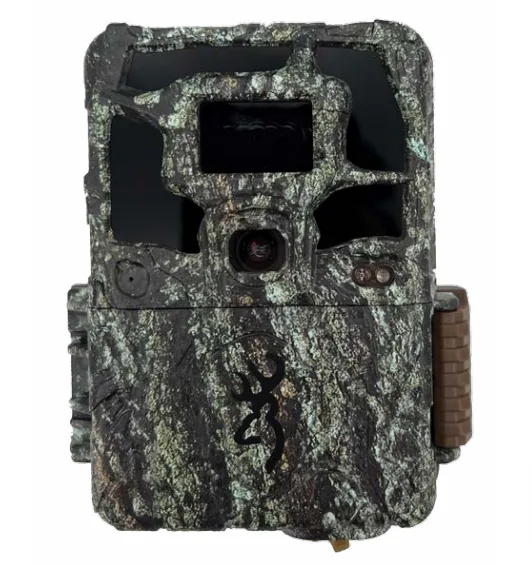
Browning Trail Camera - Dark Ops Pro X 1080
-
Browning Trail Camera - Dark Ops Pro X 1080: It features a 1.5-inch color screen and adjustable IR flash power at night. The screen lets you confirm framing in the field, and adjustable IR power helps you avoid washed-out night images at close range.