What's in the Becka's Baking House Kit
The Becka's Baking House kit from Hands Craft includes everything you need to create a cozy miniature bakery. Inside the box, you'll find wooden sheets with pre-cut pieces, an instruction booklet with illustrated steps, and tools to get started: glue, tweezers, an LED light, electrical wires, and a battery case. There are also paper pieces that need to be cut out and glued together for details like signs or decorations.
The kit is designed for both beginners and experienced builders. No two builds are exactly alike, and the unique journey of creation is part of the fun. The warm LED lighting adds a realistic glow to the finished house, making it a charming display piece.
Key Kit Facts at a Glance
-
Hands Craft | Becka's Baking House: LED lights are included to illuminate the house with a warm, realistic glow. The lighting is a standout feature that brings the miniature bakery to life, especially when displayed on a shelf or table.
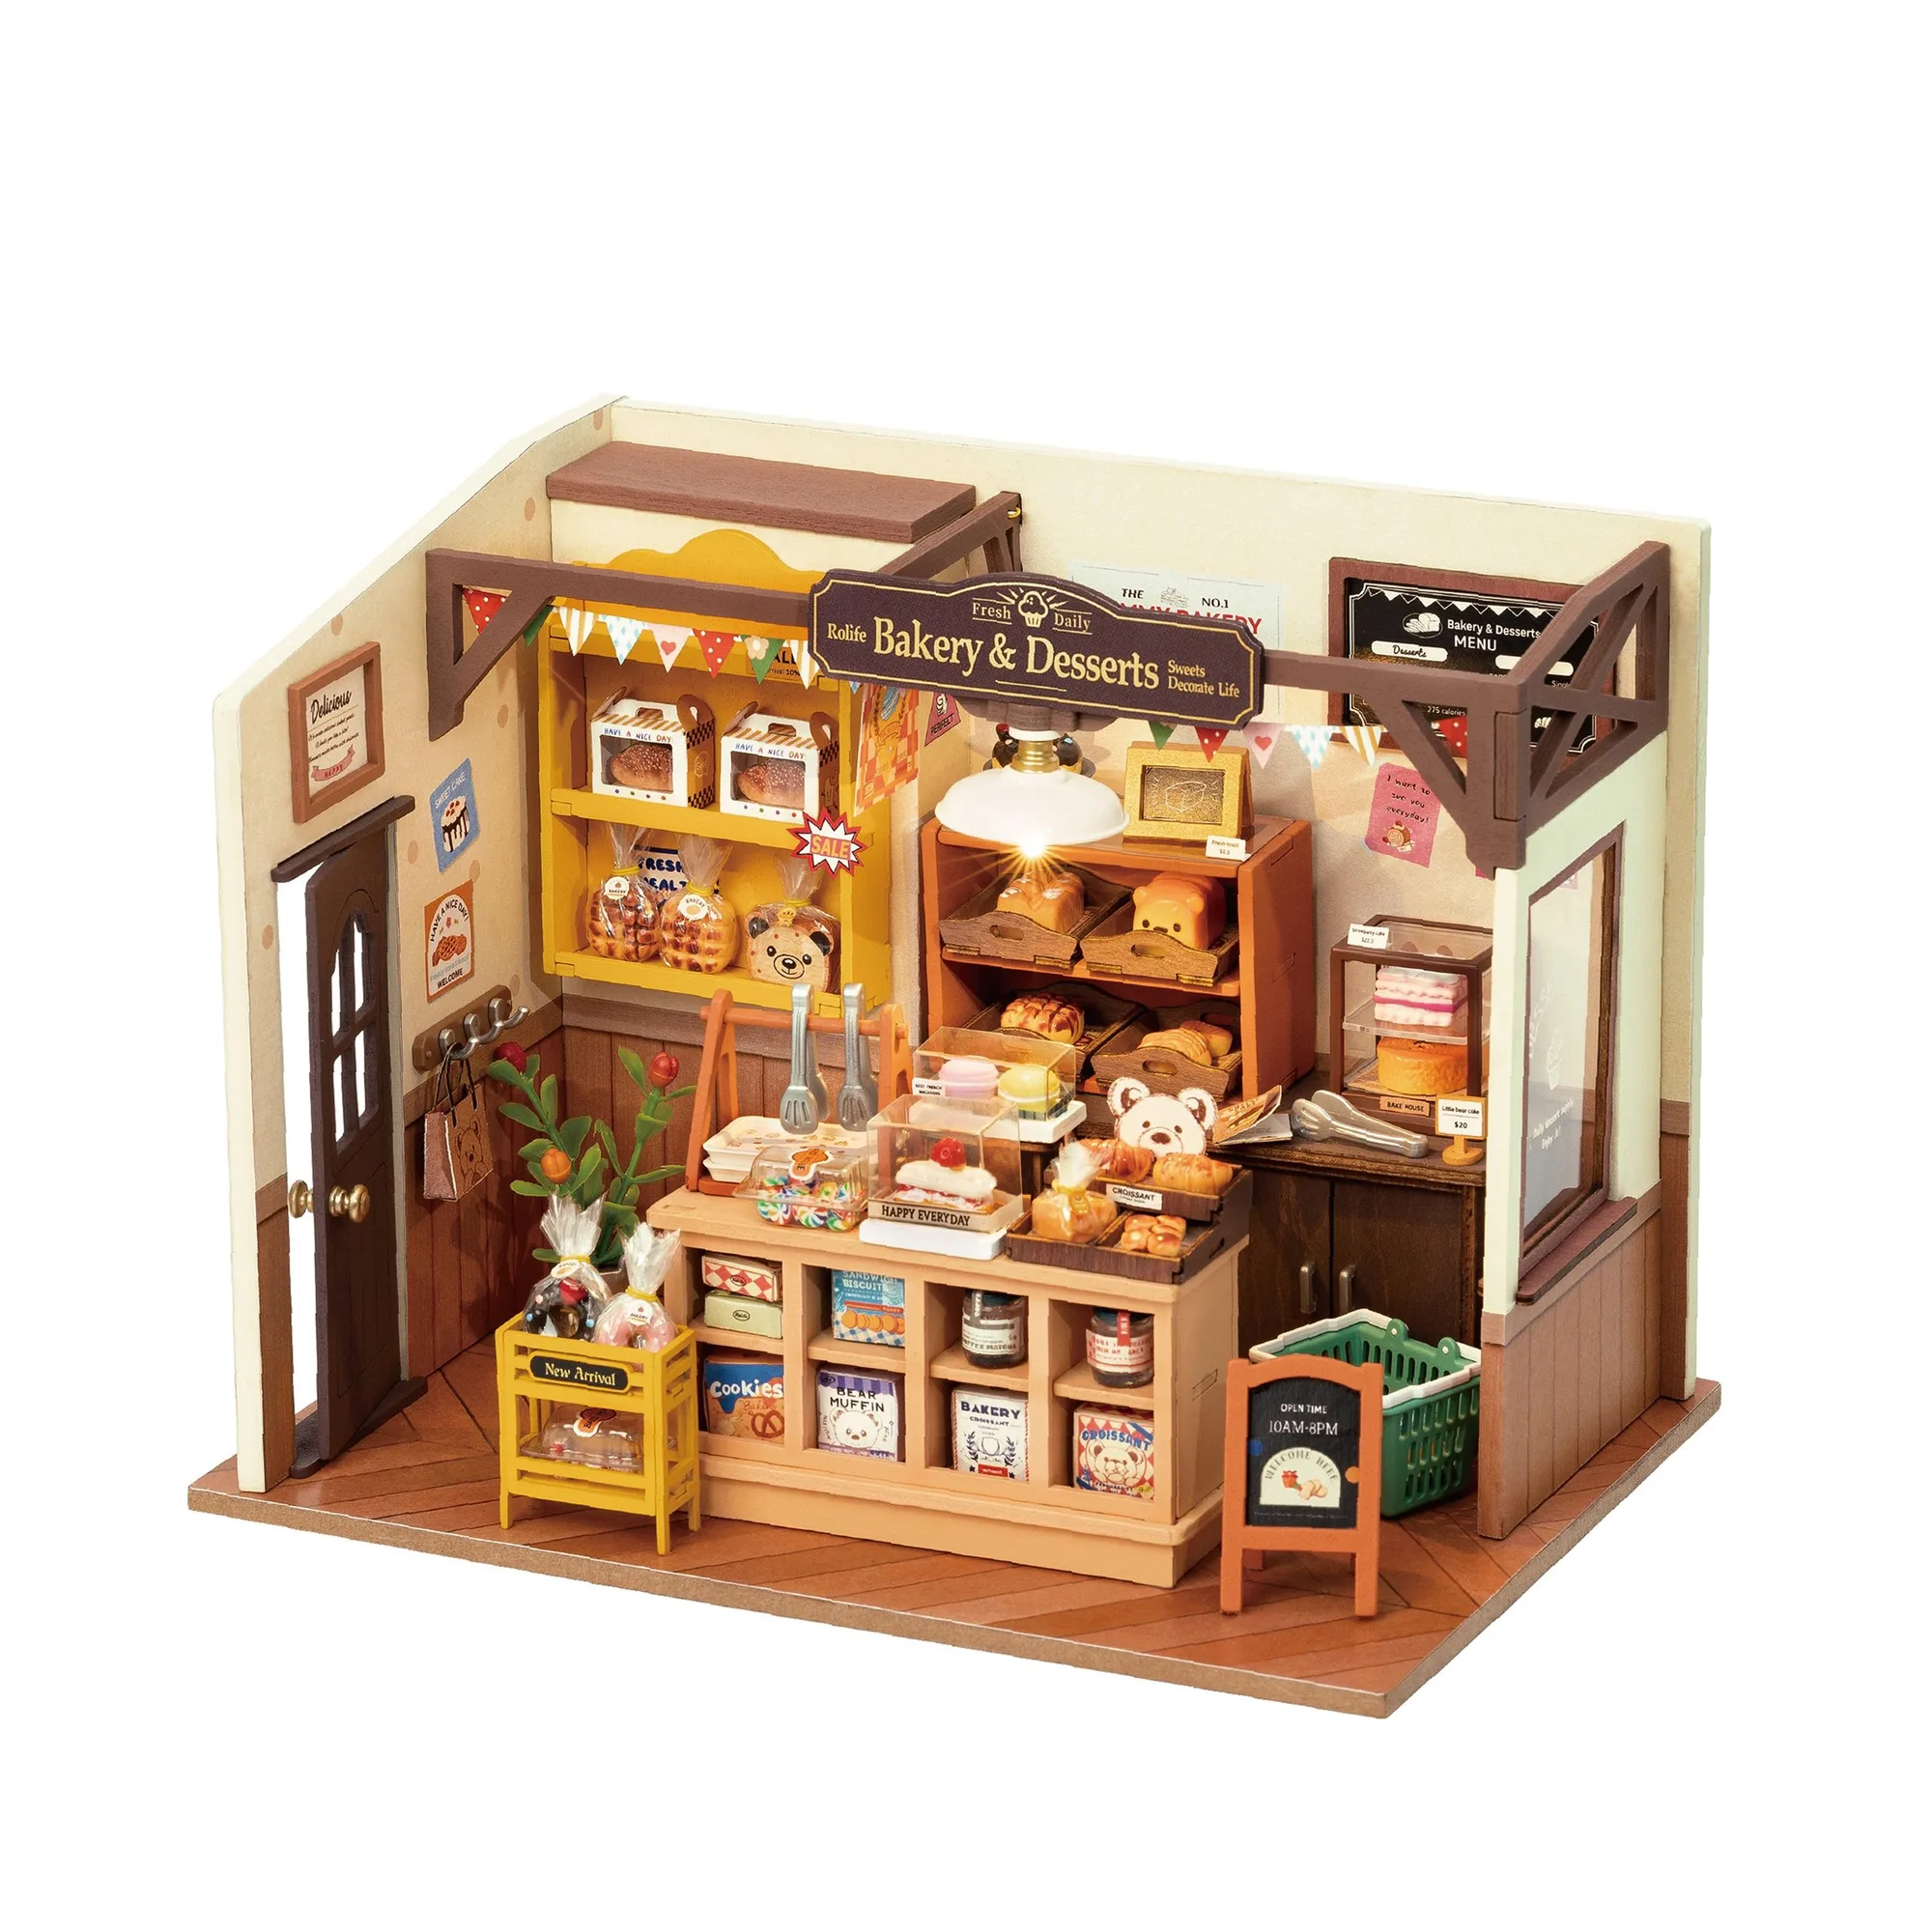
Hands Craft | Becka's Baking House
-
Hands Craft | Becka's Baking House: The kit includes glue, tweezers, LED light, electrical wires, and a battery case. You won't need to buy many extra tools – just a few common household items like scissors, a ruler, and a utility knife.
-
Hands Craft | Becka's Baking House: 2 AAA batteries are required for the lights, but they are not included. Pick up batteries before you start so you can test the lights as you build and enjoy the fully lit scene right away.
Step-by-Step Assembly Overview
These steps follow the general process for assembling the Becka's Baking House kit. Always refer to the included instruction booklet for detailed illustrations specific to your build.
- 1. Prepare Your Workspace and Tools: Clear a flat, well-lit area. Gather the recommended tools: ruler, scissors, utility knife, pliers, pencil, binder clip, and screwdriver. Have the glue and tweezers from the kit ready.
- 2. Punch Out and Sort Pieces: Carefully punch out the wooden pieces from their sheets. Sort them by size or shape using the instruction booklet as a guide. Keep small pieces in a container to avoid losing them.
- 3. Assemble the Structure: Follow the instructions to glue the main walls, floor, and roof together. Use the tweezers for small parts and the binder clip to hold pieces in place while the glue dries.
- 4. Add Interior Details and Paper Pieces: Cut out and glue the paper pieces (like menu boards or window signs) as shown. Arrange miniature bakery items – cupcakes, baguettes, bagels – inside the house.
- 5. Install the LED Lighting: Thread the electrical wires through the designated channels, connect the battery case, and place the LED bulbs in the light fixtures. Insert 2 AAA batteries (not included) to test the lights before closing up the house.
- 6. Final Assembly and Touch-Ups: Attach the roof and any remaining exterior details. Let the glue dry completely. Check that the lights work and the house stands stable. Make any small adjustments.
Tips for a Smooth First Build
Take your time – this is meant to be a relaxing project. The instruction booklet has clear illustrations, but don't be afraid to pause and re-read a step if something looks unclear. If you're new to miniature kits, start by sorting all pieces and reading the entire booklet once before gluing anything.
Use a small dab of glue at first; you can always add more. The included tweezers help with tiny pieces. For the paper parts, use scissors for clean cuts. If a piece doesn't fit perfectly, gently sand the edge with a nail file or fine sandpaper (not included, but helpful).
When installing the LED lights, test them with batteries before sealing the house. This way, if a wire is loose or a bulb doesn't light, you can fix it easily. The warm glow is a highlight of the finished build, so it's worth getting right.
Display and Care
Once your Becka's Baking House is complete, place it on a shelf, desk, or in a bookcase where the LED lights can be seen. The battery case can be tucked behind the house or inside if the design allows. To keep the miniature clean, dust it gently with a soft brush or compressed air. Avoid direct sunlight to prevent fading of the paper pieces and wood.
This kit is a rewarding project for beginners and a delightful addition to any miniature collection. Enjoy the process and the charming little bakery you create.