Start with a clean, smooth surface
The listing for Car Design 3D Stickers says they suit laptops, notebooks, phone cases or any smooth surface. That phrase is your first checkpoint: wipe the area free of dust and oil, let it dry fully, then press the sticker down from one edge to the other. A raised, dimensional sticker sits slightly proud of the surface, so a flat, clean base helps it stay put and look intentional.
Because the stickers are 9 x 24 cm each, plan where that footprint will land before you peel anything. On a notebook cover, it can run along the spine or across the lower corner. On a laptop lid, check that the sticker does not cover vents, ports or the hinge. On a phone case, avoid the camera opening and the edges that flex when the case goes on and off.
What the Car Design 3D Stickers listing confirms
-
Car Design 3D Stickers: Each sticker measures 9 x 24 cm. That size is large enough to be a feature on a notebook or laptop lid, so measure your intended spot before ordering.
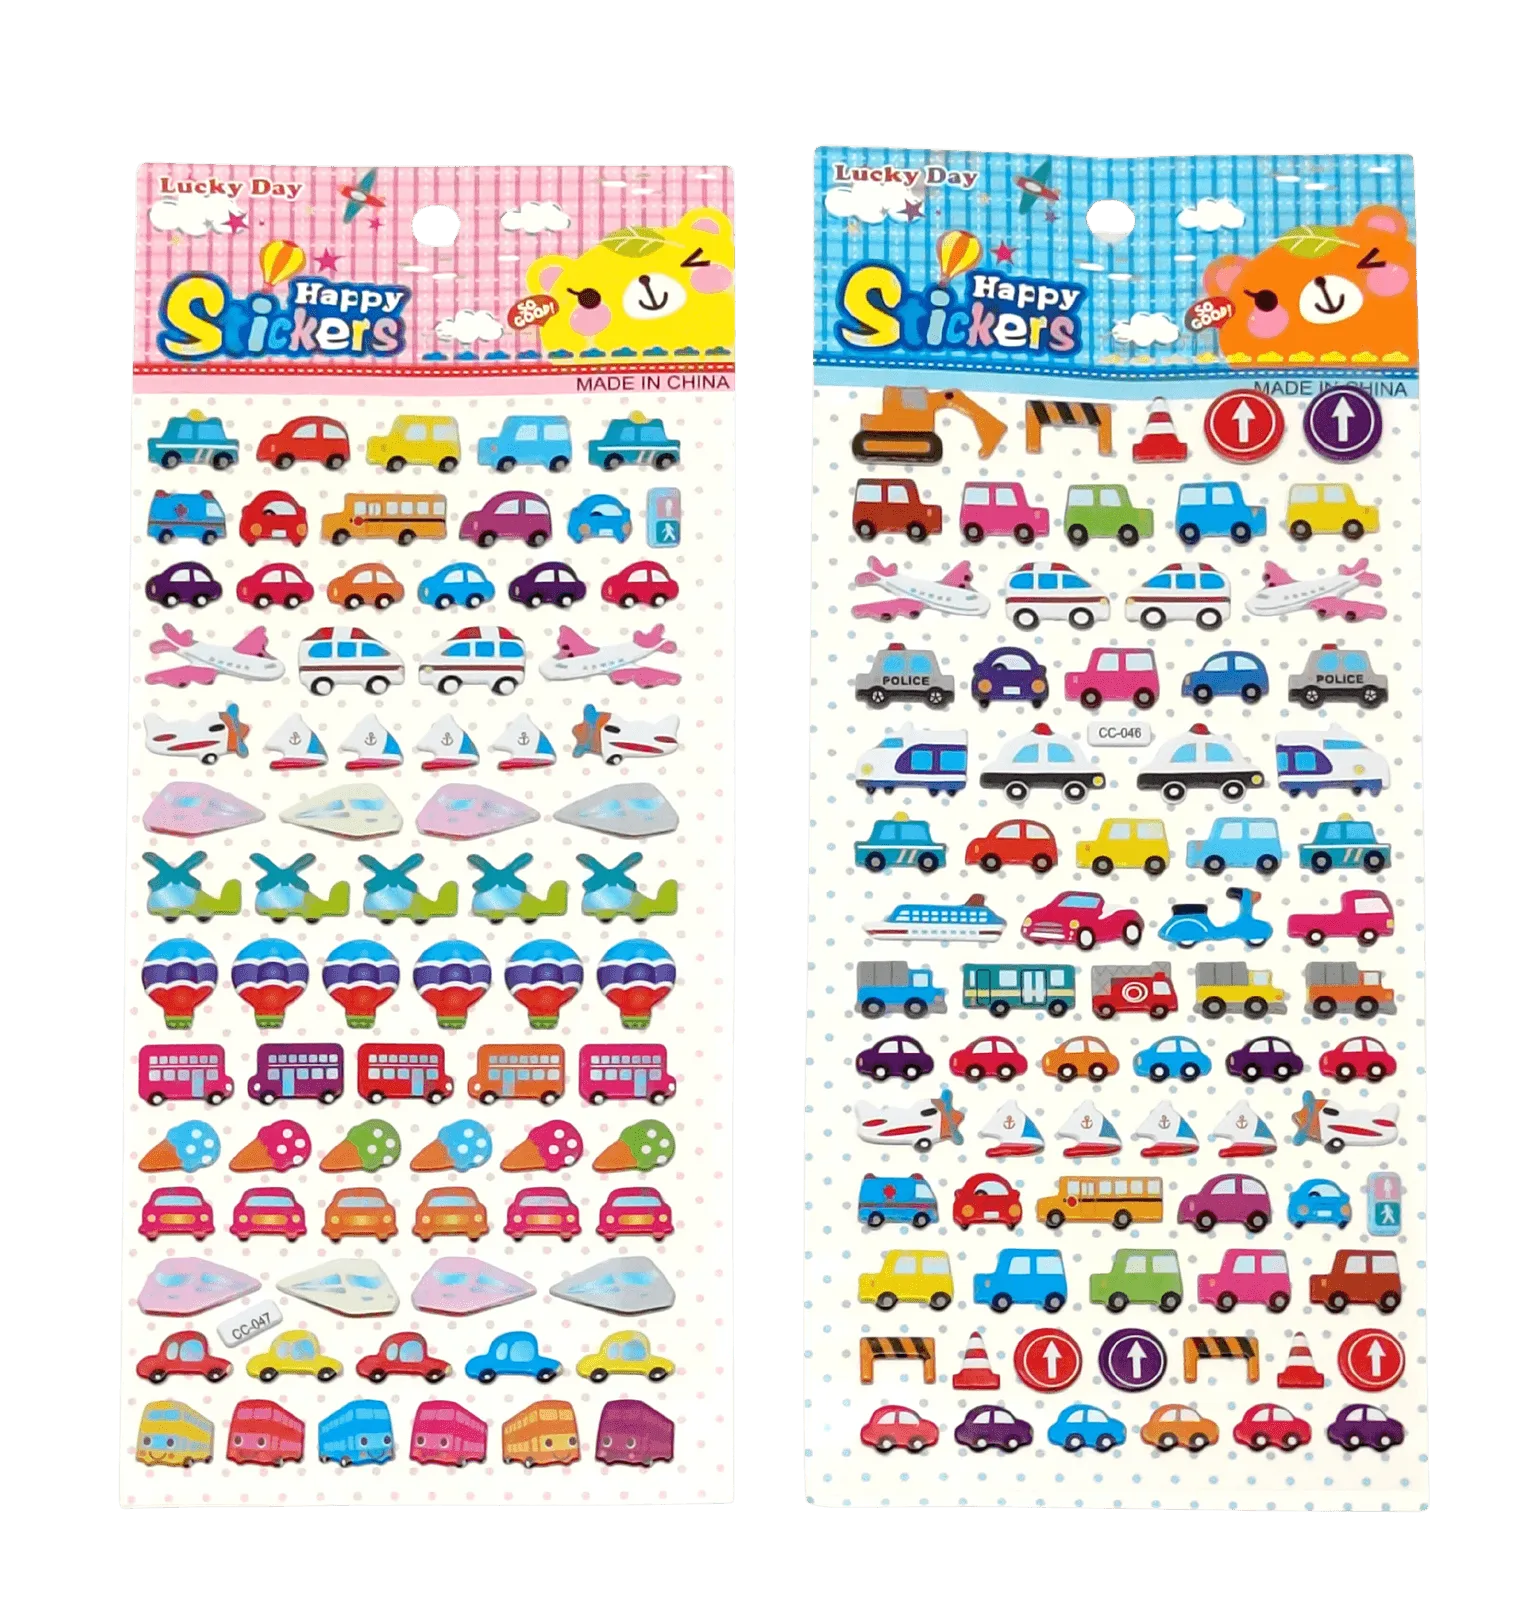
Car Design 3D Stickers
-
Car Design 3D Stickers: The stickers have a raised, dimensional 3D look. The texture adds depth, but it also means the sticker will not sit flush like a flat decal, so smooth, non-flexing surfaces suit it best.
-
Car Design 3D Stickers: The assorted selection includes multiple styles or colors, and actual designs vary by package. You get variety, but you cannot choose a specific car design from the listing, so plan for a surprise mix rather than one exact motif.
A simple way to apply them without bubbles
These steps follow from the listing's smooth-surface guidance and the sticker's raised construction. They are practical habits, not manufacturer instructions.
- 1. Dry-fit first: Place the sticker on the item without peeling the backing. Check the 9 x 24 cm footprint against edges, hinges, ports and camera openings.
- 2. Clean and dry: Wipe the surface with a dry or slightly damp cloth and let it dry completely. Dust and oil are the usual reasons a sticker lifts at the corners.
- 3. Peel and press from one edge: Remove the backing and lay the sticker down from one short edge, smoothing toward the other. The raised 3D surface can trap air if you drop the whole sticker at once.
- 4. Check the edges: Run your finger around the border. If a corner sits on a curved or flexing part of a phone case, reposition it to a flatter area.
Everyday places where the stickers earn their spot
The listing names laptops, notebooks, phone cases and any smooth surface. These are the placements that make the most of a raised car design.
- Notebook and journal covers: A 9 x 24 cm car sticker can act as a cover feature or a spine label. It is a quick way to decorate with car stickers without drawing or cutting anything.
- Laptop lids: Keep the sticker clear of vents and the hinge. The raised look reads well on a plain lid, and the car theme gives a personal touch without a full skin.
- Phone cases: Choose a flat-backed case rather than a heavily textured or fabric one. Avoid the camera cutout and the edges that bend when the case is removed.
- Stationery and scrapbooking: The listing suggests stationery, scrapbooking and decorating everyday items. A car sticker can anchor a page or add a theme to a project without extra drawing.
3D stickers for kids: set up the activity, not the outcome
If you are buying these as 3D stickers for kids, treat them as a decorating activity rather than a developmental tool. The listing does not state an age range, small-parts warning or safety certification, so the supplied information does not confirm suitability for a particular age. That is a gap in the listing, not a claim that the product is unsafe.
A practical setup is a clean table, a few smooth items to decorate, and a quick demonstration of peeling from one edge. Because the designs vary by package, children cannot request a specific car, so frame the assorted mix as part of the fun. Keep the activity on smooth surfaces and skip fabric, knitted covers or anything that flexes, where a raised sticker is more likely to lift.
Puffy stickers craft ideas that suit a car theme
The listing describes a raised, textured appearance, which is the same quality people look for in puffy stickers craft ideas. These projects use the car design and the 3D effect without requiring materials the listing does not mention.
- Scrapbook page anchor: Place one car sticker on a plain page, then build the layout around it with writing or paper scraps. The raised surface adds depth to an otherwise flat page.
- Notebook cover makeover: Use one large sticker as the main feature and leave space around it. The 9 x 24 cm size means a single sticker can carry the whole cover.
- Laptop or case accent: Combine one car sticker with a plain background for a clean look. Avoid stacking stickers on top of each other, since the 3D surface makes a level stack difficult.
- Small gift topper: The listing notes the assorted selection suits small gifts. A car sticker on a notebook or card adds a themed finish without wrapping.
What the listing leaves open before you buy
The supplied information confirms the 9 x 24 cm size, the raised 3D look, the car theme and the assorted selection, but it does not confirm an age range, a specific number of stickers per pack, a full design list or surface-care instructions. It also does not confirm whether the stickers are repositionable or waterproof. Treat those as open questions rather than assumed features.
That matters most for phone cases and laptops, which see handling and moisture. If you need a sticker you can move repeatedly or one confirmed for outdoor use, the supplied listing does not settle it. For notebooks, scrapbooks and other indoor items, the confirmed details are enough to plan a straightforward decorating session. Car Design 3D Stickers are listed at USD 1.39, with a catalog comparison price of USD 2.20, so the assorted pack is an easy way to try a few placements before committing to a larger project.