Proper maintenance of your cerumen management kit is essential for both safety and effectiveness. Whether you use it at home or in a clinical setting, a clean and sterilized kit prevents infections and ensures that earwax removal is as comfortable and efficient as possible. In this guide, we'll walk you through the step-by-step process of cleaning and sterilizing your cerumen kit, covering everything from daily hygiene to deep sterilization.
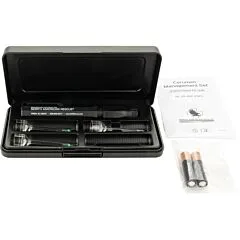
cerumen management kit
Cerumen management kits typically include tools like ear curettes, syringes, and irrigation systems. Each component has specific cleaning requirements to avoid damage and maintain functionality. By following these guidelines, you can extend the life of your kit and protect your patients or family members from potential harm.
Why Cleaning and Sterilization Matter
The ear canal is a sensitive area, and any tool that enters it must be free of bacteria and debris. Using a dirty cerumen kit can introduce pathogens into the ear, leading to infections, irritation, or even more serious complications. For clinics, proper sterilization is not just a best practice—it's a regulatory requirement. For home users, it's a simple way to ensure that each use is as safe as the first.
Moreover, earwax itself can harbor bacteria and fungi. If you don't clean your tools after each use, you risk transferring these microorganisms to the next person. Even if you're the only user, your own earwax can contain microbes that should not be reintroduced. Therefore, a consistent cleaning routine is non-negotiable.
- Prevent ear infections and cross-contamination
- Maintain tool effectiveness and longevity
- Comply with clinical hygiene standards
Step-by-Step Cleaning Process
Start by disassembling your cerumen kit if it has removable parts. Most kits include a curette, a syringe, and possibly an irrigation nozzle. Rinse each component under warm running water to remove visible wax and debris. Use a soft brush or cloth to gently scrub the surfaces, paying special attention to crevices where residue can accumulate.
After the initial rinse, soak the parts in a mild detergent solution for about 10 minutes. This helps to break down any remaining oils and wax. Then, rinse thoroughly again to ensure no soap residue is left, as this can irritate the ear. Finally, dry each part with a clean, lint-free cloth or allow them to air dry on a clean surface.
- Disassemble all removable parts
- Rinse with warm water to remove debris
- Soak in mild detergent, then rinse thoroughly
- Dry completely before reassembly
Sterilization Methods for Your Cerumen Kit
Once your kit is clean, you need to sterilize it to kill any remaining microorganisms. The most common method for home use is boiling. Place the parts in a pot of boiling water for at least 5 minutes. Ensure that all parts are fully submerged and that the water is at a rolling boil. After boiling, allow the parts to cool and dry completely before storing.
For clinical settings, an autoclave is the gold standard. If you have access to an autoclave, follow the manufacturer's instructions for cycle time and temperature. Alternatively, chemical sterilants like glutaraldehyde can be used, but they require careful handling and adequate ventilation. Always check the compatibility of your kit's materials with the chosen method to avoid damage.
- Boiling: 5 minutes in rolling water
- Autoclave: follow manufacturer's cycle
- Chemical sterilants: use with caution and ventilation
Maintenance Tips for Longevity
Regular maintenance goes beyond cleaning. Inspect your cerumen kit regularly for signs of wear, such as cracks, rust, or dull edges. Damaged tools can cause injury or ineffective cleaning. Replace any worn parts immediately, and consider upgrading to a more durable kit if you find yourself replacing components frequently.
Store your kit in a clean, dry place, preferably in its original case or a sealed container. Avoid exposing it to extreme temperatures or direct sunlight, which can degrade materials. For those who use their kit frequently, having a backup set of tools can ensure you always have a sterilized kit ready.
- Inspect for wear and tear regularly
- Replace damaged parts promptly
- Store in a dry, sealed container
By following these cleaning and sterilization steps, you can ensure that your cerumen management kit remains safe and effective for every use. Whether you're a healthcare professional or a home user, proper maintenance is key to preventing infections and extending the life of your tools. If you're in the market for a new kit, consider exploring our selection of high-quality cerumen management kits designed with easy cleaning in mind.