Start with the pot and handle you actually own
The cleaning routine below is written for a cast iron Dutch oven with a bail handle, including the 9 quart size. Before you wash anything, separate the pot from its handle if your model allows it. The replacement spiral bail handle sold for the 9 Quart Cast Iron Dutch Oven With Bail Handle is a dedicated part, so treating it as its own piece makes both cleaning and storage simpler.
The supplied catalog describes this handle as a replacement spiral bail handle for that specific 9 quart oven. It does not list a material, coating, or washing method for the handle itself. That means you should not assume it can go through a dishwasher or soak in water. Keep the handle dry, wipe it after contact with water, and check it for looseness or wear before each use.
What the catalog confirms about the handle
-
9 Quart Cast Iron Dutch Oven Spiral Bail Handle: Replacement spiral bail handle for the 9 Quart Cast Iron Dutch Oven With Bail Handle. This tells you the handle is a separate, replaceable part rather than a fixed piece, so it can be removed for cleaning and storage.
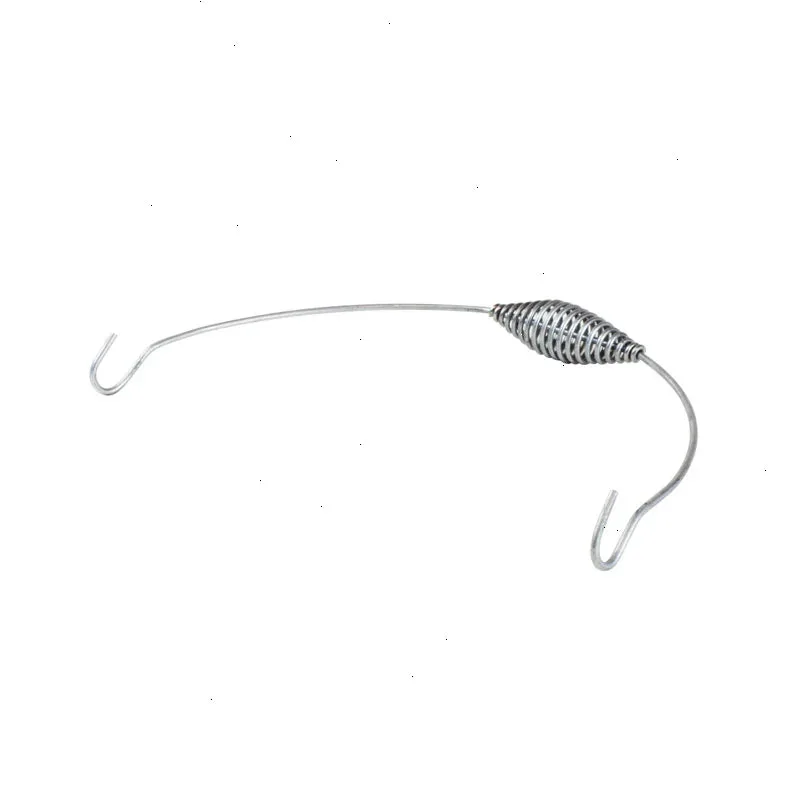
9 Quart Cast Iron Dutch Oven Spiral Bail Handle
-
9 Quart Cast Iron Dutch Oven Spiral Bail Handle: The bail handle design makes it easier to move the Dutch oven around a campsite. The handle is a carrying aid, so keeping it clean and dry protects the part you rely on to lift a full pot.
A simple wash-and-dry routine after cooking
Work through these steps while the pot is still warm enough to handle comfortably, not hot from the fire. The goal is to remove food and moisture without leaving the cast iron wet for long.
- Remove the bail handle: Take the spiral bail handle off the pot so you can clean the oven body without water sitting against the handle.
- Scrape and wipe the cooking surface: Use a scraper or stiff brush to lift stuck food, then wipe out loose residue with a cloth or paper towel.
- Wash the cast iron body: Wash the pot with warm water and a small amount of mild soap, using a brush or non-scratch scrubber. The supplied information does not include a manufacturer washing procedure, so keep the wash brief and avoid leaving the pot to soak.
- Rinse and dry immediately: Rinse the pot, then dry it right away with a towel. Do not let water sit in the bottom or around the rim.
- Wipe the handle separately: Wipe the spiral bail handle with a dry cloth. If it got wet, dry it thoroughly before putting it back on the pot.
- Re-oil the cooking surface: Apply a thin layer of cooking oil to the inside of the Dutch oven while it is fully dry. The catalog does not specify an oil type, so use a food-grade oil you normally cook with.
Rust prevention starts with drying, not with soap
The most common cause of rust on cast iron is moisture left behind after washing. A Dutch oven with a bail handle has more places for water to hide: under the rim, around the handle lugs, and along the bottom edge. After towel drying, let the pot air-dry completely in a warm, dry spot before you oil it or put it away.
If you see a light rust bloom on the cooking surface, scrub it off with a stiff brush, dry the pot fully, and re-oil. The supplied product information does not include a rust-removal method or a seasoning repair process, so treat heavy rust or damaged seasoning as a case for re-seasoning guidance rather than guessing.
Storing a 9 quart Dutch oven between trips
A 9 quart oven is large, so storage is mostly about keeping the cooking surface protected and the handle from being bent or strained.
- Store the pot dry and oiled: Put the Dutch oven away only after it is completely dry and has a thin oil film on the cooking surface.
- Keep the lid off or vented: Leave the lid slightly open or place a paper towel between the lid and the pot so air can move and moisture does not get trapped.
- Remove or secure the bail handle: If the handle comes off, store it beside the pot rather than hanging the heavy oven by the handle. If it stays on, make sure it is not bearing the pot's weight in storage.
- Choose a dry spot: Avoid damp basements, garages, or camp boxes that collect condensation. A dry shelf or cabinet is better than a closed plastic bin.
When to replace the spiral bail handle
The catalog lists the spiral bail handle as a replacement part, which means it is meant to be swapped when the original is worn, bent, or lost. Check the handle before each campout: look for bends, loose connections, or rough spots that could catch your hand. Because the supplied information does not include a load rating or a formal inspection schedule, use your own judgment and replace the handle if it no longer feels secure when you lift an empty pot.
Keep a spare handle with your camp kitchen if you rely on the bail handle for moving a full 9 quart oven. The catalog price for the replacement handle is listed as USD 6.44, compared with a catalog comparison price of USD 8.95, so a spare is a low-cost way to avoid being stuck without a safe way to carry the pot.
The 9 quart oven this routine is built around
- 9 Quart Cast Iron Dutch Oven Spiral Bail Handle: The 9 Quart Cast Iron Dutch Oven With Bail Handle is sized for cooking for a crowd on a camping trip or at a dinner party. A larger oven holds more food and more moisture, so drying the rim and sides thoroughly matters more than with a small pot.
- 9 Quart Cast Iron Dutch Oven Spiral Bail Handle: The bail handle design is intended to make the oven easier to move around a campsite. Cleaning and storing the handle correctly keeps that carrying function reliable trip after trip.