Quick answer
For a 2004-and-up Club Car DS with plastic hub covers, the SGC® 6" HD Double A-Arm lift kit is a direct bolt-on replacement for the stock front axle, but you should verify your model year and hub style, then gather the right tools before starting.
Why the 2004-and-up cutoff matters
Club Car changed the DS front suspension and hub design over the years. The SGC® kit is listed for 2004 and newer DS gas and electric models with plastic hub covers. If your cart has metal hub covers or an earlier front end, the mounting points and hardware may not match, so measure and confirm before ordering. This guide assumes you have already checked that your cart falls in the supported range.
What the double A-Arm design changes on the trail
Replacing the stock front axle with a double A-Arm setup adds suspension travel and keeps the geometry more stable than a simple spindle spacer. That matters if you plan to run larger tires or drive on uneven ground. The trade-off is more installation steps and a need to check alignment afterward. The kit includes class 8.8 hardware, but you still need to torque everything to spec and recheck after the first drive.
Step-by-step install prep and process
- Verify fitment before you buy: Check your DS model year (2004 or newer) and confirm it has plastic hub covers. Look at the front axle to see if it matches the stock setup the kit replaces. If you are unsure, measure the hub diameter and compare with the kit's listed application. A quick photo of your hub and axle can save a return later.
- Gather the right tools: You will need a floor jack, jack stands, lug wrench, socket set (including 9/16 and 3/4), torque wrench, and possibly a pickle fork or ball joint separator if the stock tie rod ends are stubborn. Have penetrating oil on hand for rusty bolts. Do not start without jack stands; never work under a cart held only by a jack.
- Lift and support the cart safely: Loosen the front lug nuts slightly, then raise the front of the cart and place jack stands under the frame rails. Remove the front wheels. Check that the cart is stable before going underneath. Shake the cart gently to confirm it is secure on the stands.
- Remove the stock front axle components: Disconnect the tie rod ends from the stock steering arms, then unbolt the stock axle from the frame. Keep the hardware organized; some stock bolts may be reused. If the tie rod ends are stuck, use a separator rather than hammering on the threads. Label left and right parts if you are unsure during reassembly.
- Install the new A-Arm assembly: Bolt the new A-Arm crossmember to the frame using the supplied class 8.8 hardware. Leave bolts snug but not fully torqued until the arms are connected. Attach the upper and lower A-Arms to the crossmember, then connect the spindles to the arms. Check that all bushings are seated properly before tightening.
- Reconnect steering and check travel: Reattach the tie rod ends to the new steering arms. Turn the steering wheel lock to lock and watch for binding or interference. Adjust tie rod length if needed to get roughly equal toe on both sides. If anything binds, stop and identify the contact point before proceeding.
- Torque all hardware and reinstall wheels: Torque the suspension bolts to the specifications provided in the kit instructions (if not supplied, use standard torque for the bolt size). Reinstall the wheels and lower the cart. Bounce the front end a few times to settle the suspension. Re-torque after the first 10 miles of driving.
Product facts
-
6” HD A-Arm Lift Kit For Club Car DS (Gas and Electric, Years 2004 and Up)⎮SGC®: Fits Club Car DS electric and gas models from 2004 and up with plastic hub covers. Confirm your cart's year and hub style first; this kit is not a universal fit for older DS models.
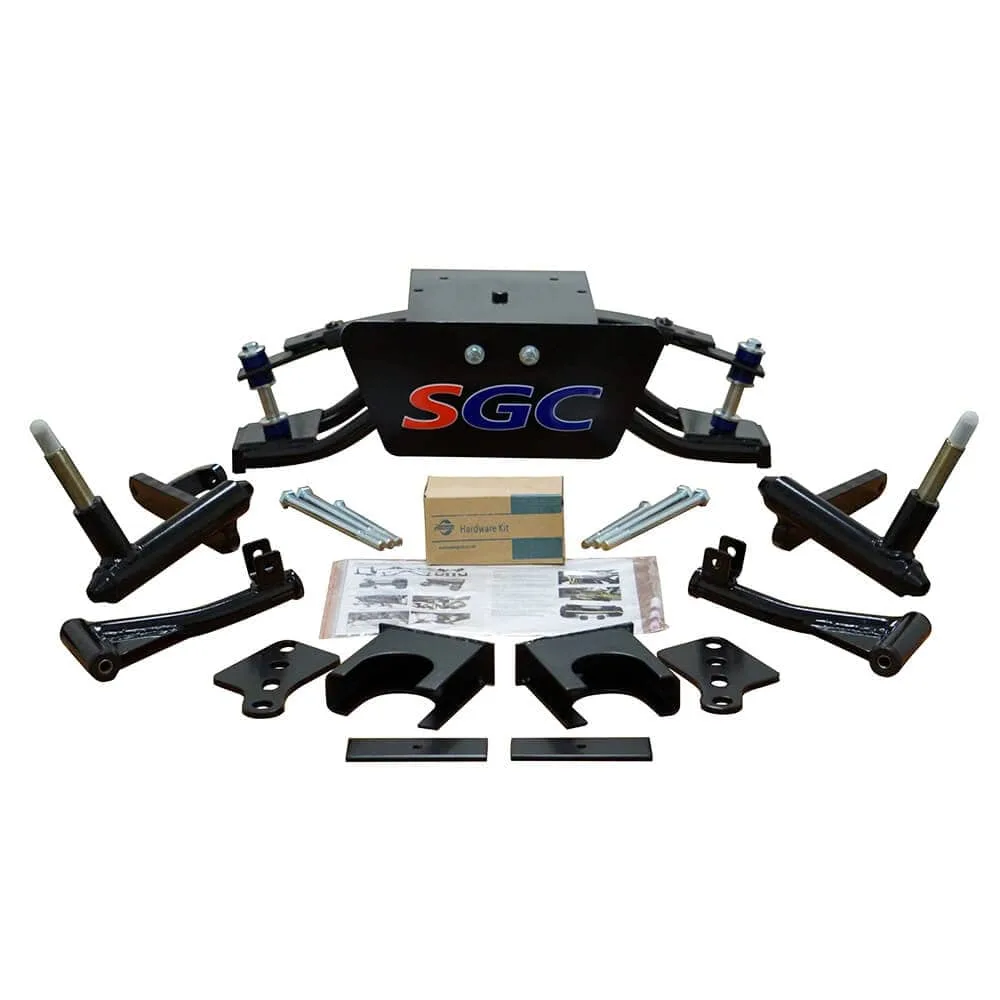
6” HD A-Arm Lift Kit For Club Car DS (Gas and Electric, Years 2004 and Up)⎮SGC®
-
6” HD A-Arm Lift Kit For Club Car DS (Gas and Electric, Years 2004 and Up)⎮SGC®: Bolt-on design replaces the stock front axle with a heavy-duty double A-Arm and includes class 8.8 hardware. No cutting or welding is required, but you still need basic hand tools and a torque wrench to install it safely.