When you're deep in a weekend reenactment, the last thing you want is a torn uniform or a loose button pulling you out of character. Yet field repairs were a daily reality for the World War II German soldier. A well-stocked sewing kit wasn't just a convenience—it was a piece of essential kit that kept a soldier functional and presentable. For today's reenactor, assembling an authentic https://wildernessworks.shop/products/german-sewing-kit-99201German sewing kit is a mark of dedication to historical accuracy and practical preparedness.
This guide walks you through the components of a period-correct German sewing kit, from the classic metal tin to the threads and needles that kept uniforms in fighting shape. We'll also cover modern equivalents and tips for maintaining your gear so your impression stays sharp. Whether you're a seasoned reenactor or just starting out, understanding the sewing kit's role will elevate your authenticity.
The Standard-Issue German Sewing Kit: What Was Inside?
The German Army issued a small, rectangular metal tin known as the Nähzeug (sewing kit) to every soldier. Typically painted field gray or dark olive, the tin measured about 3.5 by 2 inches and was just under an inch thick. Inside, soldiers found a carefully organized set of essentials: several sizes of steel needles, a spool of gray or field-green thread, a few buttons (usually in Feldgrau or black), a small pair of scissors, and sometimes a thimble or a needle threader. The kit was designed to be compact enough to fit in a tunic pocket or bread bag, yet complete enough to handle common uniform repairs.
For reenactors, finding an original tin can be expensive and fragile. Many choose high-quality reproductions that mimic the original's dimensions and finish. When building your kit, pay attention to the thread color—field gray is most versatile for Heer uniforms, while black thread suits Panzer or SS crews. Including a few extra buttons for common tunic and trouser styles is a smart move. You can also add a small piece of beeswax to help thread needles and protect thread from moisture.
- Store your sewing kit in a dry place to prevent rust on needles and scissors.
- Carry a small magnet to easily retrieve dropped needles in the field.
Authentic Thread and Needles: Matching Period Materials
Original German thread was typically cotton or linen, spun with a slight twist for strength. Modern polyester threads, while durable, lack the matte finish and texture of period-correct materials. For the most authentic look, choose waxed cotton thread in field gray or olive tones. Linen thread is even better for heavy repairs on wool tunics or greatcoats, as it matches the fiber content and behaves similarly when wet. Needles should be steel with a medium eye—too small and threading becomes a chore, too large and you risk damaging the fabric.
When assembling your kit, consider including a needle case made from leather or canvas to protect the points. A period-correct option is a small leather roll tied with a thong. This not only looks authentic but also keeps your needles organized and safe. For reenactors who want the full experience, practicing a few basic stitches like the running stitch, backstitch, and buttonhole stitch will make field repairs faster and more convincing.
- Use beeswax on your thread to reduce tangling and improve water resistance.
- Practice sewing on a scrap of wool before your first event to build confidence.
Beyond the Tin: Additional Field Repair Items
While the standard sewing kit covered most needs, German soldiers often supplemented it with personal items. A small pair of folding scissors or a pocketknife with an awl was common for cutting thread and leather. Some carried a tiny roll of adhesive tape for emergency patches on tent fabric or equipment straps. For leather gear such as belts, boots, or pistol holsters, a small container of shoe grease or leather dressing was invaluable. Products like Huberd's Shoe Grease, Quart can are perfect for maintaining leather in field conditions, keeping it supple and water-resistant.
Another practical addition is a few spare buttons for trousers and tunics, as well as a short length of cord for emergency repairs to equipment straps or tent lines. Reenactors should also consider carrying a small tube of field-expedient glue for quick fixes on items like insignia or badges. For example, if an Infantry Assault Badge, Silver comes loose, a dab of period-appropriate adhesive can save the day. These extra items can be stored in a small canvas pouch alongside your sewing kit.
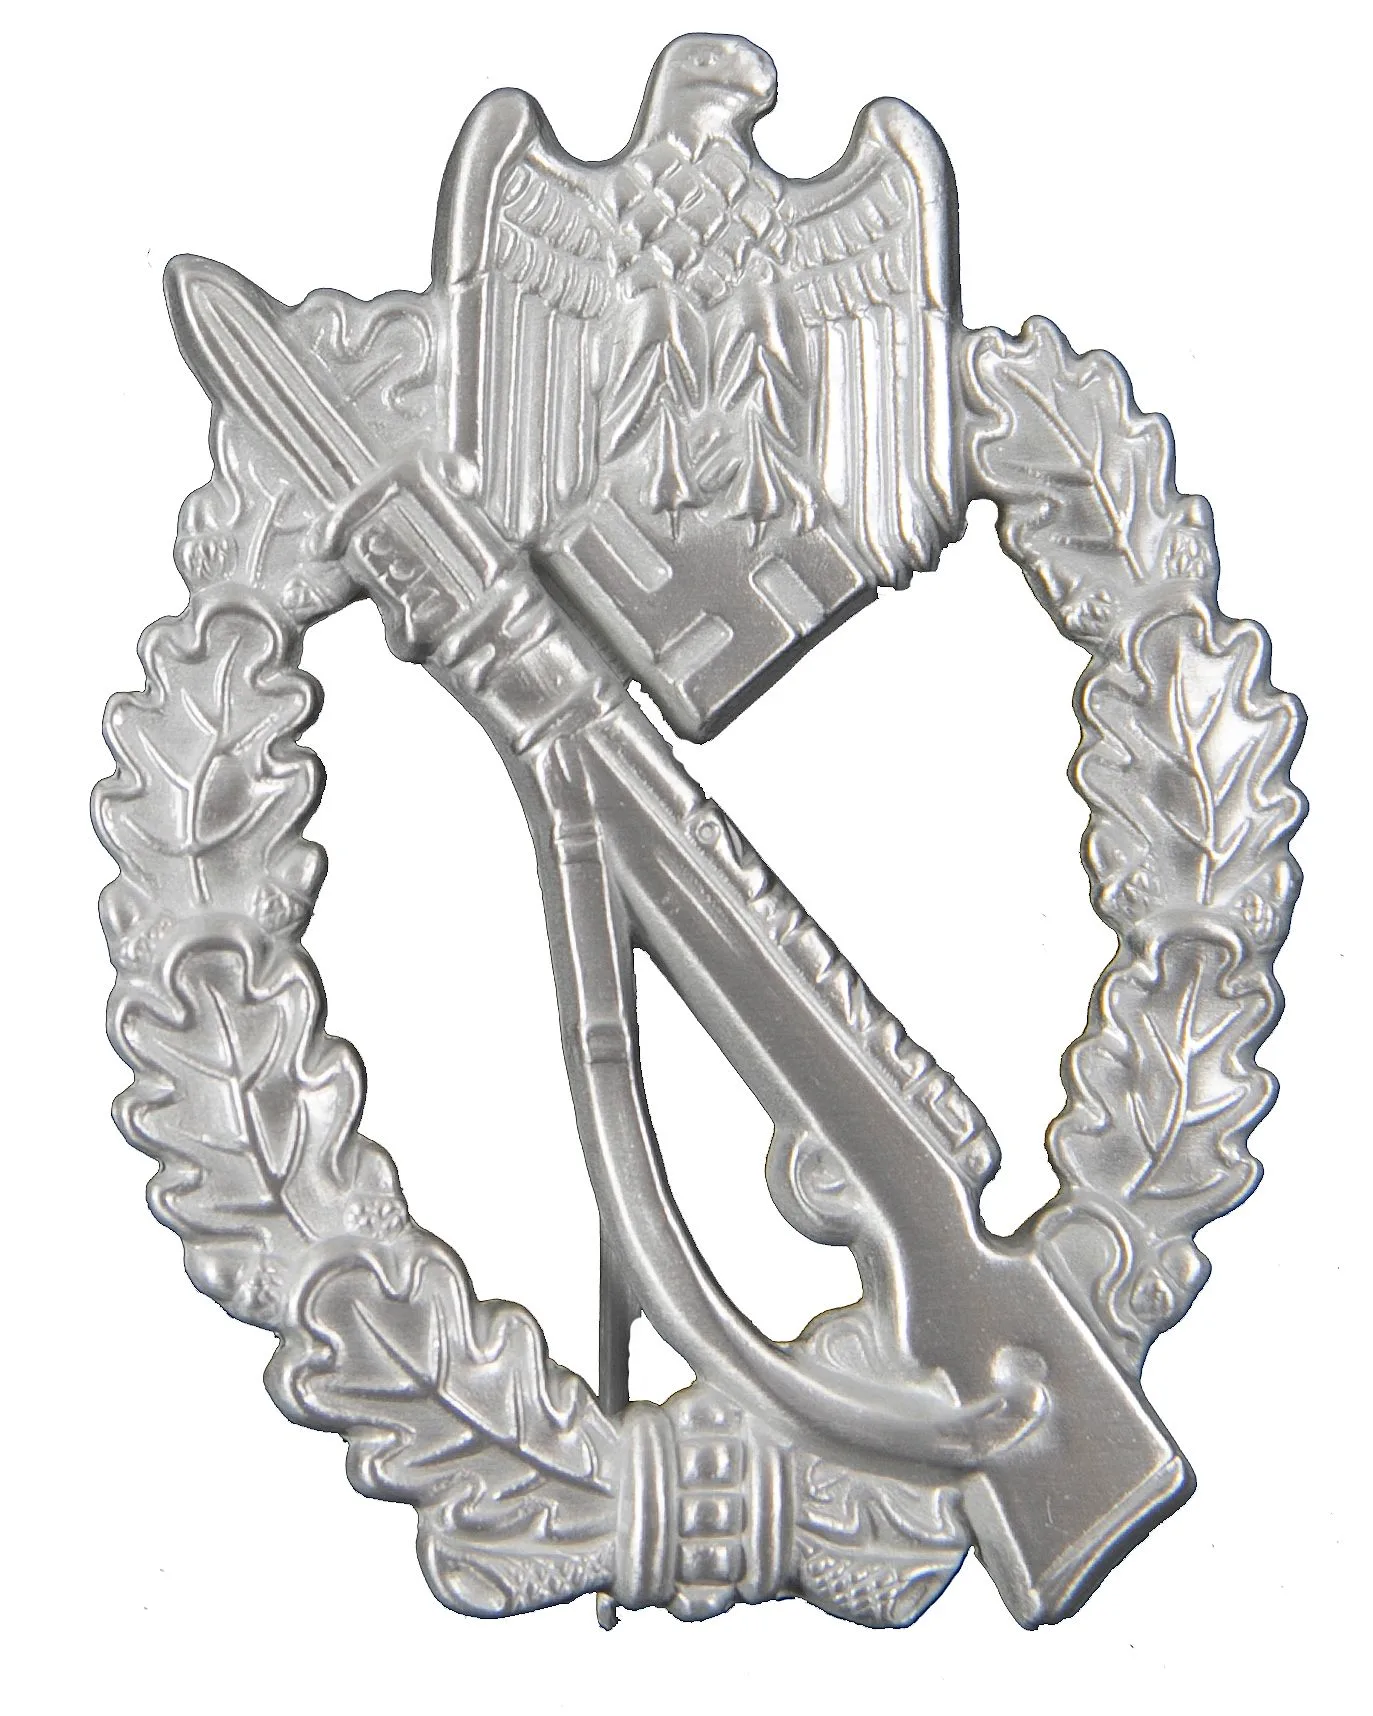
Infantry Assault Badge, Silver
- Test any leather dressing on a hidden area first to ensure it doesn't darken the material too much.
- Keep a small notebook and pencil in your repair kit to note any gear issues for later maintenance.
Maintaining Your Uniform and Gear with Your Sewing Kit
Regular inspection and prompt repair are the secrets to a long-lasting uniform. After each event, check your tunic for loose buttons, torn pocket flaps, or frayed seams. Use your sewing kit to make repairs immediately—waiting only worsens the damage. For wool uniforms, use a matching thread color and a fine needle to make stitches nearly invisible. For field caps, a few careful stitches can reattach a sweatband or tighten a loosened crown. The Navy Watch Cap, for instance, benefits from occasional reinforcement at the seams to maintain its shape.
Leather items like belts and boots also need periodic care. Clean off dirt and mud, then apply a light coat of leather conditioner or grease. For boots, a product like Griffin Shoe Polish, Brown not only restores color but also protects the leather from moisture. Store your sewing kit and leather care items together in a dedicated pouch so you always have them on hand. This habit will keep your impression looking sharp and historically accurate for years.
- Wash your hands before handling wool uniforms to avoid transferring oils that attract moths.
- Store your sewing kit in a breathable bag, not a sealed plastic container, to prevent moisture buildup.
Where to Find Authentic Sewing Kit Components
Building a period-correct sewing kit requires sourcing items that match original specifications. Many reenactor supply stores offer reproduction tins, but you can also find original pieces at militaria shows or online auctions if you're patient. For thread, look for specialty suppliers who carry waxed cotton in military shades. Needles are widely available, but choose those labeled as 'sharps' or 'betweens' for the best size and shape. Buttons can be found from dealers who specialize in German uniform parts.
For the leather care items mentioned earlier, check vendors that focus on high-quality repro gear. A reliable source is atthefront.com, where you can find items like the German Wallet, Brown for carrying small repair supplies, or the Trouser Belt w/ buckle, Black for replacing worn-out hardware. Assembling your kit from trusted suppliers ensures both authenticity and durability, so you can focus on the impression rather than gear failure.
- Compare thread colors to a known original uniform sample for the best match.
- Buy extra needles and buttons—they are small and easy to lose in the field.
A well-prepared German sewing kit is a small investment that pays dividends in authenticity and practicality. By choosing period-correct materials and maintaining your gear regularly, you'll keep your impression sharp and your uniform in top condition. Explore atthefront's selection of reproduction gear and accessories to complete your kit, and step onto the field with confidence.