Quick answer
Use a small synthetic concealer brush to tap product onto the under-eye area and blemishes, then blend the edges with light, patting motions rather than sweeping. Keep the layers thin and build only where coverage is still missing.
Why a small synthetic brush changes the finish
A concealer brush gives you control that fingers rarely match: the small head places product exactly on a blemish or in the inner corner of the under-eye area, while the synthetic fibres are designed for liquid and cream formulas. That precision matters most when you want coverage without moving the product across a wide area.
The tradeoff is speed. Fingers warm the product and can blur edges quickly, but they also tend to deposit too much at once and can drag the thin under-eye skin. A brush asks for a little more patience in exchange for thinner layers and a more even result.
When fingers still make sense
If your concealer is very emollient or you are touching up on the go, clean fingertips can be the practical choice. The brush method below works best at a mirror with a small amount of product and a light hand, so treat it as your at-home routine rather than the only way to apply concealer.
Step-by-step concealer brush routine
- Start with a small amount of product: Pick up a tiny amount of liquid or cream concealer on the tip of the brush. Common mistake: loading the brush as if it were a foundation brush, which makes blending harder and can look cakey. If you can see a visible blob on the bristles, you have picked up too much.
- Tap, don't sweep, under the eye: Place the concealer in the inner corner and under-eye area using gentle patting motions, then blend outward toward the cheekbone. Checkpoint: stop before the product reaches the lash line if you want to avoid creasing. Patting keeps the thin under-eye skin from being dragged.
- Place a dot on blemishes: Press the brush directly onto the blemish and tap around the edges to soften the border. Common mistake: sweeping across the blemish, which lifts the product and reduces coverage. Build a second thin layer only if the blemish is still visible.
- Blend the edges with a clean brush or fingertip: Use the dry side of the brush or a clean fingertip to soften any hard edges. Checkpoint: look at the area in natural light before adding more product. Blend the perimeter, not the center of the coverage.
- Set only where needed: Press a small amount of powder over the under-eye area if it creases, and leave blemishes unset if you prefer a dewier finish. Common mistake: powdering everything heavily, which can make the concealer look flat. Check for creasing after a few minutes and adjust before you leave.
Product facts
-
Concealer Brush - TWMU7: Made from advanced synthetic fibres and described as ideal for applying liquid and cream formulas. That makes it a sensible match for the cream and liquid concealers most people use for under-eye and blemish coverage.
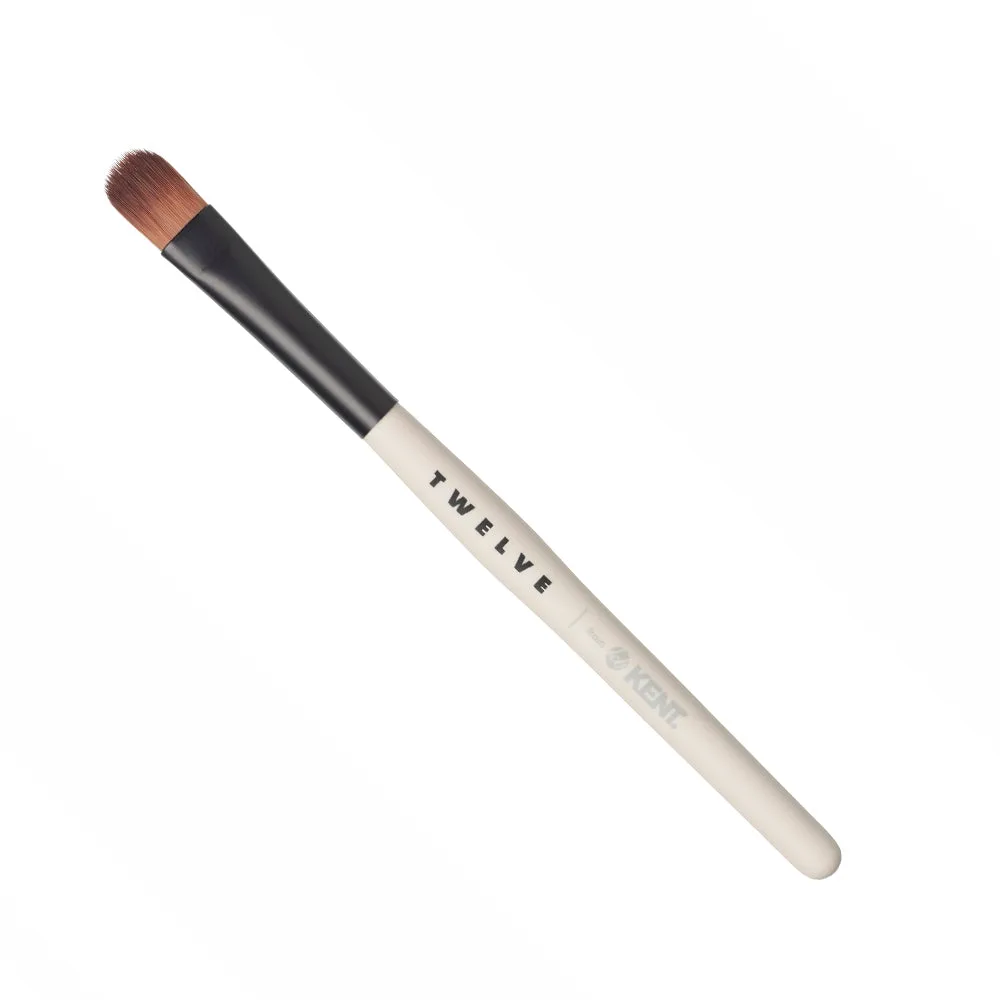
Concealer Brush - TWMU7
-
Concealer Brush - TWMU7: The brush has an overall length of 129mm, a handle length of 116mm and a width of 8mm. The narrow 8mm width gives you a small contact area for precise placement on blemishes and the under-eye area.