Confirm your Tundra is the right one before you unbox
The CoveRex SR is built for the 1999-2006 Toyota Tundra with a 6.2 ft bed, Fleetside only. That single line decides whether the rest of this guide applies to your truck. Step back and look at the bed: if it has a step in the side or bed caps along the rails, this cover is not the match. The fitment notes list it as not compatible with Stepside models and only compatible with standard bed models without bed caps.
Measure the bed length from the inside of the tailgate to the front bulkhead. The 6.2 ft figure is the one the cover is designed around, so a different bed length means you are looking at the wrong part, not a cover that needs extra persuasion.
Fitment facts for the CoveRex SR on this Tundra
-
ARMORDILLO® CoveRex SR Series 1999-2006 Toyota Tundra 6'2" Bed Low Profile Soft Roll-up Tonneau Cover: For 1999-2006 Toyota Tundra 6.2ft Bed (Fleetside Only) This is the compatibility line that must match your truck before any installation step is useful.
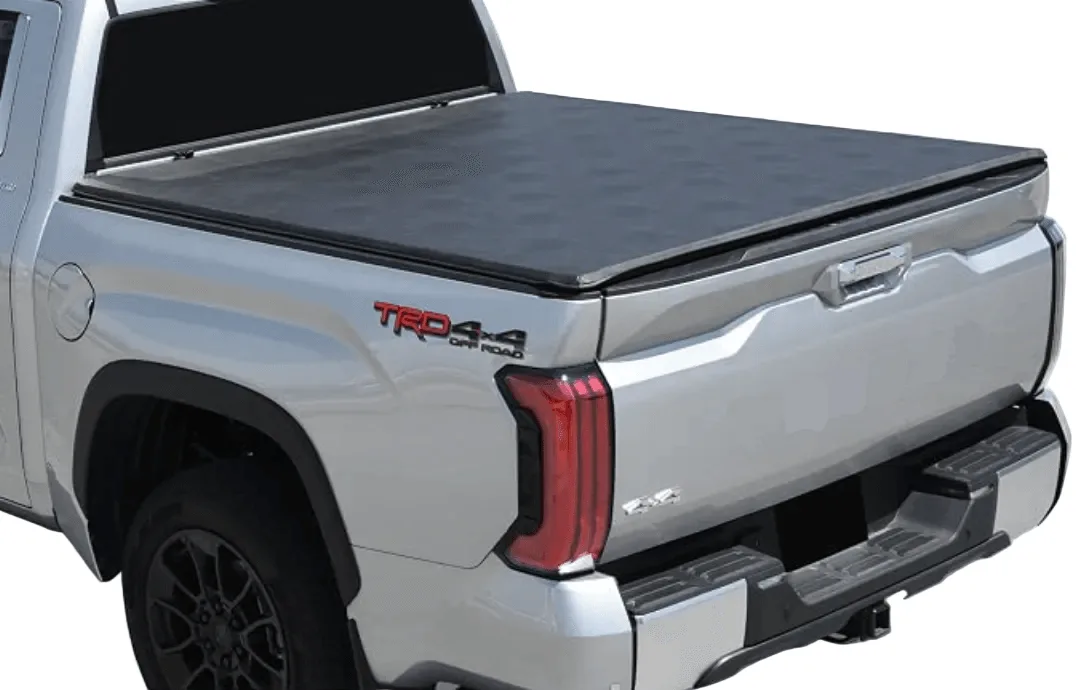
ARMORDILLO® CoveRex SR Series 1999-2006 Toyota Tundra 6'2" Bed Low Profile Soft Roll-up Tonneau Cover
-
ARMORDILLO® CoveRex SR Series 1999-2006 Toyota Tundra 6'2" Bed Low Profile Soft Roll-up Tonneau Cover: This item is not compatible with Stepside Model A stepside bed has different rail geometry, so this cover should not be forced onto one.
-
ARMORDILLO® CoveRex SR Series 1999-2006 Toyota Tundra 6'2" Bed Low Profile Soft Roll-up Tonneau Cover: This item is only compatible with Standard Bed Models without Bed Caps Bed caps change the rail surface the twist clamps sit on, so check for them before you plan the job.
-
ARMORDILLO® CoveRex SR Series 1999-2006 Toyota Tundra 6'2" Bed Low Profile Soft Roll-up Tonneau Cover: No-Drill Twist Clamp Installation The mounting method is clamp-based, which sets the tools and the order of work for the install.
Install the CoveRex SR with the twist clamp system
The cover uses a no-drill twist clamp design. The catalog notes that no drilling is required in most applications and recommends professional installation for best results. If you are doing it yourself, work through these checkpoints in order.
- Lay out the cover and confirm the parts: Unroll the cover on a clean surface and check that the vinyl tarp, reinforced frame, and twist clamps are all present before you start climbing into the bed.
- Set the cover on the bed rails: Position the cover so it sits flush along the bed rails. The low-profile design is meant to sit close to the rail line, so take a moment to center it front to back and side to side.
- Attach the twist clamps: The integrated twist clamp mounting system is designed for secure rail attachment. Hand-tighten the clamps evenly rather than fully tightening one corner at a time.
- Check tension across the cover: The twist clamp tension system is meant to maintain tight tension across the bed. After the clamps are seated, check that the vinyl is taut and the frame sits straight.
- Test the roll-up and close: Roll the cover forward and secure it in the open position, then close it again. The roll-up system is designed for quick full-bed access, so the motion should be smooth before you call the job done.
- Lock the tailgate for cargo security: When the cover is closed, lock the tailgate. The catalog describes the secure tailgate-locking protection as part of how the cover helps protect cargo from casual access.
Where bed liners and minor adjustments come in
The fitment notes say some bed liners may require minor adjustments, and the product details add that minor trimming or adjustment may be required for certain bed liner setups. That is a preparation point, not a reason to skip the fitment check. If your Tundra has a bed liner that sits over the rails, look at how the twist clamps will meet the rail before you tighten anything.
The catalog does not supply a torque specification, a clamp sequence, or a list of required hand tools. Those details are not confirmed by the supplied information, so follow the printed instructions that come with the cover and use professional installation if you are unsure.
What the CoveRex SR is built from
- ARMORDILLO® CoveRex SR Series 1999-2006 Toyota Tundra 6'2" Bed Low Profile Soft Roll-up Tonneau Cover: Built with heavy-duty black vinyl and a reinforced support frame The vinyl tarp and frame are the two parts you handle most during installation and use.
- ARMORDILLO® CoveRex SR Series 1999-2006 Toyota Tundra 6'2" Bed Low Profile Soft Roll-up Tonneau Cover: It is weather-resistant and designed to help keep cargo clean and mostly dry under normal driving conditions. This sets a realistic expectation for the cover after installation: weather-resistant, not a sealed hard shell.
- ARMORDILLO® CoveRex SR Series 1999-2006 Toyota Tundra 6'2" Bed Low Profile Soft Roll-up Tonneau Cover: Warranty on craftsmanship only The warranty scope is worth knowing before you decide between this cover and a different design.
After the install: using the roll-up cover day to day
Once the clamps are set, the cover is meant to roll forward quickly for full bed access and secure in place when open. That makes it practical for hauling tools, equipment, luggage, or outdoor gear without removing the cover entirely. The low-profile aerodynamic design sits flush along the bed rails and is intended to improve airflow over the bed compared with an open bed.
The catalog describes the cover as economical and lightweight compared with a hard folding cover, and it is aimed at daily drivers, work trucks, and weekend adventurers. The tradeoff is the soft vinyl construction: it is weather-resistant and helps keep cargo mostly dry under normal driving, but it is not described as waterproof or as a hard security enclosure. Locking the tailgate is what completes the casual-access protection.
A short pre-install checklist for your first-gen Tundra
- Bed length: Confirm the 6.2 ft bed figure matches your truck.
- Bed style: Fleetside only; not compatible with Stepside models.
- Bed caps: Standard bed models without bed caps only.
- Bed liner: Some bed liners may require minor adjustments or trimming.
- Installation help: No drilling is required in most applications, but professional installation is recommended for best results.