Start with the right DataStick Pro2 variant
The Centon DataStick Pro2 is a cost-effective USB flash drive for everyday use, available in a wide assortment of colors, sizes, and speeds. Before you plug it in, confirm which variant you have: the options are Size, Speed, and Color. The supplied catalog shows 256GB capacities in both USB 3.2 and USB 2.0 speeds, with colors including Magenta, Purple, Teal, Orange, Yellow, Lime, Blue, Red, White, Black, and Grey. Not every color is listed for both speeds, so check the label on the drive or the product page to see exactly what you received.
Choosing the right variant matters because speed affects how quickly files move between your computer and the drive, while capacity determines how much you can store. If you often transfer large files, a USB 3.2 version will generally be faster than a USB 2.0 version, but only if your computer has a compatible USB 3.x port. If you mostly store documents and photos, either speed can work, and the USB 2.0 option may be sufficient.
What the DataStick Pro2 record confirms
-
USB Flash Drive, DataStick Pro2: The Centon Data Stick Pro2 is a cost-effective drive ideal for everyday use. Sets expectations: this is a practical, budget-friendly drive for routine storage rather than a high-performance specialty device.
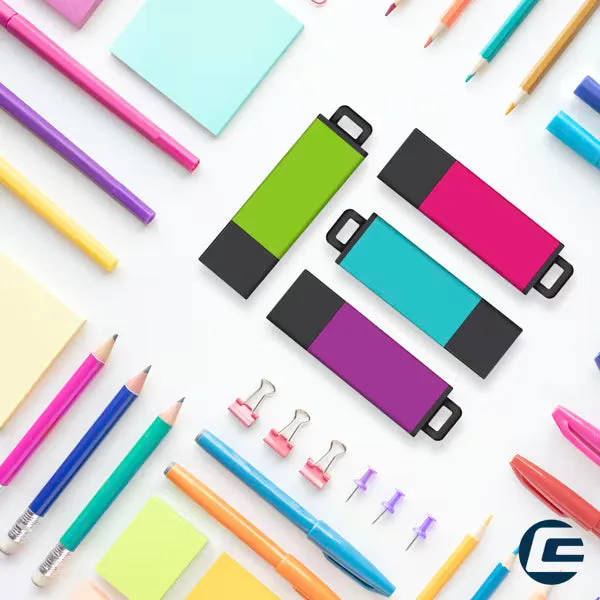
USB Flash Drive, DataStick Pro2
-
USB Flash Drive, DataStick Pro2: Available in a wide assortment of colors, sizes and speeds. You can match the drive to your capacity needs and personal preference, but you should verify the exact combination you receive.
-
USB Flash Drive, DataStick Pro2: Bulk options and multiple pack options are available, contact Centon for more information. If you need several drives for a team or event, Centon can advise on pack and bulk configurations beyond single-unit retail.
First-use checklist for your DataStick Pro2
The supplied product record does not include step-by-step setup or formatting instructions, so the following are general good practices for any USB flash drive rather than manufacturer-mandated procedures. Always refer to your operating system's prompts and the drive's packaging for any specific guidance.
- Inspect the drive and connector: Check that the USB connector is clean and undamaged. Avoid touching the metal contacts, and do not force the drive into a port.
- Plug into a compatible port: Insert the drive into a USB port on your computer. If you have a USB 3.2 variant, use a USB 3.x port if available to take advantage of higher speeds; USB 2.0 ports will still work but at lower speed.
- Wait for your computer to recognize it: Your operating system should detect the drive and assign it a drive letter or mount point. If nothing happens, try a different port or computer to isolate the issue.
- Check the reported capacity: Open File Explorer (Windows) or Finder (Mac) to see the drive's available space. The advertised capacity is the raw total; the usable free space will be slightly less after formatting and system files.
- Create a folder structure: Set up folders for the types of files you plan to store, such as Documents, Photos, or Projects. This makes it easier to find files later and reduces clutter.
- Copy a test file and eject safely: Transfer a small file to confirm the drive works, then use the safe eject or unmount option before removing the drive to avoid data corruption.
Formatting: when and how to approach it
The supplied information for the DataStick Pro2 does not confirm a required file system or formatting procedure. In general, USB flash drives come pre-formatted with a file system that works across Windows and macOS, such as exFAT or FAT32. If you need to format the drive—for example, to clear it completely or to use a file system required by a specific device—use your operating system's built-in formatting tool and choose the options that match your needs. Be aware that formatting erases all data on the drive, so back up anything important first.
If you are unsure which file system to choose, consider where you will use the drive. FAT32 offers broad compatibility but has a file size limit; exFAT removes that limit and is widely supported on modern systems. For large files and cross-platform use, exFAT is often a practical choice. The DataStick Pro2 record does not specify a preferred format, so these are general guidelines rather than product-specific instructions.
Everyday use and care
The DataStick Pro2 is designed for everyday storage, and a few simple habits can help it last longer and perform reliably.
- Eject before removing: Always use the safe eject or unmount function in your operating system before pulling the drive out. This ensures all data is written and reduces the risk of corruption.
- Keep it away from heat and moisture: Store the drive in a cool, dry place. Avoid leaving it in a hot car or near liquids.
- Use a cap or cover if available: If your drive came with a cap, keep it on when the drive is not in use to protect the connector from dust and damage.
- Avoid frequent full reformats: Reformatting is rarely necessary for routine use. Deleting files or using the drive normally is sufficient for most everyday tasks.
What to do if the drive is not recognized
If your computer does not detect the DataStick Pro2, try a few basic troubleshooting steps. First, test the drive in a different USB port, preferably one directly on the computer rather than a hub. Then try it on another computer to see if the issue is system-specific. Check that the connector is clean and that the drive is fully inserted. If the drive still does not appear, it may be a hardware issue; contact Centon support for further assistance. The supplied record does not include a troubleshooting guide, so these are general suggestions.