Start with what the E1 Pro can actually do
Placement decisions only make sense once you know the camera's job. The Reolink E1 Pro is an indoor 4MP Super HD WiFi camera with pan and tilt, so it can sweep across a room rather than stare at one fixed slice of it. That single fact shapes everything below: you are not hunting for the one perfect angle, you are choosing a home position that gives the pan and tilt room to work.
It also supports real-time two-way talk, which matters for placement in a practical way. A camera you plan to speak through should sit somewhere the built-in audio can plausibly reach the people you want to talk to, not buried behind furniture or pointed at a bare wall.
The E1 Pro at a glance
-
E1 Pro: 4MP Super HD resolution with pan and tilt functionality Sharp detail plus a moving field of view means placement is about coverage range, not just a single framing choice.
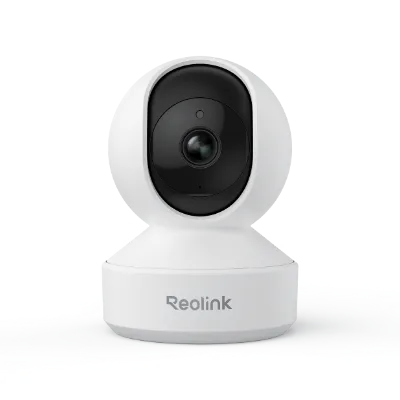
E1 Pro
-
E1 Pro: Real-time two-way talk If you plan to communicate through the camera, position it where voices and room sound are not blocked.
-
E1 Pro: Designed for indoor use and integrates easily with your home network It is a WiFi indoor camera, so signal strength and room conditions belong in your placement plan.
A placement walkthrough for an indoor room
Work through these in order. Each step narrows the options before you commit to a spot.
- 1. Map the room's blind spots first: Walk the room and note the areas a single fixed view would miss: doorways, hallway openings, the far corner. The E1 Pro's pan and tilt is the tool for covering more than one of these, so list them before choosing a position.
- 2. Pick a corner-ish home position: A spot near a corner or along a wall gives a pan-tilt camera more useful sweep than dead center of the room, where it mostly sees the same furniture from different sides. Aim the resting view at the highest-priority area.
- 3. Choose a height that sees faces, not ceilings: Very high mounts tend to look down on heads and lose the room. Very low mounts get blocked by furniture. Pick a height where the camera has a clear line across the space, then confirm the pan range does not sweep into a wall or cabinet.
- 4. Check the view for glare sources: Windows, glossy screens, and bare lamps can wash out part of the frame depending on the time of day. Before finalizing, view the scene at the times you care about most and shift the camera or the resting angle if a bright source dominates.
- 5. Confirm the WiFi spot before mounting: Because this is a WiFi camera, test the intended location with the camera in place but not yet fixed. If the room's far corner is weak, a position closer to the router side of the room is the better trade.
- 6. Re-check the pan and tilt sweep: Once positioned, move through the full pan and tilt range and look for obstructions, reflections, or a view that ends up staring at a blank wall. Adjust the home position so the sweep covers the blind spots from step one.
Indoor camera angles worth avoiding
- Straight into a bright window: Backlight flattens the rest of the room. Angle the camera so the window sits to the side of the main view rather than dead center.
- Pointed at a mirror or glossy TV: Reflections can double the scene and confuse what you are looking at. Shift the angle so reflective surfaces are peripheral.
- Nose-to-wall mounts: A pan-tilt camera needs room to turn. Mounting it flush against a side wall wastes half its range.
- Behind glass or inside a cabinet: The supplied information does not describe enclosure use. Keep the camera in open air where its view and audio are unobstructed.
Where the supplied information stops
The supplied product details cover resolution, pan and tilt, two-way talk, indoor use, and network integration. They do not include recommended mounting heights, pan or tilt degree limits, night vision range, or specific installation steps. Treat the guidance above as planning principles rather than manufacturer instructions, and check the camera's own documentation for exact mounting and operating specifications before you drill anything.
If you are still deciding whether the E1 Pro is the right indoor camera for a room, compare its pan-tilt coverage against a fixed indoor camera for the same space. If you have already bought it, the placement plan above is the part that most affects how useful the footage turns out to be.