Start with the beam path, not the prism
An equilateral prism setup begins with a clear beam path: a collimated source, a stable mount, and a screen or detector placed where the dispersed fan can land without clipping. The prism itself is a flat, polished optical element that deflects or deviates light; its job in a dispersion experiment is to separate wavelengths by angle. Before choosing a variant, sketch where the beam enters, where it exits, and how much room you have for the mount and the observation plane.
Esco Optics supplies Equilateral Prisms in three materials (S1-UV, BK-7, and SF-10), two quality levels (Commercial and Laser), and several leg lengths. The catalog record does not include a recommended angle of incidence, minimum-deviation angle, or mounting torque, so treat those as application-specific values you establish in your own layout rather than fixed instructions from the product page.
A practical alignment sequence
The sequence below keeps the prism fixed while you adjust the beam, which is easier to repeat than moving a mounted prism between measurements. It uses only actions supported by the supplied product description and general optical practice; it does not assume a specific fixture or coating.
- Mount the prism before the beam is live: Secure the prism in its mount first. The catalog variants differ by leg length, so confirm the mount opening matches the leg length you ordered before tightening anything.
- Set a reference line with the beam: With the prism removed, mark where the undeviated beam hits the screen. This reference makes the deviation produced by the prism visible and comparable between runs.
- Place the prism and find the exit beam: Insert the mounted prism into the path and locate the deviated beam on the screen. Rotate the mount slowly until the beam is clear of the prism edges and the dispersed fan is fully visible.
- Check that the beam clears both faces: A beam that clips an edge produces a truncated fan and misleading dispersion readings. Adjust height and lateral position so the beam passes through the polished faces, not the edges.
- Record the geometry, then change one variable: Note the prism orientation and screen position before changing anything. If you compare materials or leg lengths, change only one factor at a time so the deviation difference is attributable to that choice.
What 'angle of deviation' means in this setup
The angle of deviation is the angle between the incoming beam direction and the outgoing beam direction after the prism. In a dispersion experiment, you care about two things: the overall deviation and how much it differs across wavelengths. The supplied product record does not state a minimum-deviation angle or a dispersion value for any variant, so you cannot read a expected deviation angle from the catalog. You measure it in your own layout by comparing the deviated beam position with the reference line you set before inserting the prism.
Minimum deviation is a geometry condition in which the beam passes through the prism symmetrically and the deviation reaches a minimum as the prism is rotated. Finding it experimentally means rotating the prism mount while watching the deviated spot, then noting the orientation where the spot stops moving in one direction and reverses. That orientation is your minimum-deviation position for that wavelength and prism. The catalog does not supply a precomputed value, so this is a measurement you make, not a specification you look up.
Choosing leg length, material, and quality
The available variants combine three leg lengths with three materials and two quality levels. Use the decision points below to narrow the list before ordering.
- Leg length: The catalog lists leg lengths in millimeters. A longer leg gives a larger prism face and more room for the beam, which helps when the beam is wide or the mount is bulky. A shorter leg keeps the setup compact. The record does not state a maximum beam diameter for any leg length, so confirm clearance against your actual beam size before ordering.
- Material: S1-UV, BK-7, or SF-10: The record names the three materials but does not list refractive index, transmission range, or dispersion values for each. Material choice therefore depends on information outside the supplied record, such as your source wavelength and the dispersion you need. If those values are critical, request them from Esco rather than assuming.
- Quality: Commercial or Laser: The catalog offers Commercial and Laser quality variants. The record states that Esco can supply elements with surface quality better than laser grade, 10-5, or lambda/20, but it does not assign a specific surface specification to each quality label. Treat the label as a starting point and confirm the exact surface figure for your application.
- Coating: Unless otherwise specified, all prisms are supplied uncoated. The record notes that coatings can greatly enhance a prism's performance. If your setup needs a coating, plan to request it rather than assuming it is included.
What the Equilateral Prism record confirms
-
Equilateral Prism: Esco manufactures Equilateral Prisms alongside Right Angle Prisms and Laser Prisms, and also designs custom prism optics. If none of the standard variants fit your beam path, a custom prism is a documented option rather than an exception.
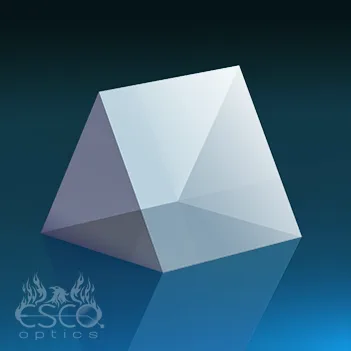
Equilateral Prism
-
Equilateral Prism: Available variants combine leg length, quality, and material, including S1-UV, BK-7, and SF-10. You can match the prism to your mount size and material preference without changing suppliers.
-
Equilateral Prism: Unless otherwise specified, all prisms are supplied uncoated, and coatings can be requested. Plan coating into the order if your dispersion experiment depends on surface reflection losses.
-
Equilateral Prism: Esco can manufacture elements with surface quality better than laser grade, 10-5, or lambda/20, and can produce custom tolerances other than the standard elements. If the standard quality levels are not tight enough for your measurement, a custom specification is available.
Where the supplied information stops
The catalog record does not include a recommended angle of incidence, a minimum-deviation angle, a dispersion curve, a mounting procedure, or a cleaning method for these prisms. It also does not state a maximum beam diameter per leg length or a surface specification tied to each quality label. Those gaps matter for a dispersion experiment, because the deviation you measure depends on the prism material and the geometry you build, not on a single catalog number.
Use the record to choose a variant and confirm what is supplied, then establish alignment and deviation values in your own setup. If a measurement depends on a value the record does not provide, ask Esco for it before you rely on an assumption.