Quick answer
Mount the speedring to your Bowens light first, then build the EZ-Pro softbox around it and fit the inner baffle before the outer diffuser. Check that the speedring seats flush and the rods are fully in their pockets before you tighten anything.
Why the speedring goes on first
The EZ-Pro uses interchangeable speedring inserts, so the ring is the anchor for the whole modifier. Attaching it to the light before the box is built gives you a stable base and lets you confirm the insert matches your Bowens, Calumet, or Interfit mount without wrestling a half-open softbox.
This order also protects the reflective interior: you are not reaching around a mounted light to seat a ring while the fabric is under tension.
When the quick-fold design helps and when it does not
The collapsible frame is genuinely useful for location work because you can assemble and disassemble it in a heartbeat. The trade-off is that the rods must be seated correctly every time; a rod that looks close but is not fully in its pocket will pull the front face out of shape and make the diffuser fit poorly.
If you leave the softbox mounted between shoots, do a quick rod and speedring check before each session rather than assuming it stayed seated in transit.
Step-by-step EZ-Pro setup and fit checks
- Match the speedring insert to your light: Identify your light's mount (Bowens, Calumet, Interfit, or compatible) and fit the matching insert into the speedring before attaching it to the light. Common mistake: assuming all Bowens-style mounts are identical and forcing an insert that does not seat. If the insert does not sit flush, stop and check the mount type rather than tightening it down.
- Mount the speedring to the light: With the light switched off, attach the speedring to the light's mount and tighten the locking mechanism. Check that the ring is fully seated and cannot rock. Common mistake: leaving the lock loose so the whole softbox rotates when you fit the baffles. A mounted ring should feel solid before any fabric is attached.
- Open the frame and seat the rods: Expand the collapsible frame and push each rod fully into its pocket or receiver. Work around the ring evenly rather than fully opening one side first. Common mistake: leaving a rod tip resting against the pocket edge instead of inside it. Run a finger around the ring to confirm every rod is fully seated.
- Fit the inner baffle: Attach the inner baffle to the interior hooks or loops, starting at opposite corners and working around. The silver interior should stay smooth and unpinched. Common mistake: stretching the baffle over a rod that is not fully seated, which pulls the fabric tight on one side. The inner baffle should sit flat without distorting the box shape.
- Fit the outer diffuser: Attach the outer diffuser last, securing the corners first and then the midpoints. Check that the front face is evenly tensioned. Common mistake: fitting the outer diffuser before the inner baffle, which makes the inner layer hard to reach and easy to leave loose. Both layers should be attached before you judge the light quality.
- Check the light path and optional grid: Switch on the light at low power and look for hotspots or uneven spill. If you use the optional eggcrate grid, fit it after the outer diffuser is secure. Common mistake: judging output with the modeling light too high to see the actual spread. If the throw is uneven, recheck rod seating and baffle tension before changing light position.
Product facts
-
Pro Studio Solutions EZ-Pro Softbox with Bowens Speedring for Bowens,Calumet,Interfit and Compatible Lights - Quick Collapsible Softbox with Silver Reflective Interior with Double Diffusion Panels: The EZ-Pro softbox has a silver reflective interior and includes inner and outer baffles. The two baffles let you tune the throw for even coverage instead of relying on a single diffuser layer.
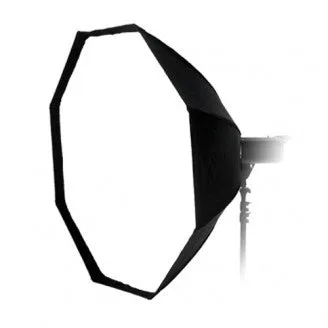
Pro Studio Solutions EZ-Pro Softbox with Bowens Speedring for Bowens,Calumet,Interfit and Compatible Lights - Quick Collapsible Softbox with Silver Reflective Interior with Double Diffusion Panels
-
Pro Studio Solutions EZ-Pro Softbox with Bowens Speedring for Bowens,Calumet,Interfit and Compatible Lights - Quick Collapsible Softbox with Silver Reflective Interior with Double Diffusion Panels: It uses interchangeable speedring inserts for Bowens, Calumet, Interfit, and compatible lights. Confirm your light's mount before assembly so you do not force the wrong insert onto the ring.