Start with the Death Army's snap-fit system
The 1/144 HGFC Death Army model kit is designed for snap-fit assembly with molded color parts, so you can build a display-ready model without glue or paint. This makes it a straightforward project whether you are new to G Gundam kits or adding a grunt suit to your collection.
Because the parts come molded in color, you can focus on clean assembly and optional detailing rather than a full paint job. The kit includes a rifle, foil stickers, and an instruction guide to walk you through each step.
What the kit actually gives you
-
1/144 HGFC Death Army Model Kit: This 1/144 scale HGFC Death Army model kit from Mobile Fighter G Gundam features snap-fit assembly, molded color parts, and customizable details like eye and leg variants. The snap-fit and pre-colored parts mean you can complete the build in one sitting, while the customizable eye and leg options let you personalize the model without extra parts.
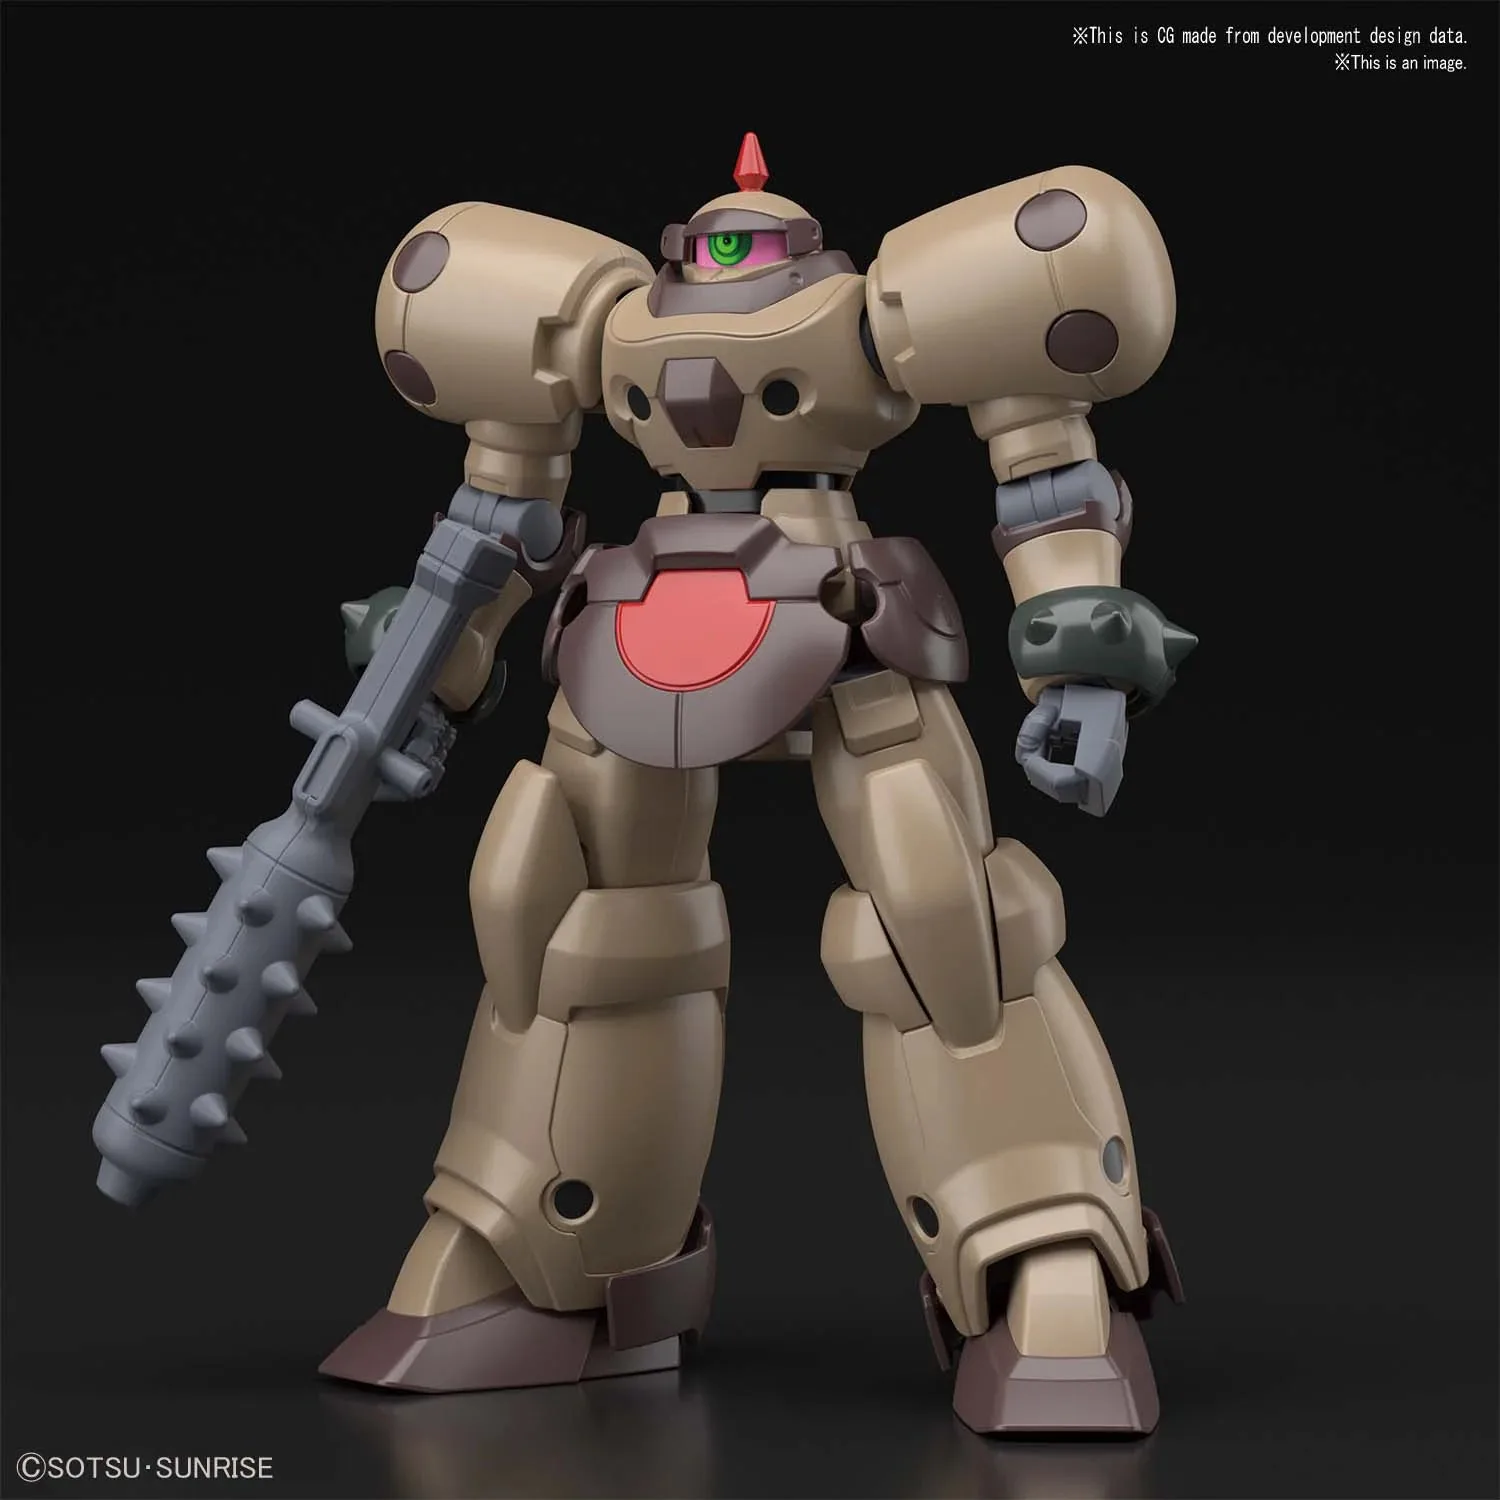
1/144 HGFC Death Army Model Kit
-
1/144 HGFC Death Army Model Kit: It includes a rifle, foil stickers, and an instruction guide for easy building and display. The included rifle gives the model its signature weapon, and the foil stickers add detail to the eyes and other small areas without painting.
Build order: assemble the torso and head first
The instruction guide provides the official sequence, but these practical steps help you avoid rework and make the most of the customizable features.
- 1. Build the torso and head: Start with the central body section. This establishes the core structure and lets you attach the arms and legs later. The head includes the eye component, which can be customized with the included foil stickers or painted for a different look.
- 2. Choose your eye and leg variants: The kit offers customizable details for the eyes and legs. Decide which variant you want before assembling these parts. For the legs, you can select the standard or alternate configuration. For the eyes, apply the foil sticker that matches your preferred appearance.
- 3. Attach the arms and weapon: Once the torso is complete, attach the arms. The rifle fits into the hand piece, so test the fit before securing. The snap-fit system allows you to adjust the pose after assembly.
- 4. Final assembly and display: Attach the legs to the torso. The completed model stands on its own for display. If you plan to paint, do so before applying the foil stickers to avoid covering them.
Customization ideas using the kit's features
The Death Army's molded color parts provide a good base, but you can customize it further with panel lining or a matte topcoat. The eye and leg variants let you create two different looks from one kit. If you want a unique finish, consider painting the eye area instead of using the foil sticker, or swapping the leg configuration to match a specific scene from the series.
Because the kit is snap-fit, you can also disassemble it later if you decide to repaint or modify parts. This flexibility makes it a solid choice for builders who enjoy revisiting their models.
Trade-offs to consider
The snap-fit and pre-colored parts save time, but they also mean some seam lines may be visible if you do not sand or paint. The foil stickers add detail but may not match the exact shade of the plastic. If you prefer a seamless, painted finish, plan to fill seams and paint after assembly.
The kit does not include a base or action stand, so you will need to supply your own if you want dynamic poses. The rifle is the only included weapon, so additional armaments require separate purchases.