Quick answer
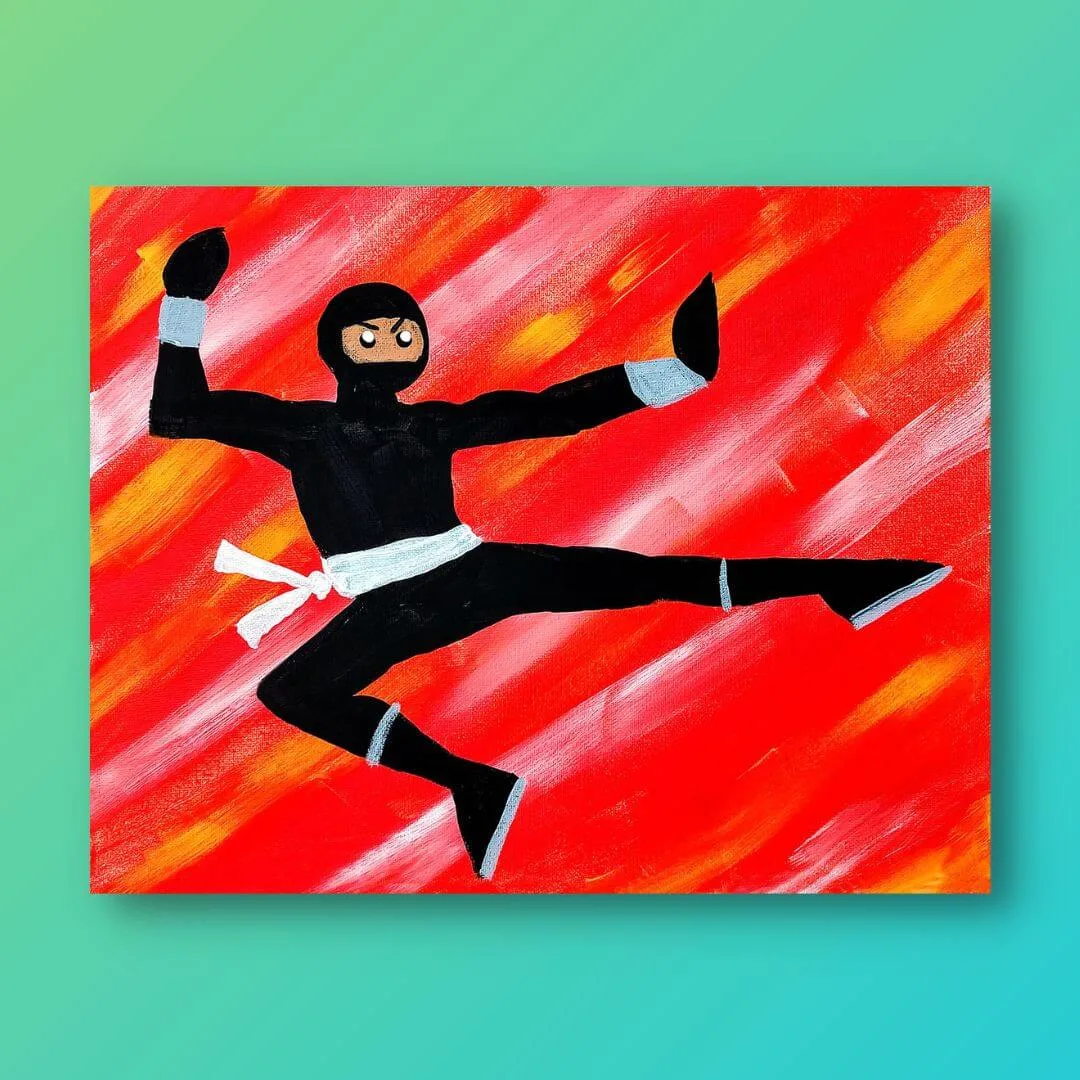
Paint the Hi-YAH! ninja scene by working from background to foreground: blend a bold sky, sketch a dynamic pose, then layer skin tones and final details. The kit’s guided tutorial makes it easy to follow these junior artist painting steps.
Why bold acrylic colors work for action scenes
Action scenes rely on contrast and energy. Bold acrylic colors help a figure pop against a blended background, and acrylics dry quickly so kids can build layers without long waits. The Hi-YAH! kit is designed around this approach, teaching how to mix a range of realistic skin tones—a useful skill that goes beyond this single painting.
What to expect from the Hi-YAH! kit
This kit includes a sample tutorial that walks through blending a background, drawing a figure in a dynamic pose, and mixing skin tones. It’s a complete project for young artists ready to try more than a simple shape. The kit type option lets you choose the format that suits your child, but keep in mind that the tutorial is self-guided, so younger kids may need an adult nearby for the drawing step.
Step-by-step: paint your Hi-YAH! action scene
- Prepare your workspace and colors: Cover the table, set out the canvas, brushes, and water. Squeeze small amounts of the bold acrylic colors onto a palette, keeping skin-tone colors separate. Common mistake: using too much water on the brush, which can make acrylics runny and dilute the intensity. Keep a paper towel handy to blot excess water before loading paint.
- Blend the background: Choose two or three bold colors for the sky or backdrop. Paint them in loose bands, then use a clean, slightly damp brush to blend where the colors meet. Work quickly while the paint is wet. Checkpoint: step back to see if the blend looks smooth; if not, add a little more paint and blend again. Blend in one direction to avoid muddying the colors.
- Sketch the ninja figure: Lightly draw the figure in a dynamic pose using a pencil. Focus on the line of action—a curve from head to foot—to keep the pose energetic. Common mistake: making the pose too stiff by drawing straight limbs. Checkpoint: ensure the figure fits the canvas with room for movement. Draw the pose with simple shapes first, then refine.
- Mix and apply skin tones: Use the tutorial’s guidance to mix a base skin tone, then create a lighter and a darker shade for highlights and shadows. Paint the skin areas, then add shadows where the body overlaps or turns away from the light. Checkpoint: test colors on a scrap paper before applying to the canvas. Mix a tiny bit of blue or red into your skin tone to make it look more realistic.
- Paint the ninja and details: Fill in the ninja’s clothing with bold, contrasting colors. Use a smaller brush for details like the mask, eyes, and any accessories. Common mistake: painting over the skin tones with dark colors—work carefully around the figure. Checkpoint: let each layer dry before adding the next to avoid smudging. Use a light touch for outlines to keep the action feeling lively.
- Add final touches and let it dry: Step back and check the contrast. Add highlights to the figure or background if needed. Then let the painting dry completely before displaying. Checkpoint: ensure no wet paint remains before hanging. Sign and date the back of the canvas for a proud keepsake.
Product facts
-
Hi–YAH!: Includes a sample tutorial for painting a ninja in a dynamic pose with a blended background and mixed skin tones. The tutorial gives kids a clear path to follow, so they can focus on technique rather than inventing a composition.
Hi–YAH!