Quick Answer
Install the HiTorque Micro Mill base to provide a stable, level foundation for your Super X1 micro mill, reducing vibration and improving cutting accuracy.
Why a Dedicated Base Matters
The HiTorque Micro Mill base is designed specifically for the Super X1 micro mill, offering a precise mounting surface that helps align the mill column and minimize flex during operation. Using a generic or makeshift base can introduce misalignment and reduce repeatability.
Installation Steps
- Prepare the Work Surface: Clean the bench top thoroughly. Place the HiTorque Micro Mill base on a flat, level area. Use a machinist's level to check for any tilt; shim if necessary. A common mistake is skipping the level check, which can cause uneven wear on the mill ways.
- Mount the Mill on the Base: Lift the Super X1 micro mill onto the base, aligning the mounting holes. Secure it with the provided bolts, tightening in a crisscross pattern to distribute stress evenly. Over-tightening one side first can warp the base or misalign the column.
- Check Column Alignment: Use a dial indicator on the spindle to measure runout along the column travel. Adjust the base's leveling screws (if equipped) or shim under the base to bring runout within 0.001 inch per inch. If runout exceeds 0.002 inch, recheck the base's flatness and the bench surface.
- Secure and Test: Tighten all bolts to the manufacturer's torque spec. Run the mill through its full range of motion without a cutter to ensure no binding or unusual vibration. Listen for changes in motor sound—binding often produces a distinct hum.
Product Details
-
Base, HiTorque Micro Mill: This base is a replacement part intended for the Super X1 micro mill, branded under Sieg Industrial Group. It ensures a proper fit and alignment, which is critical for maintaining accuracy in precision milling tasks.
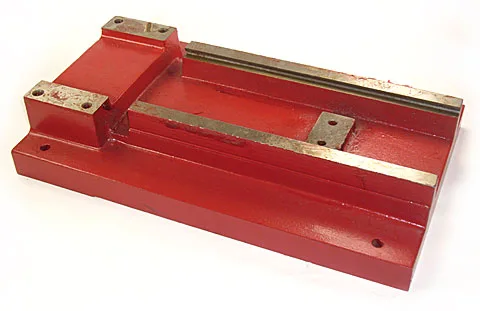
Base, HiTorque Micro Mill