Quick Answer
To apply Noir Chrome Square press-on nails flawlessly, focus on thorough nail prep, precise sizing, and proper adhesive application. Follow the steps below for a salon-quality finish that lasts.
Why Prep Matters More Than You Think
The key to a flawless press-on manicure is preparation. Natural oils and moisture on your nail plate can prevent adhesive from bonding properly, leading to early lifting. Taking a few extra minutes to clean and dehydrate your nails ensures the Noir Chrome Square press-ons stay put for days, not just hours.
Sizing: The Square Shape Advantage
Square press-on nails have a wider, flatter tip, which means they cover more of your natural nail. This shape is forgiving for those with wider nail beds, but it also means you need to match the width carefully. A nail that is too small will look like it's floating, while one that's too large can cause pressure and discomfort. Take your time to find the perfect fit for each finger.
Adhesive Choice: Glue vs. Tabs
Your adhesive choice affects both wear time and removal. Nail glue offers a stronger, longer-lasting bond, ideal for up to two weeks of wear. Adhesive tabs are gentler on your natural nails and allow for quick changes, but they may not last as long. For the Noir Chrome Square set, consider your lifestyle and how long you want the manicure to last.
Step-by-Step Application Guide
- Prep Your Natural Nails: Remove any old polish, push back your cuticles, and gently buff the surface of your nails. Wash your hands with soap and water, then dry thoroughly. Wipe each nail with rubbing alcohol to remove oils and debris. Skipping the alcohol wipe is a common mistake that causes early lifting.
- Select the Right Size for Each Nail: Lay out the Noir Chrome Square press-ons and match each one to your natural nail. The press-on should cover the entire nail surface from side to side, without overhanging or touching your cuticles. Check the fit by placing the nail on top of your natural nail before applying adhesive—if it doesn't match, try another size.
- Apply Adhesive to the Press-On Nail: Apply a thin, even layer of nail glue to the back of the press-on nail, or apply an adhesive tab. Avoid getting adhesive on your skin. Too much glue can cause it to squeeze out from under the nail, creating a mess and weakening the bond.
- Place and Press the Nail: Align the press-on nail at a 45-degree angle near your cuticle, then gently press down and slide it into place. Hold for 10-15 seconds to ensure a secure bond. Pressing too hard can cause the nail to shift or create air bubbles—use steady, even pressure.
- File and Shape the Edges (If Needed): After all nails are applied, use a file to smooth any rough edges or adjust the length to your liking. Be gentle to avoid damaging the chrome finish. Filing too aggressively can chip the chrome coating—use light, even strokes.
- Seal and Care for Your Manicure: Apply a top coat to the tips of the nails to seal the edges and add extra shine. Avoid water and harsh chemicals for the first hour after application. Wearing gloves while doing dishes or cleaning will help your manicure last longer.
Product Spotlight
-
Noir Chrome Square Press-On Nails: The Noir Chrome Square Press-On Nails feature sleek black chrome tips, a natural nude base, and a bold long-square silhouette. The dark chrome finish adds a high-shine, edgy look, but it also means fingerprints and smudges are more visible—handle them carefully during application.
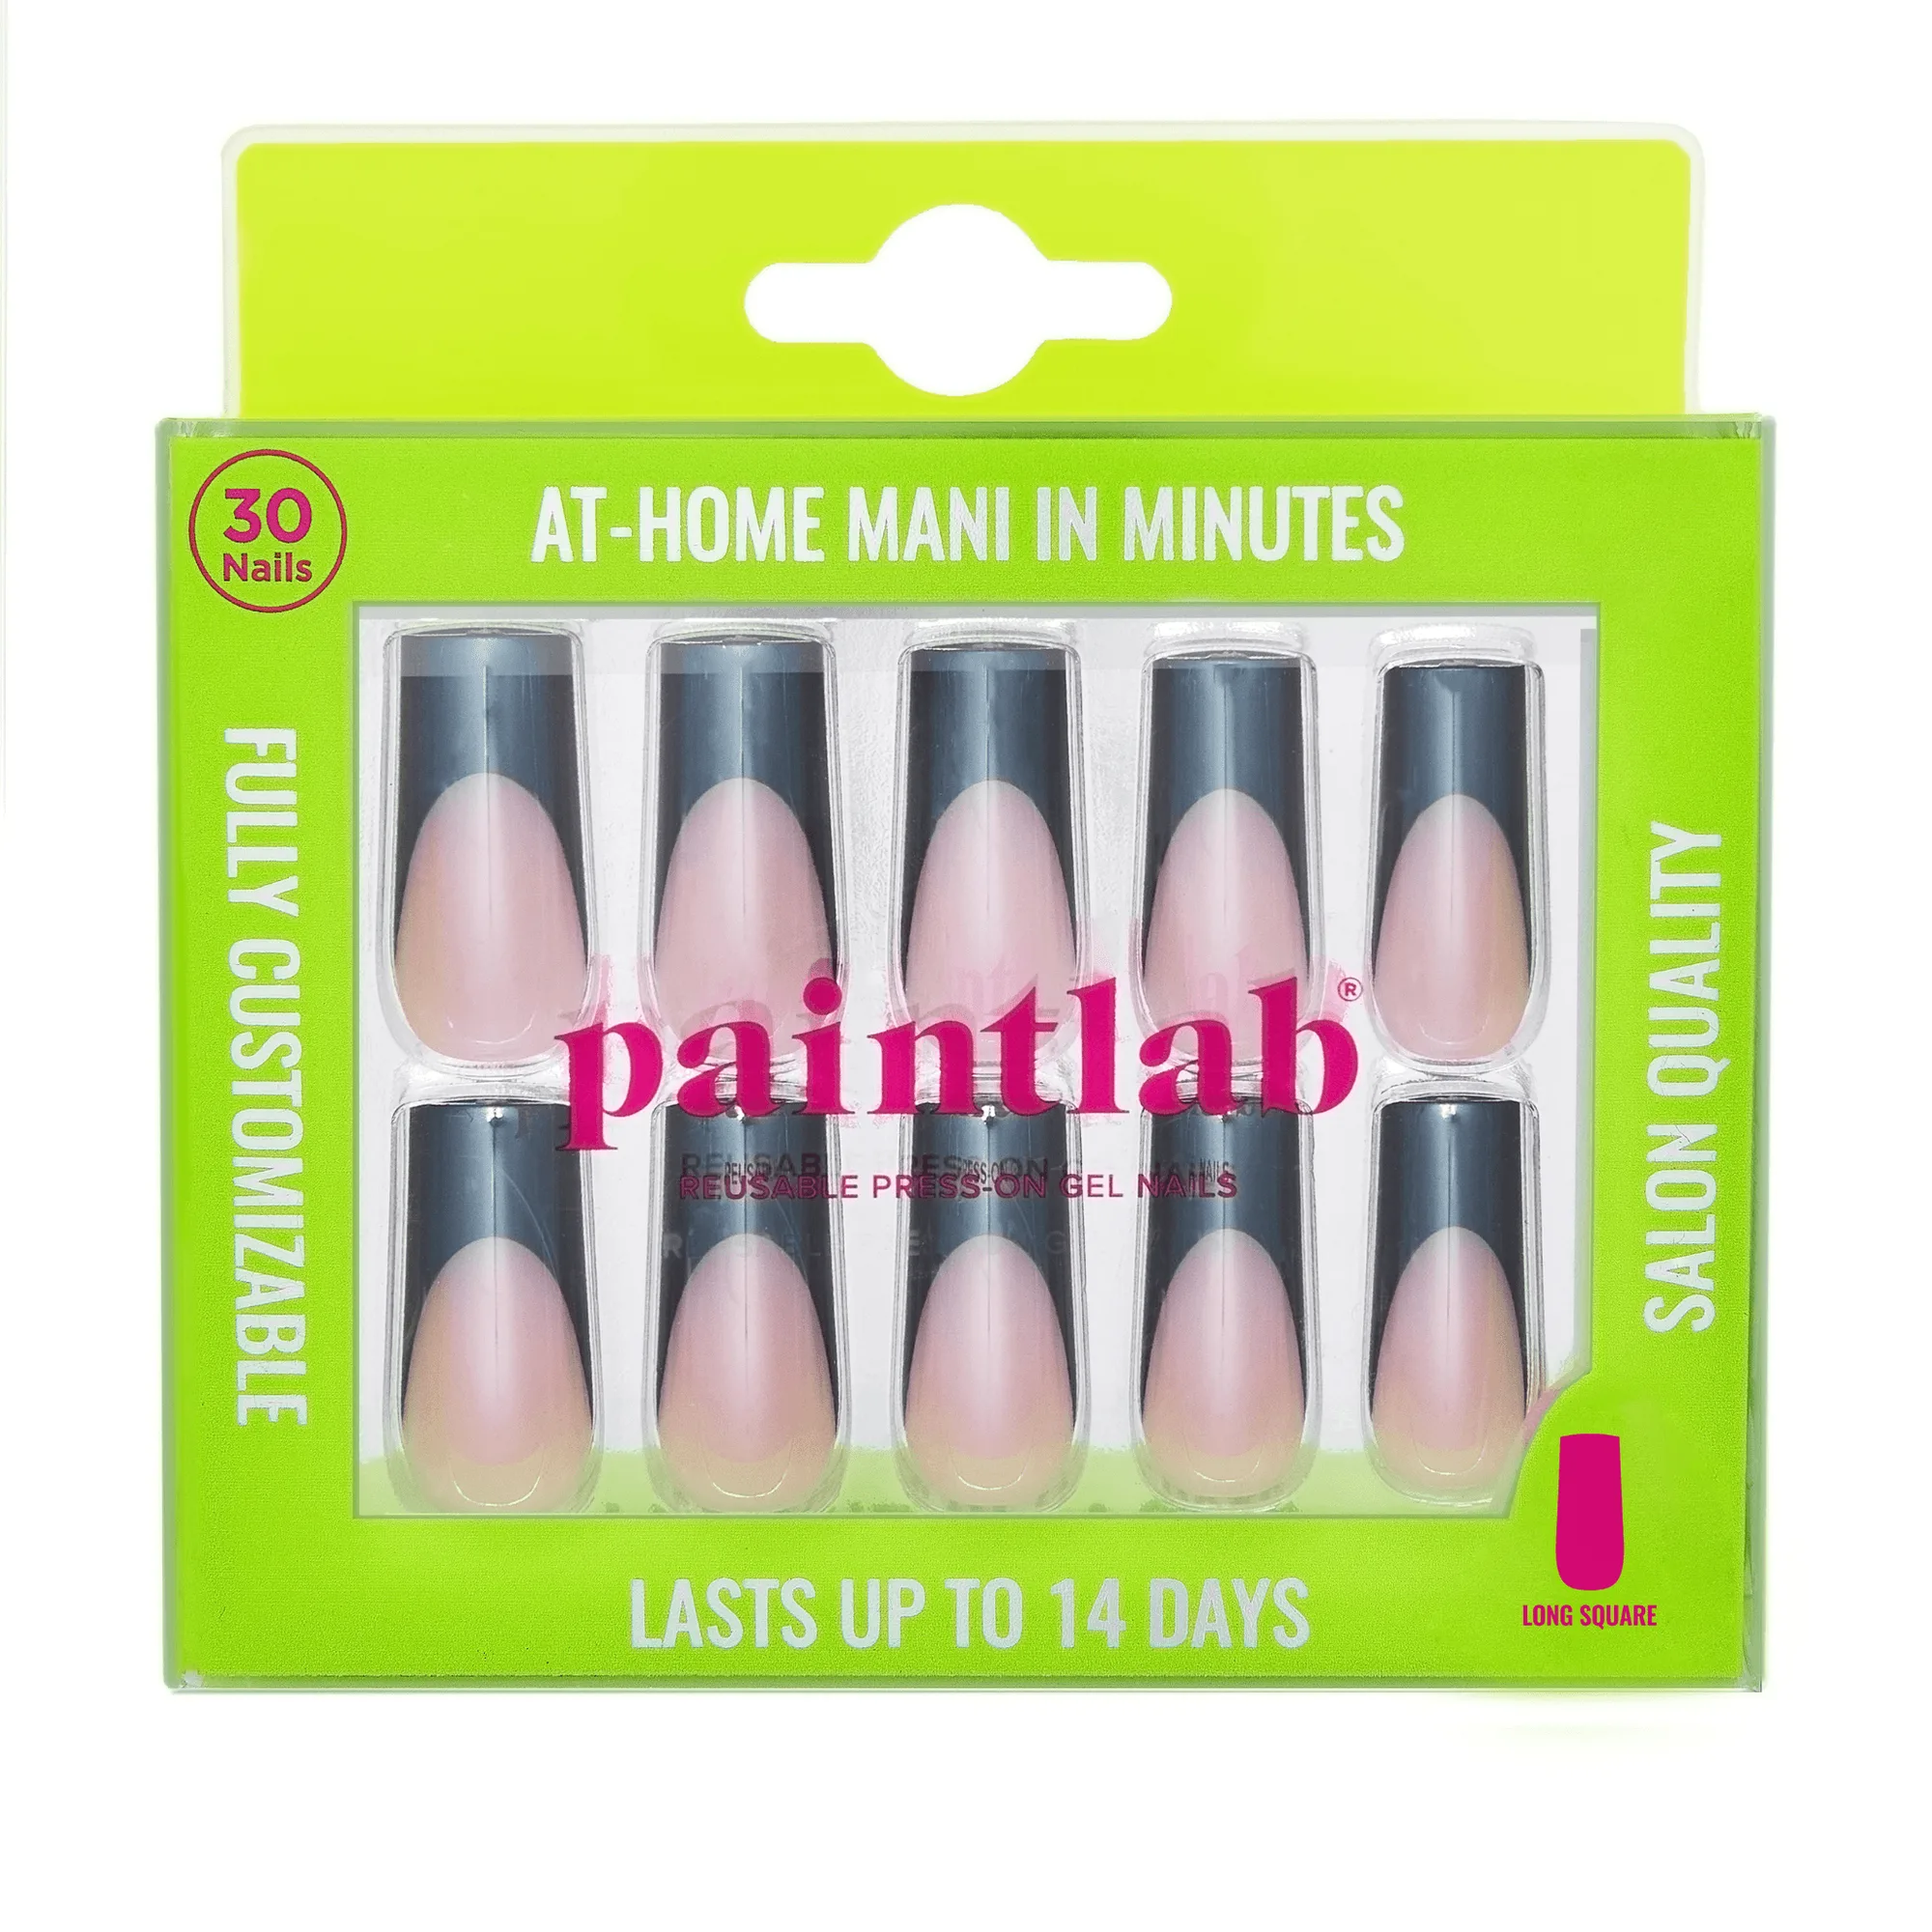
Noir Chrome Square Press-On Nails