The no-makeup makeup look has become a staple for those who want a fresh, effortless appearance without the heavy feel of traditional foundation and powder. At the heart of this trend is a natural flush that looks like you just came from a brisk walk—radiant, healthy, and completely believable. Achieving that perfect glow doesn’t require a dozen products; it starts with the right cheek color and technique.
Enter Sheer Cheek Gel, a lightweight, buildable formula that melts into skin for a dewy, second-skin finish. Unlike powder blushes that can sit on top of makeup or cream blushes that may feel heavy, a sheer gel delivers a wash of color that looks like it’s coming from within. In this guide, we’ll walk you through how to apply Sheer Cheek Gel for a no-makeup makeup look, from prep to placement, so you can glow naturally every day.
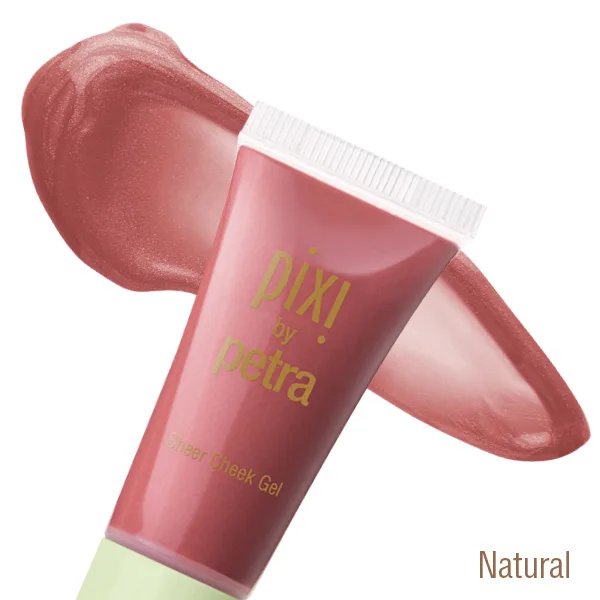
Sheer Cheek Gel
Why Sheer Cheek Gel Is the Ultimate No-Makeup Makeup Blush
Sheer Cheek Gel stands out because of its weightless texture and transparent pigment. Traditional powder blushes can look obvious or cakey, especially on bare skin or light foundation. Gels, on the other hand, blend seamlessly and allow your skin’s natural texture to shine through. They’re also incredibly forgiving—if you apply too much, you can simply blend it out with a damp sponge or fingertips without disturbing the rest of your makeup.
Another reason gels are perfect for a natural look: they dry down to a satin finish that mimics the look of healthy, hydrated skin. No shimmer or glitter—just a subtle, lit-from-within glow. Plus, many gel blushes are formulated with skin-loving ingredients like aloe vera or vitamin E, so they double as skincare. This makes them ideal for days when you want to skip foundation but still add a pop of color to your cheeks.
- Weightless, non-sticky texture that melts into skin
- Buildable color—apply one layer for a hint or two for more intensity
- Dries to a natural, dewy finish without glitter
- Works beautifully over bare skin, tinted moisturizer, or light foundation
Step 1: Prep Your Skin for a Flawless Application
Before you even touch the cheek gel, start with well-prepped skin. Cleanse with a gentle cleanser like the SuperBerry Cleansing Whip to remove any dirt or oil, then follow with a hydrating toner. This ensures your skin is smooth and ready to absorb product evenly. If you have dry patches, a lightweight moisturizer like the Hydrating Milky Lotion will create a smooth canvas without feeling greasy.
For a truly natural look, you can skip foundation altogether. If you prefer a bit of coverage, apply a tinted moisturizer or a light layer of the Hydrating Milky Serum, which adds hydration and a subtle glow. Let your skincare sink in for a minute before moving on to the cheek gel—this prevents the gel from sliding around or pilling.
Step 2: Choose the Right Shade and Amount
The key to a no-makeup look is choosing a shade that mimics your natural flush. If you have fair skin, opt for soft pinks or peachy tones. Medium skin tones look beautiful with rose or coral shades, while deeper skin tones can rock berry or warm terracotta hues. Sheer Cheek Gel is designed to be buildable, so you can always add more if needed.
Start with a tiny amount—about half a pea-size drop on the back of your hand. This is crucial because gel formulas are concentrated; a little goes a long way. Dip your ring finger or a stippling brush into the product and tap off any excess. Remember, you can always build up, but it’s hard to remove excess gel once it’s on your cheeks.
- Start with a pea-size drop on your hand
- Use a finger or stippling brush for precise application
- Tap off excess before applying to cheeks
Step 3: Apply in the Right Placement for a Natural Flush
For a youthful, natural look, apply the gel to the apples of your cheeks—the roundest part when you smile. Use gentle tapping motions to blend the color upward toward your temples. This mimics the way blood naturally rushes to your cheeks, giving you a believable flush. Avoid sweeping motions, which can disturb the skin underneath and create streaks.
If you want a more lifted effect, apply the gel slightly higher on the cheekbones, blending outward. You can also add a tiny dot to the bridge of your nose and the cupid’s bow for a sun-kissed, cohesive look. The goal is to keep the color soft and diffused, with no harsh lines. If you notice any edges, use a clean damp sponge to blend them out.
- Apply to the apples of the cheeks and blend upward
- Add a tiny dot to the nose bridge for a sun-kissed effect
- Use a damp sponge to soften any harsh lines
Step 4: Set the Look Without Losing the Dew
One of the best things about Sheer Cheek Gel is that it dries down on its own, so you don’t need to set it with powder. If you have oily skin, you can lightly dust a translucent powder only on your T-zone, but avoid powdering the cheeks—it will dull the dewy finish. For extra staying power, use a setting spray with a hydrating mist.
To complete your no-makeup makeup look, add a swipe of mascara and a tinted lip balm or a Glow-y Lip Oil for a glossy, hydrated pout. The combination of a natural flush, defined lashes, and glossy lips creates a fresh, put-together appearance that looks like you’re barely wearing makeup. And if you want to take your glow to the next level, try layering the gel over a liquid highlighter for a multidimensional effect.
- Let the gel dry naturally for a dewy finish
- Only powder the T-zone if needed
- Finish with mascara and a glossy lip product like Glow-y Lip Oil
Common Mistakes to Avoid When Using Sheer Cheek Gel
Even the best products can go wrong with improper application. One of the most common mistakes is using too much product at once. Because gels are concentrated, starting with a small amount and building up is essential. Another mistake is applying gel over heavy foundation or powder—the gel won’t blend well and may look patchy. Always apply gel blush before powder products.
Also, avoid using a dry brush or sponge. Gels work best when applied with slightly damp tools or clean fingers. The warmth of your fingers helps the product melt into the skin. Finally, don’t forget to blend the edges thoroughly. A harsh line of color on the cheek is a dead giveaway that you’re wearing makeup. Take an extra 10 seconds to blend, and you’ll achieve that seamless, natural look.
- Start with a tiny amount and build up
- Apply gel before powder products
- Use damp tools or fingers for best blending
- Blend edges thoroughly to avoid harsh lines
Mastering the art of Sheer Cheek Gel application is the secret to an effortlessly natural no-makeup makeup look. With the right prep, placement, and blending technique, you can achieve a radiant flush that looks like your skin but better. Ready to try it yourself? Explore the Sheer Cheek Gel collection and find your perfect shade for a fresh, dewy glow every day.