Smoothing solution is a powerful exfoliating treatment that can transform your skin texture when used correctly. Whether you're dealing with rough patches, uneven tone, or clogged pores, proper application is key to achieving the smooth, radiant complexion you desire. In this guide, we'll walk you through the exact steps to apply smoothing solution for best results, including frequency, technique, and aftercare.
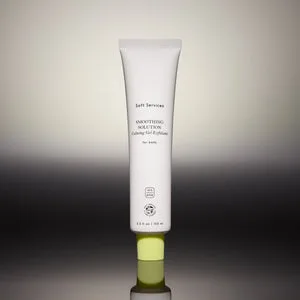
Smoothing solution
Many people make the mistake of overusing or misapplying smoothing solution, leading to irritation or diminished results. By following the right method, you can maximize the benefits while keeping your skin healthy. Let's dive into the step-by-step process.
What Is Smoothing Solution and How Does It Work?
Smoothing solution is a leave-on exfoliant typically formulated with alpha hydroxy acids (AHAs), beta hydroxy acids (BHAs), or enzymes that dissolve dead skin cells and promote cell turnover. Unlike physical scrubs that can be abrasive, chemical exfoliants like smoothing solution work gently to reveal fresher, smoother skin underneath. Regular use can help reduce the appearance of fine lines, hyperpigmentation, and rough texture.
For best results, it's important to choose a smoothing solution that matches your skin type and concerns. Some are designed for sensitive skin with lower concentrations, while others target stubborn rough patches. Always patch test before full application.
- Start with a low concentration if you're new to chemical exfoliants.
Step-by-Step Guide to Applying Smoothing Solution
1. Cleanse your face thoroughly to remove makeup, dirt, and oil. Pat dry with a clean towel. Your skin should be completely dry before applying smoothing solution, as water can dilute the product and reduce efficacy.
2. Apply a small amount of smoothing solution to a cotton pad or your fingertips. Use just enough to lightly saturate the pad—about the size of a dime. Avoid soaking the pad, as excess product can cause dripping and irritation.
3. Gently swipe the smoothing solution over your face, avoiding the eye area, lips, and any broken skin. Move in upward, outward motions. Don't rub or scrub; let the product absorb naturally.
4. Wait for the solution to fully dry (about 30 seconds to 1 minute) before applying any other products. This ensures optimal penetration. Follow with a moisturizer to hydrate and protect your skin barrier.
- Never apply smoothing solution to damp skin—it increases absorption and risk of irritation.
- Use only once or twice a week to start, then gradually increase frequency as your skin builds tolerance.
Best Practices for Using Smoothing Solution on Rough Skin
If you have rough, bumpy skin on areas like elbows, knees, or heels, smoothing solution can be a game-changer. Apply it to these areas after showering when skin is clean and dry. For extra stubborn patches, you can leave the solution on for a few extra minutes before moisturizing.
For facial rough skin, such as texture around the nose or chin, use a targeted approach. Apply the solution with a cotton swab to those specific areas, avoiding the rest of the face if they are not affected. This prevents over-exfoliation of normal skin.
After using smoothing solution, it's essential to wear sunscreen during the day. AHAs and BHAs increase sun sensitivity, so protect your skin with SPF 30 or higher to prevent damage and maintain results.
- Pair smoothing solution with a gentle, hydrating moisturizer to support skin recovery.
- If you experience redness or peeling, reduce frequency to once a week.
Common Mistakes to Avoid When Applying Smoothing Solution
One of the biggest mistakes is using too much product. More is not better—excess smoothing solution can cause chemical burns or severe dryness. Stick to the recommended amount and frequency.
Another common error is combining smoothing solution with other strong actives like retinol, vitamin C, or benzoyl peroxide in the same routine. This can overwhelm your skin and lead to irritation. Instead, use smoothing solution on alternate nights or in separate routines (AM vs. PM).
Don't forget to moisturize! Smoothing solution can be drying, so always follow with a rich moisturizer. Skipping this step compromises your skin barrier and can make texture worse over time.
- Always read the product instructions—some smoothing solutions are rinse-off, others are leave-on.
Building a Routine Around Smoothing Solution
Incorporate smoothing solution into your evening routine, as it works best when skin repairs overnight. A simple routine: cleanse, apply smoothing solution, wait, then moisturize. On non-exfoliation nights, focus on hydration and gentle cleansing.
For enhanced results, consider pairing smoothing solution with a nourishing serum or a soothing mask once a week. For example, after using smoothing solution, you can apply a hydrating sheet mask to boost moisture and calm the skin.
If you're looking for a complete skincare set that includes smoothing solution, the https://novabeautyai.shop/products/skin-essentials-set-267824Skin Essentials Set offers a curated combination of products designed to work together for smoother, healthier skin. It's a convenient way to start your journey.
- Always introduce smoothing solution gradually—start with once a week for the first two weeks.
Mastering the application of smoothing solution can dramatically improve your skin's texture and radiance. Remember to start slow, listen to your skin, and always follow with moisturizer and sunscreen. For a complete exfoliating experience, explore the Skin Essentials Set which includes smoothing solution and complementary products to elevate your routine. Your journey to smoother skin starts with the right technique!