Quick answer
To apply red crystal press on nails from a mixed shape bling press on set, start with clean, dry nails, confirm your size before ordering, and use a flexible adhesive that suits the longer coffin shape. Work slowly around the crystals so the set stays secure and comfortable.
Why sizing comes before application
A handmade red bling nail set is built to the measurements you provide, so the fit you receive depends on the sizes you submit. Check each nail against the size chart before ordering and note your sizes in the order notes. If a nail feels tight or lifts at the sidewall, stop and remeasure rather than forcing it. The catalog does not list a sizing kit or replacement policy, so confirm your measurements first.
How the long coffin shape changes wear
The long coffin shape gives the red crystals room to catch light, but it also means more length past the fingertip. That extra length can catch on drawers, hair, and zippers, so keep the first day or two low-impact while you adjust. If you are not used to long nails, practice typing and opening packaging with the side of your finger rather than the tip.
Adhesive choices and crystal care
Press on nail wear tips often focus on glue strength, but with a crystal-covered set the goal is a secure bond that still lets you remove the nails without pulling at the stones. Use a press on adhesive recommended for your chosen wear time and avoid soaking the set in water during the first hour. The catalog does not specify a removal method, so follow the adhesive instructions and never pry the nail off.
Step-by-step application for red crystal press ons
- Confirm your sizes before ordering: Use the size chart to measure each natural nail and enter your sizes in the notes section when you order. Common mistake: guessing a size or skipping the notes, which can leave you with a set that does not fit. Checkpoint: compare every nail to the chart before checkout.
- Prep your natural nails: Push back cuticles, buff the nail surface lightly, and wipe each nail with alcohol to remove oils. Common mistake: skipping the wipe, which leaves a barrier that weakens adhesion. Checkpoint: nails should look matte and feel completely dry before you continue.
- Dry-fit the set: Lay out all 10 nails and match each one to a finger without adhesive. Common mistake: assuming the largest nails go on the thumbs without checking. Checkpoint: every nail should sit comfortably without pressing into the sidewalls.
- Apply adhesive and press: Apply a thin, even layer of press on adhesive to your natural nail and a small dot inside the false nail, then press from cuticle to tip and hold for the time stated on the adhesive. Common mistake: using too much glue, which can seep around the crystals. Checkpoint: the nail should not slide or lift when you let go.
- Protect the crystals during wear: Avoid soaking the set in hot water and dry your hands gently after washing. Common mistake: using the nail tip to open cans or scrape labels. Checkpoint: check the edges and stones weekly for lifting or looseness.
- Remove without force: Follow the adhesive removal instructions and never pry the nail off. Common mistake: pulling a nail off when it starts to lift, which can damage the crystal setting. Checkpoint: if a nail feels loose, remove it properly rather than wearing it until it falls off.
Product facts
-
Handmade- Red Crystal Mixed Shape Bling Press On Nail Set: Each set contains 10 handmade false nails in a C-curve long coffin shape. The long coffin shape and C-curve affect how the nails sit on your natural nails, so check the fit before applying adhesive.
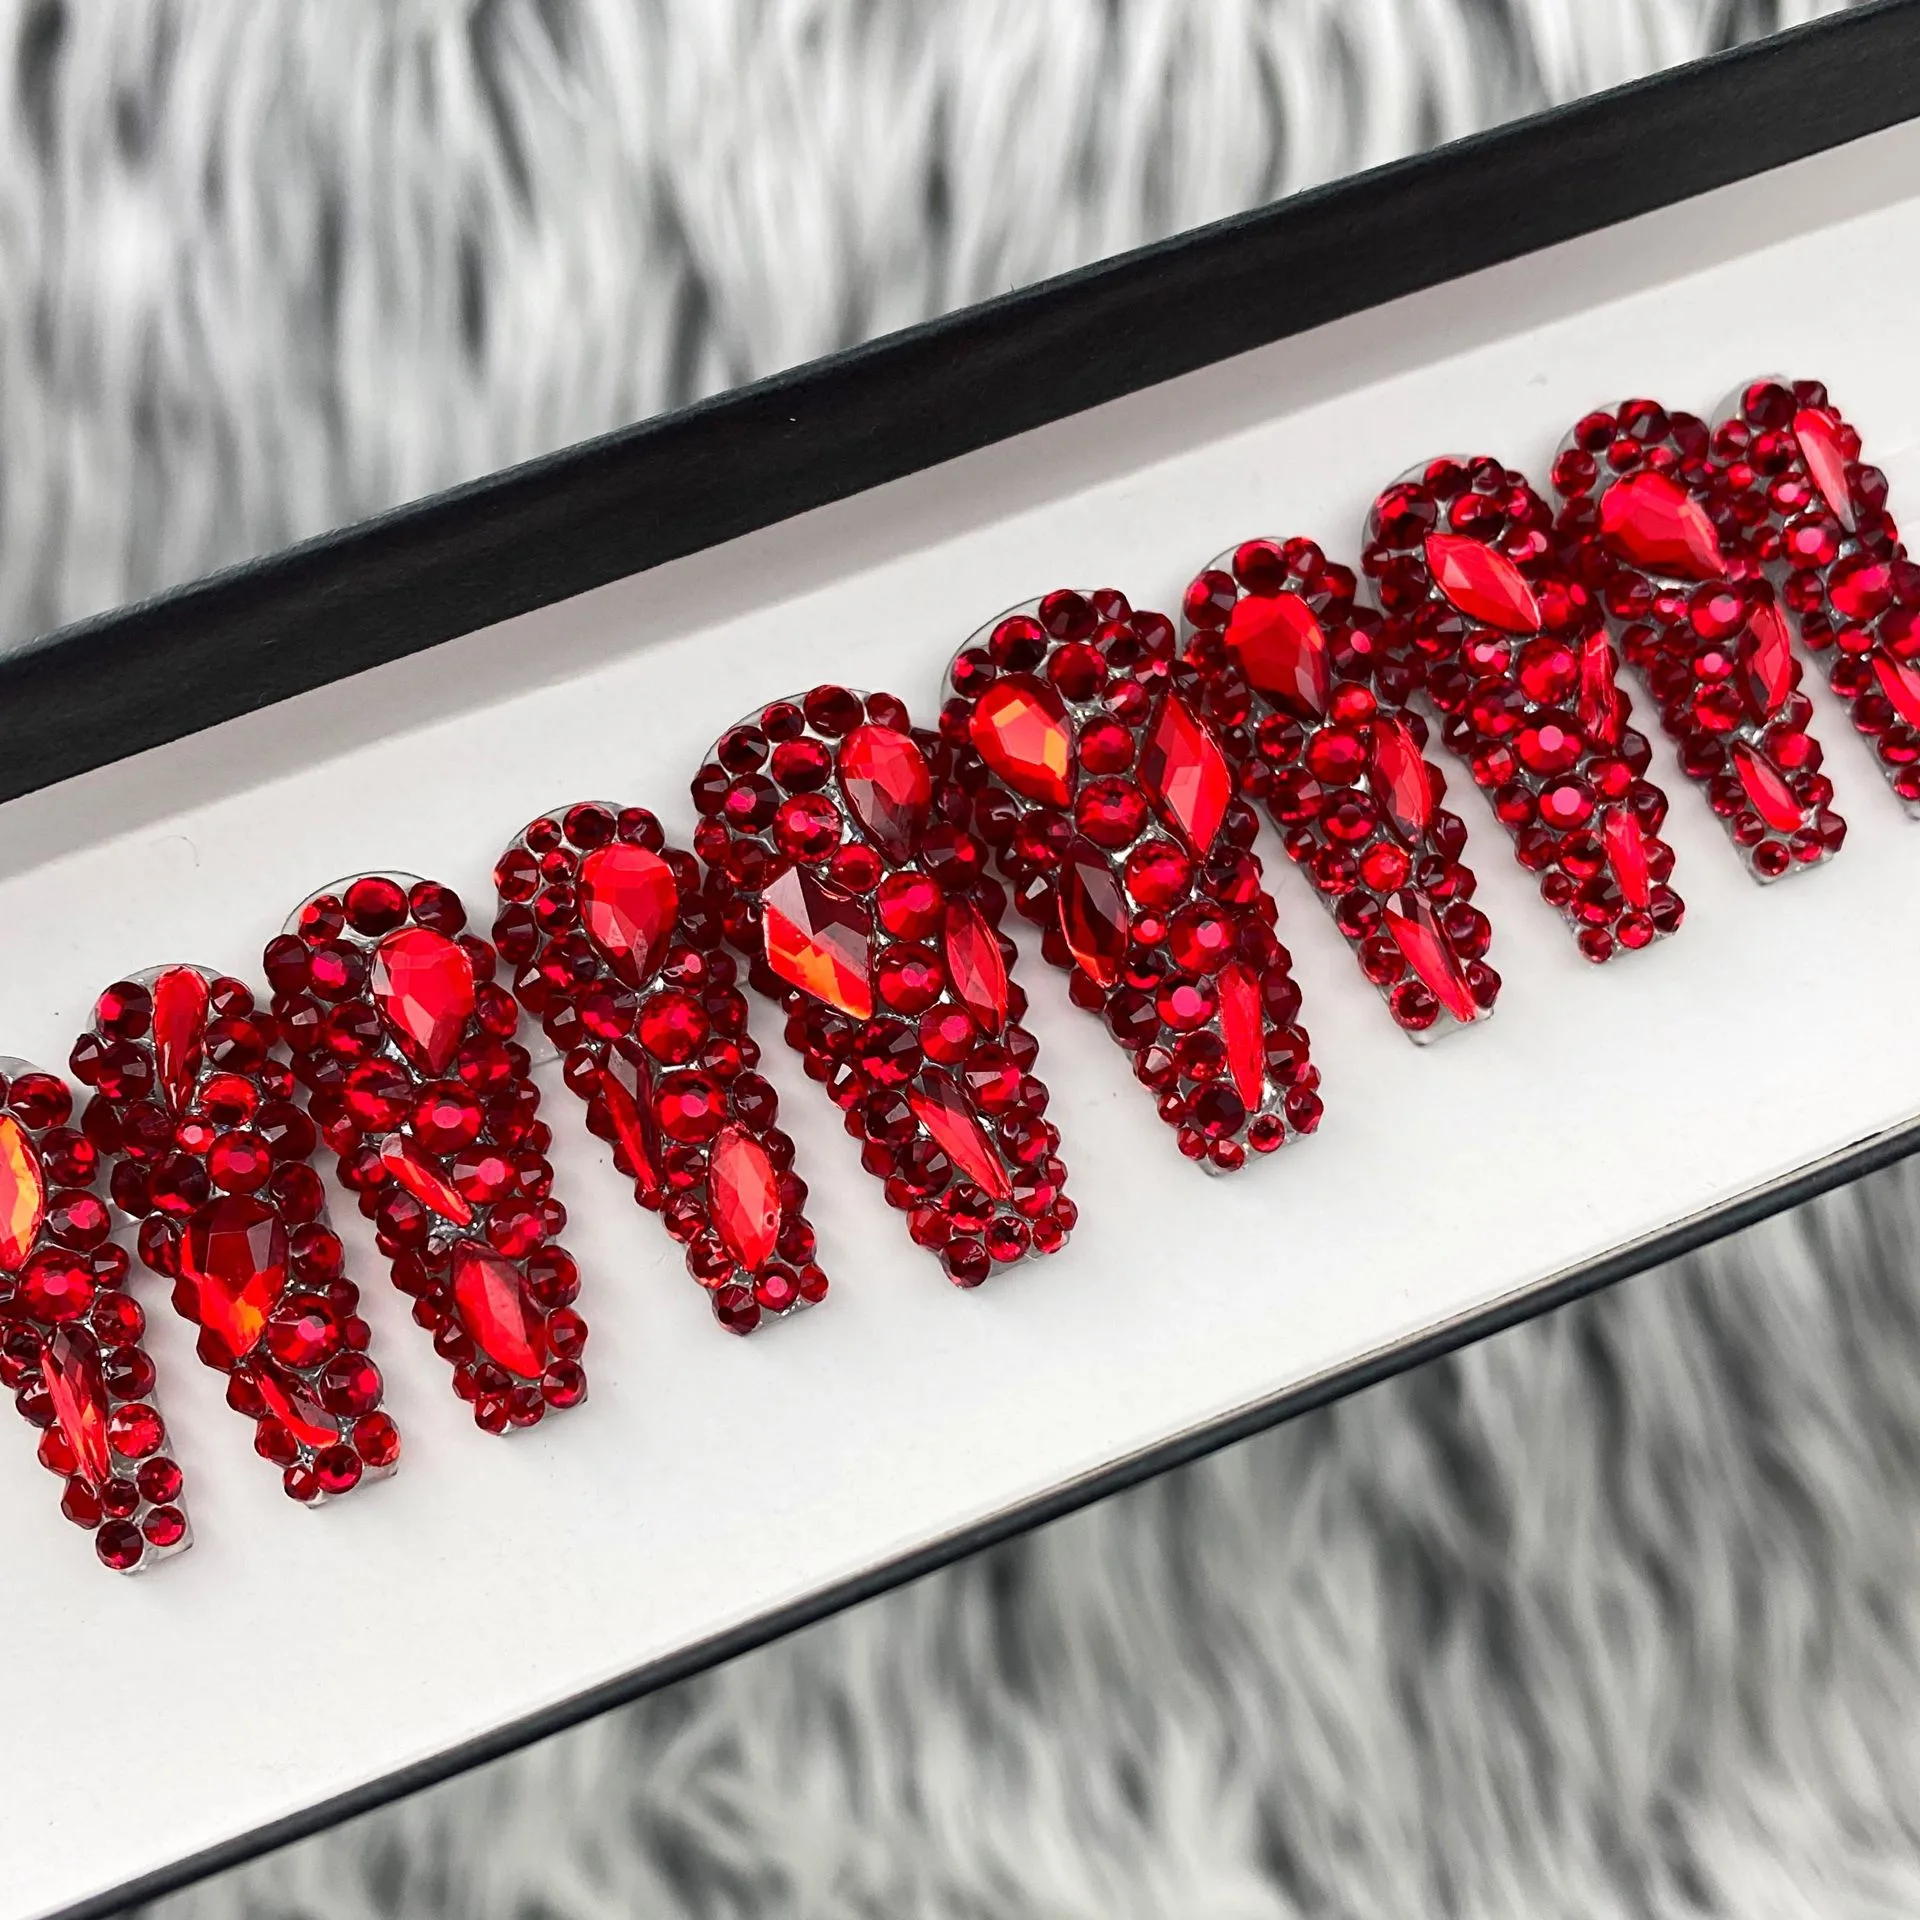
Handmade- Red Crystal Mixed Shape Bling Press On Nail Set