Quick Answer
To assemble your travel crib and play yard, start by laying out all parts, then unfold the frame, lock the side rails, and secure the mattress. Always double-check that all locks are engaged and the mattress fits snugly before use.
Whether you're heading to Grandma's house or jetting off on a family vacation, a travel crib and play yard gives your little one a familiar and safe place to sleep. But if you've ever wrestled with a half-open frame or wondered if the mattress is supposed to sit that way, you're not alone. This guide walks you through the setup process step by step, so you can get from car trunk to naptime in minutes.
We'll cover the essential steps for assembling a typical travel crib and play yard, highlight common pitfalls, and share practical tips to make the process smoother. Remember, every model is slightly different, so always keep the manufacturer's manual handy—but these general principles will help you tackle most designs.
Before You Start: Unpack and Inspect
Take everything out of the travel bag and lay it on a clean, flat surface. You should have the frame, mattress, and any locking mechanisms. Inspect each piece for damage—especially the frame joints and fabric—to ensure nothing is broken or missing before you begin.
Check the manual for any specific instructions or warnings. Some models have a particular order for unfolding or locking, and skipping a step can make the process more difficult or even unsafe. If you've lost the manual, most brands offer PDFs online.
- Lay out all parts and count them against the manual.
- Look for any visible wear or damage before assembly.
Unfold the Frame and Lock the Rails
Most travel cribs have a collapsible frame that unfolds like an accordion. Start by locating the release mechanism—usually a button or latch on the side. Press it and gently pull the rails apart until the frame is fully extended. You'll hear a click when each side locks into place.
This is the most common step to rush, and a partially locked rail can cause the crib to collapse later. Give each corner a firm tug to confirm it's secure. If the frame wobbles or doesn't sit flat, unlock and try again.
For play yards with a floor that folds, make sure the floor panel is pushed down and locked before you add the mattress.
- Always lock all four corners before moving on.
- A common mistake is forgetting to lock the floor panel.
Position the Mattress and Secure the Fabric
Once the frame is stable, place the mattress inside. It should fit snugly with no gaps around the edges. Some models have straps or Velcro to hold the mattress in place—secure those if present.
Check that the fabric walls are pulled taut and not bunched up. The mattress should sit flat on the floor panel, and the top of the mattress should be well below the top rail for safety.
If your travel crib comes with a separate sheet, now is the time to put it on. A fitted sheet designed for the crib mattress will stay in place better and keep the surface clean.
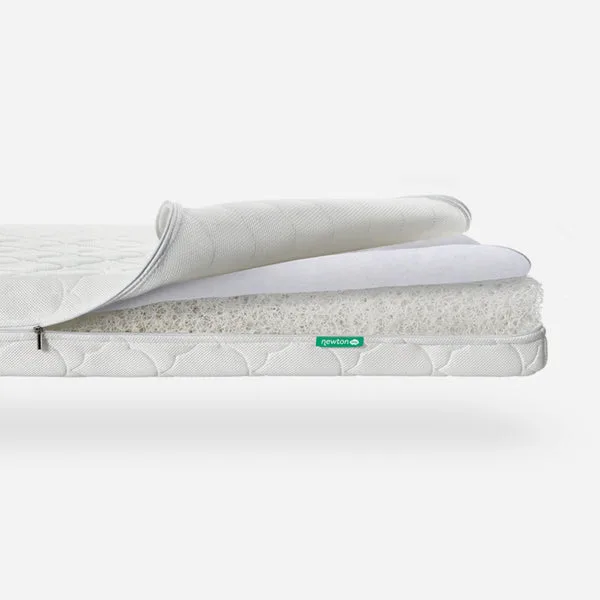
crib mattress
- A gap between mattress and frame is a safety hazard—adjust if needed.
- Use a fitted sheet to keep the mattress hygienic and comfortable.
Final Safety Check
Before placing your baby in the crib, do a final walk-around. Push on the sides and corners to ensure the frame doesn't fold or collapse. Check that all locks are engaged and that there are no loose parts or fabric that could pose a suffocation risk.
Verify the mattress is firm and fits tightly. The sleep surface should be flat and firm, with no soft bedding or pillows inside. This is the same safe sleep guidance you'd follow at home.
Finally, place the crib on a level surface away from cords, blinds, or furniture that could be used to climb out.
- If anything feels unstable, disassemble and start over.
- Never add extra padding or blankets underneath the mattress.
Step-by-Step Assembly Checklist
- Unpack and inspect: Lay out all parts and check for damage or missing pieces. Checkpoint: All parts are present and intact.
- Unfold the frame: Press the release mechanism and pull the rails until they click into place. Checkpoint: All corners lock with a click; no wobble.
- Secure the floor panel: Push the floor down and lock it if your model has a foldable floor. Common mistake: Forgetting to lock the floor can cause collapse.
- Place the mattress: Position the mattress so it lies flat and fits snugly against the frame. Checkpoint: No gaps between mattress and frame.
- Add a fitted sheet: Put on a sheet designed for the travel crib mattress to keep it clean and snug. Checkpoint: Sheet is smooth with no wrinkles or loose fabric.
- Perform a safety check: Push on the sides and corners to ensure stability and confirm all locks are engaged. Verdict: If everything is secure, the crib is ready for your baby.
Products That Make Travel Crib Setup Easier
- Compact Travel Crib & Play Yard: Ultra-breathable Wovenaire® mattress core promotes airflow for safer sleep. Breathable mesh sides for visibility and ventilation. Durable steel frame — lightest in its class at just 13 lbs. The lightweight frame makes unfolding and locking easier, and the breathable mattress core means you don't need an extra pad—just a fitted sheet.
- Deluxe Travel Crib & Play Yard Sheets: Ultra-breathable cotton muslin sheets are supremely soft and feature a snug fit. Designed specifically for our Deluxe Travel Crib & Play Yard floor mattress. A properly fitted sheet prevents bunching and keeps the sleep surface smooth, reducing the risk of loose fabric in the crib.
Assembling a travel crib and play yard doesn't have to be a struggle. By following these steps and checking each lock and fit, you'll create a safe and comfortable sleep space for your baby wherever you go. Remember to practice setting it up at home before your trip so you're confident when you're on the road.