Quick Answer
Attaching bindings on a longarm machine is efficient and gives a clean finish. Use a clear acrylic ruler like the Brilliant Bindings tool to guide your stitching and keep lines straight.
Why Use a Longarm for Binding?
Binding on a longarm saves time compared to hand finishing, especially on large quilts. The machine feeds the quilt evenly, reducing puckers and wavy edges.
However, longarm binding requires careful setup. If the binding is not aligned properly, you may get uneven seam allowances or skipped stitches.
Choosing the Right Tool
A dedicated binding tool helps maintain consistent seam width and straight lines. The Brilliant Bindings tool is made from 1/4-inch thick clear acrylic, so you can see your stitching line clearly.
It can also double as a ruler for stitching straight and diagonal lines at the longarm, making it a versatile addition to your quilting supplies.
Steps to Attach Bindings on a Longarm
- Prepare the Binding Strip: Cut your binding strips 2.5 inches wide and join them on the bias. Press the binding in half lengthwise with wrong sides together. Attach it to the front of the quilt using a 1/4-inch seam allowance. Check that the binding is not twisted before you start stitching.
- Set Up the Longarm: Load the quilt onto the longarm frame with the binding side up. Use a binding foot or a ruler foot. Position the needle 1/4 inch from the binding edge. Lower the presser foot and set a moderate stitch length (10-12 stitches per inch). Test on a scrap sandwich to confirm stitch tension and seam allowance.
- Stitch the Binding: Guide the quilt under the needle, keeping the binding edge aligned with your seam guide. Use the Brilliant Bindings ruler to press the binding flat and check for straight lines. Stitch slowly around corners, stopping 1/4 inch before the edge and pivoting. If the binding shifts, stop and reposition; do not tug the fabric.
- Finish the Back Side: Remove the quilt from the frame. Fold the binding over to the back and hand stitch it down with a blind stitch, or use the longarm to stitch-in-the-ditch from the front to catch the back binding. For a machine-finished back, use a matching thread color so stitches are less visible.
Tool Highlight
-
Brilliant Bindings on the Longarm: 1/4in thick clear acrylic, 3.5in x 8.5in, includes instructions for binding on the longarm. The clear material lets you see your needle placement, and the size is easy to handle while guiding the quilt sandwich.
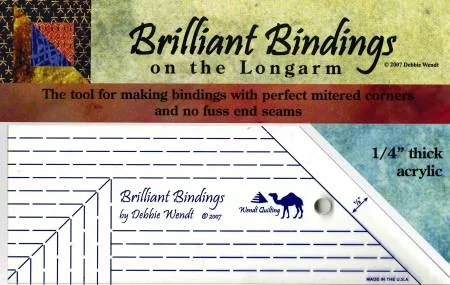
Brilliant Bindings on the Longarm