Quick answer
Fit the bent 7-hole flat bar by starting at the two holes closest to the bend and working outward, leaving every nut finger-tight until all screws are in place. Tighten only after the bar sits flush against the frame, because a bent bar pulls the frame slightly out of square and pre-tightening one end will twist the whole assembly.
A bent 7-hole flat bar is one of the few eitech parts that changes direction as well as length, which is exactly why it is useful for wheel arches, roof curves, and angled braces. It is also the part most likely to be fitted in the wrong order, because the bend means the holes no longer sit on one flat plane.
This guide walks through the attachment sequence for a bent flat bar, from checking hole alignment to the final tightening pass. The same order applies whether you are building from a printed plan or improvising a repair on an existing model.
Before you start: check the bend and the hole count
Lay the bent flat bar on a flat surface and look along its length. A 7-hole bar has seven mounting holes, and on a correctly formed part they should run in a smooth curve without any kink at the bend. If one hole looks oval or the bar rocks when you press it flat, set it aside and use another one, because a distorted bar will never sit flush against a straight frame.
Count the holes out loud from one end to the other. Knowing that hole 4 is the apex of the bend tells you immediately which hole should meet the corner of your frame. This sounds trivial, but most assembly errors with bent bars come from starting at hole 1 when the plan expects the bend to land at hole 4.
- Checkpoint: the bar should rest on the table touching at both ends and at the bend, with no visible gap underneath.
Match the bar to the frame corner first, not to the nearest hole
Hold the bar against the frame without screws and slide it until the bend lines up with the corner or curve it is meant to follow. On a right-angle corner, the apex hole usually sits directly over the corner hole of the frame. On a gentle roof curve, the bar should follow the same arc as the roof line, not cut across it.
Once the bend is in the right place, note which two holes sit over frame holes. Those are your anchor points. Everything else is adjusted around them.
- Common mistake: forcing the bar so that hole 1 meets the first frame hole, which pushes the bend off the corner and leaves the far end floating.
Insert the two anchor screws and leave them loose
Push a screw through the apex hole and its matching frame hole, add the nut, and turn it two or three threads only. Do the same at the hole next to the bend. These two screws hold the bar in position while you work outward, but they must stay loose enough that the bar can still rotate a few degrees.
If a screw will not pass through both holes, do not enlarge the hole or force it. Shift the bar by one hole and check again, or check whether the frame itself is out of alignment from an earlier step.
- Checkpoint: with both anchor screws loose, you should still be able to wiggle the bar slightly by hand.
Work outward one hole at a time
Move to the next hole along the bar, line it up with the frame, and add the screw and nut loosely. Continue in the same direction until you reach the end of the bar, then repeat on the other side of the bend. Working outward from the bend keeps the curve under control; working inward from the ends traps the bend and makes the middle holes impossible to align.
If a hole refuses to line up, loosen the previous screw a quarter turn and try again. The bar has very little give, so a single over-tightened screw can hold the whole curve out of position.
- Practical tip: on long runs, add a second bar or a plate between the bent bar and the frame to bridge any gap rather than bending the bar to fit.
Tighten in a cross pattern, then check the frame
Once every screw is in place, tighten them in a cross pattern: apex first, then the two holes either side, then the outer holes. This spreads the load evenly and stops the bend from pulling the frame out of square. Finish with a firm but not crushing turn, since eitech nuts are small and easy to overtighten.
After tightening, sight along the frame from one end. If the frame has developed a slight bow, loosen the outer screws half a turn, press the frame flat, and retighten. A bent bar should follow the frame, not reshape it.
- Checkpoint: the bar should sit flush against the frame at every hole, with no gap visible under a screw head.
When the bar will not fit at all
Sometimes the geometry simply does not work: the frame is metric, the mating part is not, or the curve is in the wrong plane. In that case, an adapter is the correct fix rather than a longer screw or a drilled hole. The Flat bar adapter 4-hole converts between centimetre and inch spacing, with two holes at 10 mm spacing and two at 12.7 mm spacing, so a metric eitech frame can meet a non-metric component without modification.
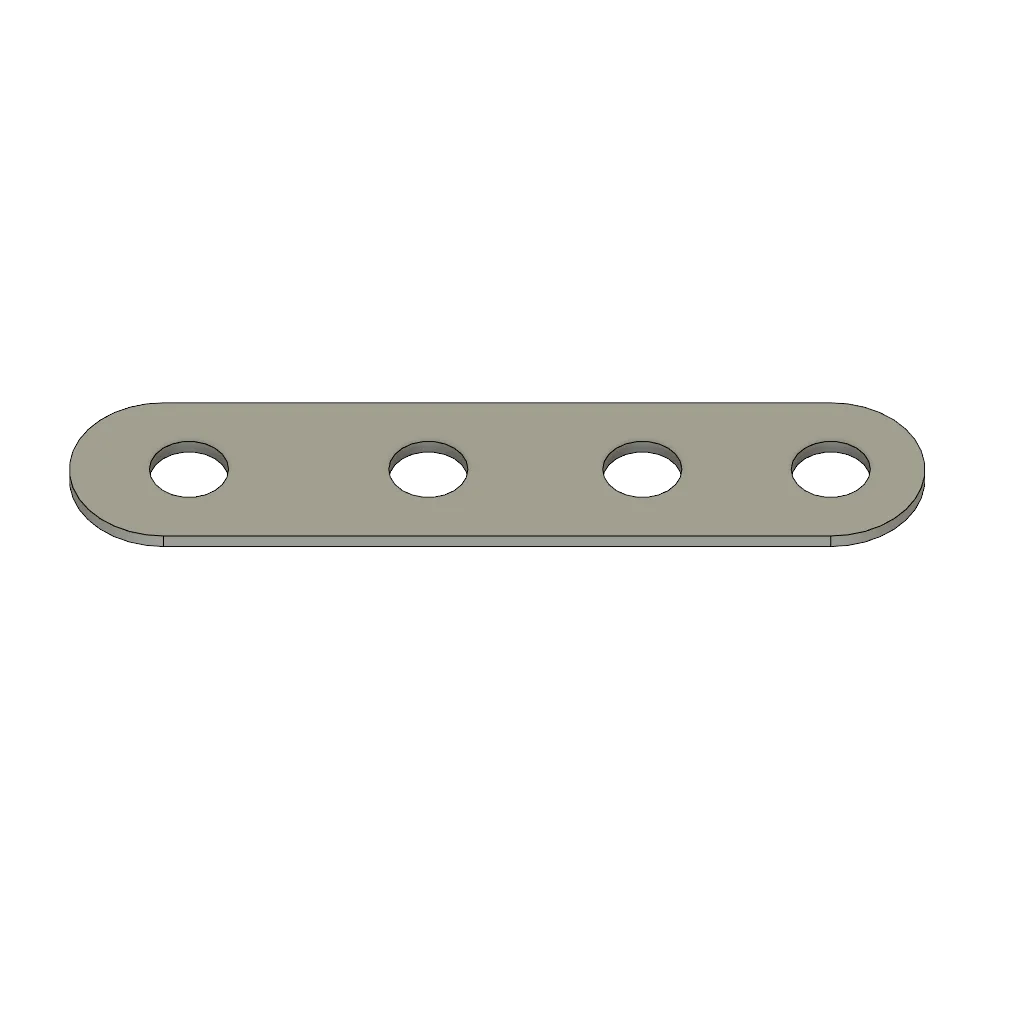
Flat bar adapter 4-hole
For curved runs where a 7-hole bar is the wrong radius, a dedicated curved part such as the Curved flat bar Ø 320 mm 30° gives you a predictable arc instead of an improvised bend. Both parts are small and inexpensive, and they save a lot of trial and error on mixed builds.
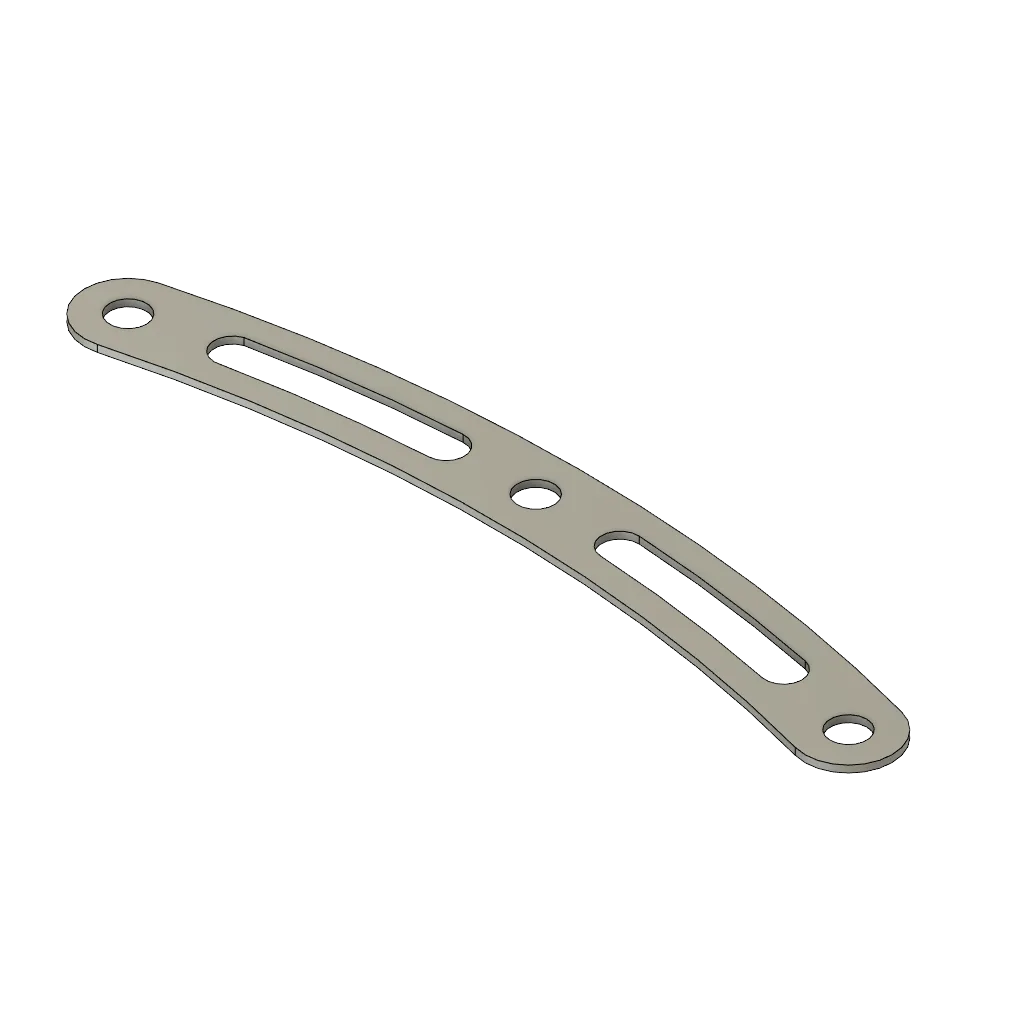
Curved flat bar Ø 320 mm 30°
- Practical tip: keep one adapter and one curved bar in your spares box if you regularly combine eitech with other construction sets.
Bent flat bar attachment: step by step
- Step 1: Inspect the bar: Lay the bent 7-hole flat bar on a flat surface and check that all seven holes are clear and the curve is smooth. Checkpoint: the bar should not rock or show a kink at the bend.
- Step 2: Position the bend: Hold the bar against the frame and slide it until the bend matches the corner or curve, noting which holes line up. Common mistake: starting at hole 1 instead of at the bend.
- Step 3: Fit two anchor screws: Add screws and nuts at the apex hole and the adjacent hole, turning each only two or three threads. Checkpoint: the bar should still wiggle slightly.
- Step 4: Work outward: Add the remaining screws one hole at a time, moving away from the bend in both directions. If a hole will not align, loosen the previous screw a quarter turn.
- Step 5: Tighten in a cross pattern: Tighten apex first, then either side, then the outer holes, finishing firmly but not forcefully. Checkpoint: no gap under any screw head.
- Step 6: Recheck the frame: Sight along the frame; if it has bowed, loosen the outer screws, press flat, and retighten. The bar should follow the frame, not reshape it.
Parts that help with bent-bar connections
- Flat bar adapter 4-hole: Adapter from cm to inches, with two holes at 10 mm spacing and two holes at 12.7 mm spacing, length 45.5 mm and width 10 mm. It lets a metric eitech frame connect to components from other manufacturers that do not use the metric system, so you do not have to drill or force holes when a bent bar meets a non-metric part.
- Curved flat bar Ø 320 mm 30°: A curved flat bar from the eitech Manufaktur range, product code 01841, Standard variant. When a 7-hole bar cannot follow the curve you need, this gives you a defined 30-degree arc instead of an improvised bend, which keeps the frame geometry predictable.
Attaching a bent 7-hole flat bar is mostly about sequence: find the bend, anchor it loosely, work outward, and tighten last. Get that order right and the bar will sit flush every time; get it wrong and you will spend the session chasing holes that never quite line up.