What You Need to Know Before You Start
The Agilite Pincer Placard is designed to mount directly to the front of a plate carrier using a hook-and-loop (Velcro) panel and quick-release buckles. Before you begin, confirm that your plate carrier has a compatible front flap with Velcro and, ideally, a set of male buckles that align with the Pincer Placard’s female buckles. If your carrier lacks these buckles, the placard can still attach securely via the Velcro panel alone, but the buckles provide extra retention.
The Pincer Placard ships without the 2nd Layer accessories. If you plan to add the Pincer Placard 2nd Layer Admin Pouch or the 2nd Layer MOLLE panel, you will attach those after the placard is on the carrier.
Step-by-Step Attachment
Follow these steps to attach the Pincer Placard to your plate carrier.
- 1. Prepare the Carrier: Ensure the front of your plate carrier is clean and free of debris. If your carrier has a removable front flap, you may want to attach the placard with the flap on the carrier.
- 2. Align the Placard: Hold the Pincer Placard so its Velcro hook side faces the carrier’s loop field. Center it vertically and horizontally on the front panel. The buckles (if present) should line up with the carrier’s male buckles.
- 3. Press and Secure: Press the placard firmly onto the Velcro panel. If your carrier has buckles, snap the female buckles on the placard onto the male buckles. The placard is now attached.
- 4. Check Retention: Tug gently on the placard to ensure it is fully seated. The Velcro should hold securely; the buckles add extra security for dynamic movement.
Adding the 2nd Layer Admin Pouch
-
Pincer™ Placard 2nd Layer Admin Pouch: Attaches quickly and easily to the front of the Agilite Patented Pincer Placard and gives it a whole new tier of organization, storage and capability in one compact package. The Admin Pouch adds low-profile storage for maps, pens, shears, and small tools without increasing bulk significantly. It mounts directly onto the placard’s front Velcro and MOLLE slots.
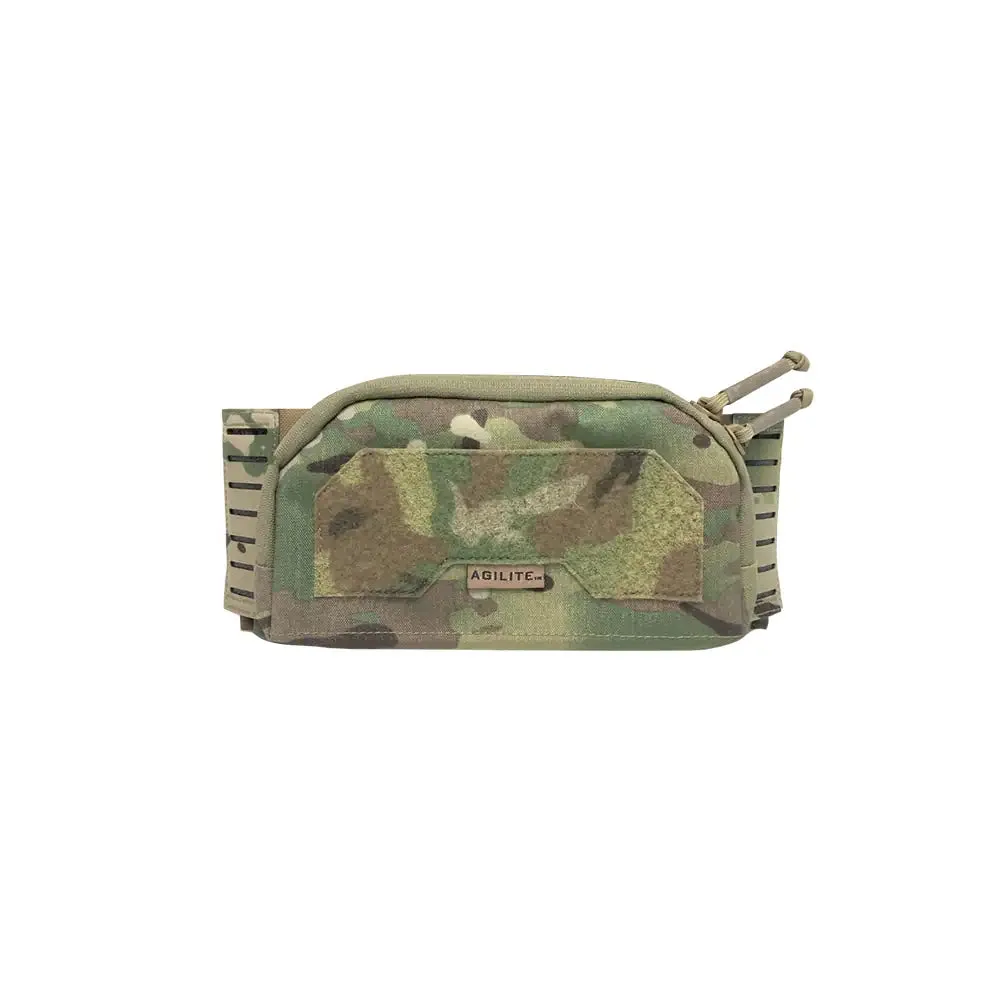
Pincer™ Placard 2nd Layer Admin Pouch
-
Pincer™ Placard 2nd Layer Admin Pouch: This will NOT fit any other Placard system besides the Agilite Pincer Placard. The Admin Pouch is purpose-built for the Pincer Placard. If you are using a different placard system, this pouch will not attach correctly.
How to Attach the 2nd Layer Admin Pouch
Once the Pincer Placard is on your carrier, adding the Admin Pouch takes only a few seconds.
- 1. Align the Pouch: Hold the Admin Pouch so its Velcro loop back faces the front of the Pincer Placard. The pouch’s female buckles should align with the male buckles on the placard’s front.
- 2. Press and Buckle: Press the pouch onto the placard’s Velcro field. Snap the buckles together. The pouch is now secured.
- 3. Use the Internal Organization: The Admin Pouch includes internal elastic loops for chemlights, trauma shears, markers, or pens, and a loop panel for attaching Velcro-backed inserts. Load these items after attachment.
Compatibility and Limitations
The Pincer Placard is designed exclusively for the Agilite Pincer system. The 2nd Layer Admin Pouch and 2nd Layer MOLLE panel will only attach to the Pincer Placard, not to other brands or generic placards. If you are using a different plate carrier placard, these accessories will not fit.
The Admin Pouch measures 18.5 x 5.1 x 1.1 inches (47 x 13 x 3 cm) and weighs 0.3 lbs (132 g). It adds minimal weight while providing substantial organization. Available in six colors: Multicam, Ranger Green, Black, Coyote Brown, Multicam Black, and M81 Woodland.