Quick answer
To build a personalised stack with Classic Stacks, start by choosing a finger and deciding how many rings you want. Then select your metal and personalisation for each ring, and order them together so the widths and finishes work as a set.
Why Classic Stacks work for personalised layering
At approximately 2mm wide, Classic Stacks are deliberately slim. That narrow profile is what makes them useful for layering: you can wear several on one finger without the stack feeling bulky or crowding your knuckles. It also means each ring can carry a short personal message without the text wrapping too far around the band.
The trade-off is that slim bands have less room for long phrases. If you want a full sentence or a complex design, a wider ring or a different style will serve you better. For names, dates, initials, or a few words, the 2mm width keeps the stack comfortable and readable.
Plan the stack before you personalise
Personalisation is permanent, so decide the overall look first. Think about whether you want all rings in the same metal or a mix, and whether the messages should relate to each other or stand alone. A common mistake is ordering each ring separately without checking how they will sit together.
Also consider which finger will carry the stack. Your dominant hand and your ring finger have different proportions, and a stack that feels right on one may feel tight or loose on another. If you are between sizes, size up rather than down for stacking, because multiple bands take up more room than a single ring.
Steps to build your Classic Stacks ring stack
- Choose your finger and measure: Decide which finger will wear the stack and measure it at the end of the day when your fingers are at their largest. Order the size that matches that measurement, and if you are between sizes, choose the larger one. Avoid measuring in the morning or in cold weather, as fingers can be smaller then and lead to a tight stack.
- Decide how many rings you want: Plan for two to five rings per finger. Fewer rings give a subtle look; more rings create a bolder statement. Keep in mind that each additional ring adds roughly 2mm to the total width on your finger. A common mistake is ordering too many rings at once. Start with two or three and add more later if you want a fuller stack.
- Select your metal: Choose silver or gold for each ring. You can keep the stack uniform or mix metals for contrast. If you mix, decide whether the rings will alternate or sit in groups. Check that the metal you choose matches other jewellery you wear daily, so the stack fits your existing look.
- Personalise each ring: Enter the text for each band. Short words, names, dates, or initials work best on a 2mm band. Keep punctuation simple and double-check spelling before you order. Remember that the personalisation is permanent. Read each entry aloud and confirm it matches what you intend.
- Order all rings together: Place all the rings for one stack in the same order so they are made as a set. This helps ensure the finishes and widths are consistent across the stack. If you add rings later, expect slight variations in finish; ordering together gives the most uniform result.
- Try on and adjust: When your rings arrive, try them on at different times of day. If the stack feels too tight, remove one ring or move it to another finger. If it feels loose, add a thinner ring or wear the stack on a larger finger. Do not force a tight stack over your knuckle; discomfort is a sign to resize or redistribute the rings.
Product facts
-
Classic Stacks (personalised): Classic Stacks are approximately 2mm wide and can be personalised with just about anything you like. The slim width keeps layered rings comfortable, while the open personalisation lets you choose meaningful text for each band.
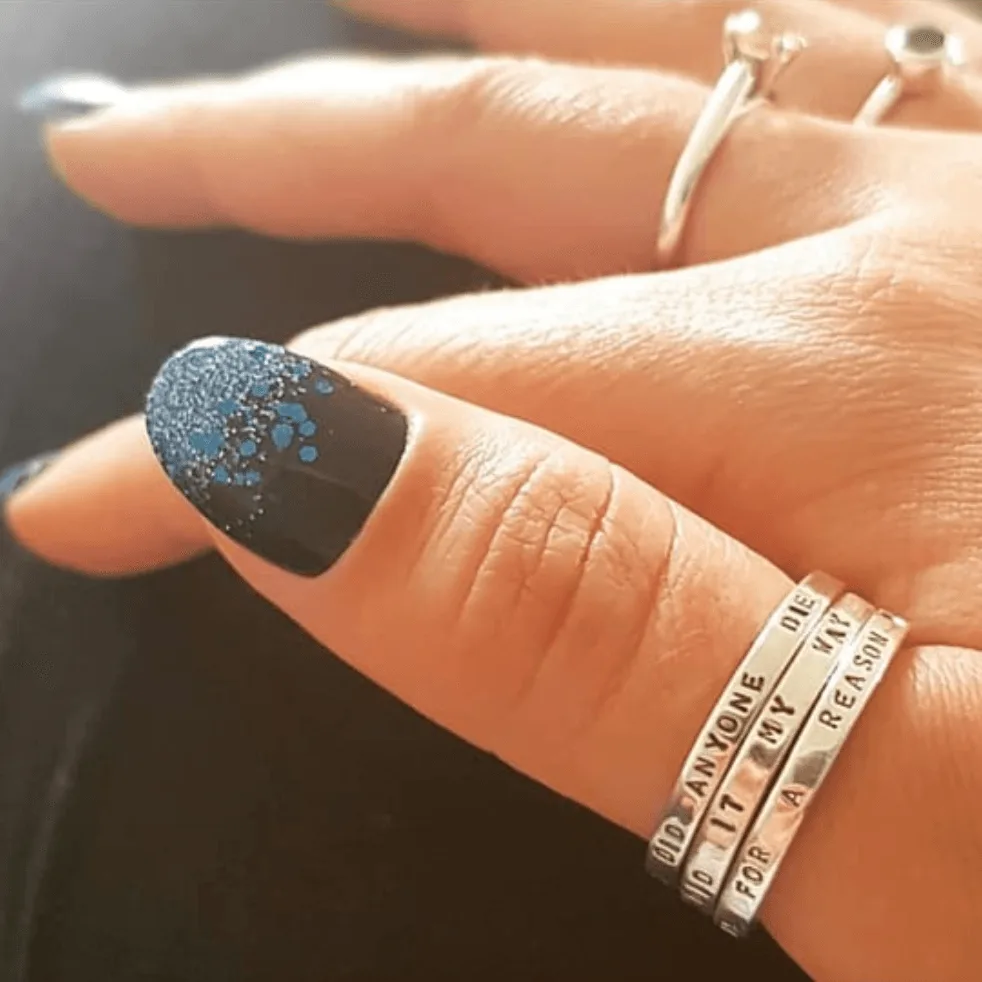
Classic Stacks (personalised)