Quick answer
Sort your stickers by size and motif before peeling anything, then assign each one to a surface where it will actually be seen: gift tags, journal pages, a laptop lid, or a water bottle. Plan the layout on paper first so you never waste a sticker on a spot you'll regret.
Why the pastel retro theme changes where stickers work
The Retro Holiday Christmas Sticker Pack uses a pastel retro holiday theme, which means the colors are softer than traditional red-and-green Christmas decor. That softness is an advantage on light-colored surfaces like white gift tags, cream journal pages, and pale laptop lids, but it can get lost against dark backgrounds or busy patterns. Before you commit a sticker to a dark water bottle or a patterned notebook cover, hold it next to the surface in the same light you'll see it in. If the sticker disappears, save it for a lighter spot.
When to skip the sticker and use a different decoration
Stickers are not the right tool for every holiday project. If you're decorating a surface that gets heavy handling, frequent washing, or direct heat, a sticker may peel or fade faster than you'd like. The pack is water-resistant and UV laminated, which helps on water bottles and laptops, but the care instructions specifically say not to do something — check the product care note before applying to anything you plan to scrub. For surfaces that need to survive repeated washing, consider a tag, card, or journal page instead.
Step-by-step: decorate with your retro Christmas sticker pack
- Lay out all 20 stickers and sort by motif: Empty the pack onto a clean sheet of paper and group stickers by theme: Christmas trees, holiday coffee cups, and other retro holiday designs. This helps you see what you have before you start peeling. Common mistake: peeling a sticker before you know which project it belongs to. Once peeled, it loses its backing and is harder to store.
- Choose your surfaces and check the fit: Decide which items will get stickers: gift tags, a journal cover, a laptop lid, a water bottle, or a card. Hold a sticker against each surface to check size and contrast. Remember all stickers are 3 inches, so they suit medium-to-large flat areas better than tiny tags. Checkpoint: if a sticker covers more than half of a gift tag, use it on a larger surface instead.
- Plan the layout on paper first: Arrange stickers on a plain sheet of paper in the same shape as your target surface. Move them around until the spacing looks balanced. For gift tags, place one sticker per tag and leave room for a name. For journals, cluster two or three stickers in a corner rather than spreading them evenly. Common mistake: sticking the first sticker in the center, then running out of room for the rest. Start from one edge and work inward.
- Apply stickers to gift tags and cards: Peel and press each sticker firmly onto the tag or card, smoothing from the center outward to avoid bubbles. Use the retro holiday designs as the main decoration and write the recipient's name beside them. For a set of tags, repeat the same motif across all tags for a cohesive look. Checkpoint: write names before sticking if you're unsure of spacing; pencil wipes off, sticker residue does not.
- Decorate a journal page or planner spread: For christmas sticker journaling, use stickers as page headers or to mark a gift-list section. Place one large sticker at the top of the page, then add smaller stickers along the margin. Avoid covering writing space you'll need later. Common mistake: sticking over a spot where you plan to write. Leave at least a half-inch border around any sticker.
- Apply stickers to a laptop or water bottle: Clean and dry the surface completely before applying. Press the sticker down firmly, starting from one edge to push out air. Keep stickers away from buttons, ports, and the bottle lid. Follow the product care instructions for washing and handling. Checkpoint: water-resistant and UV laminated stickers still need a dry, clean surface for best adhesion.
- Store leftover stickers flat and dry: Return unused stickers to their backing sheet or a flat envelope. Keep them away from heat and moisture so the adhesive stays intact for next year. Label the envelope with the year if you plan to reuse them. Common mistake: leaving stickers loose in a drawer where they can curl or stick to each other.
Product facts
-
Retro Holiday Christmas Sticker Pack: The pack includes 20 retro Christmas stickers with no duplicates, all 3 inches and water-resistant with UV lamination. Twenty unique 3-inch stickers give you enough variety for multiple projects, and the water-resistant lamination makes them suitable for water bottles and laptops as long as you follow the care instructions.
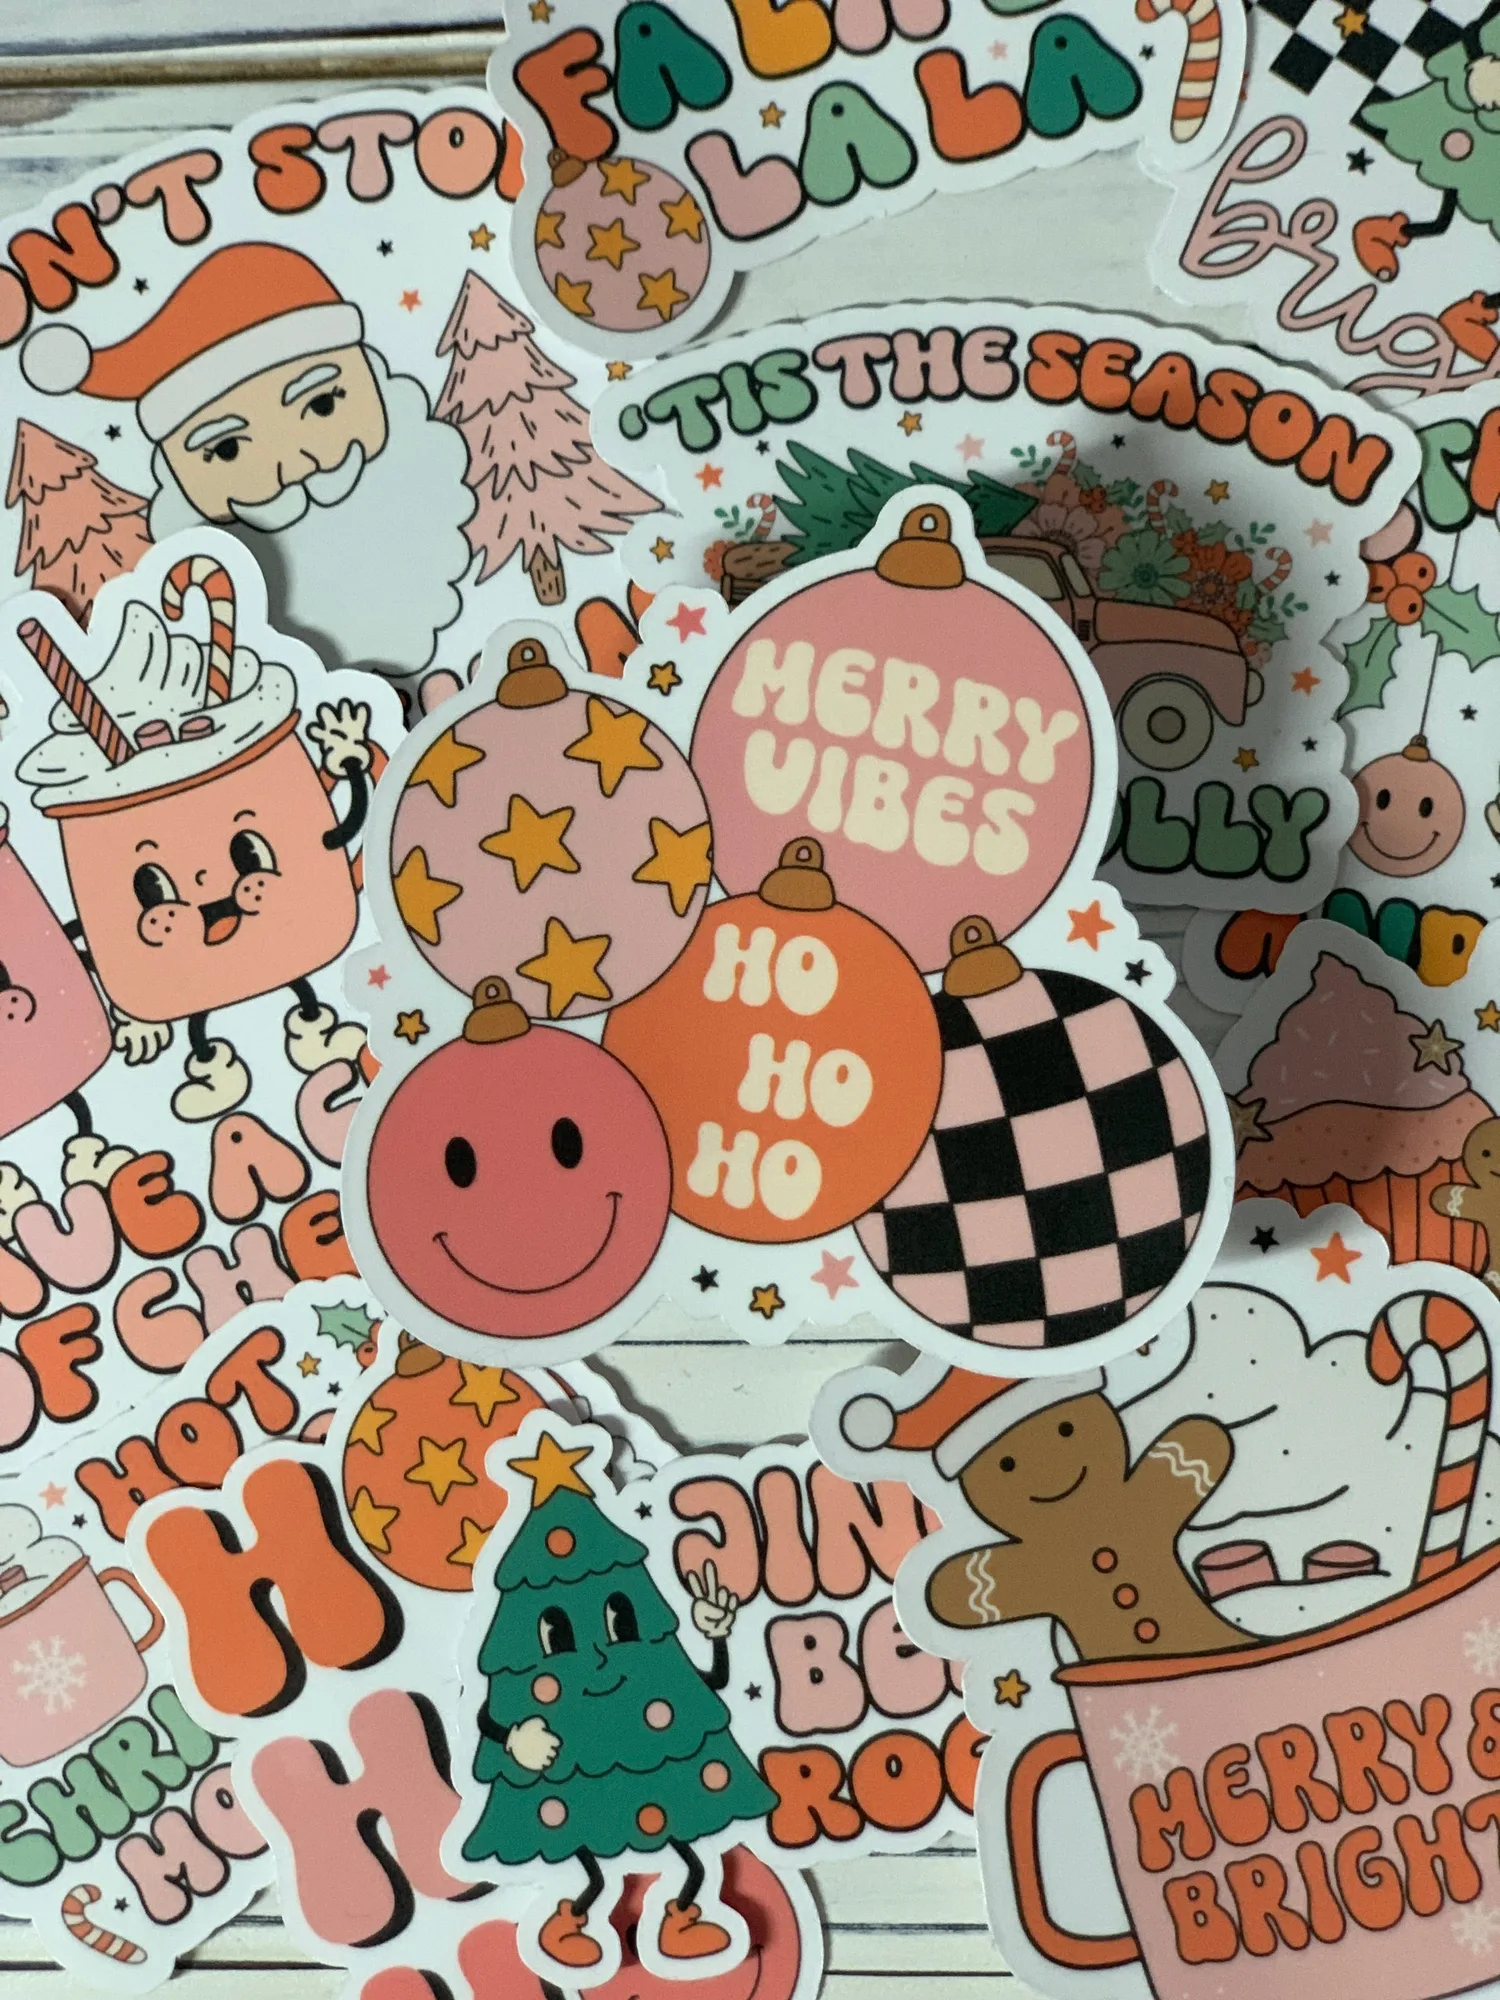
Retro Holiday Christmas Sticker Pack