A well-designed landscape lighting plan does more than illuminate a path; it guides guests safely, highlights your home’s best features, and extends the hours you can enjoy your outdoor spaces. Path lights are the backbone of any outdoor lighting scheme, but knowing where and how to place them is key to achieving a balanced, inviting look.
In this guide, we’ll walk you through the essential steps of designing a landscape lighting plan with path lights. From measuring your walkway to choosing the right fixtures and layering with other lighting, you’ll learn how to create a cohesive design that’s both functional and beautiful.
Assess Your Walkway and Define Goals
Before you buy a single fixture, take a walk around your property at night (with a flashlight!) to identify dark spots, potential tripping hazards, and areas you’d like to highlight. Consider the main paths: the front walkway, driveway, or garden trails. What is the primary purpose? Safety, aesthetics, or both? Defining your goals will guide every decision, from fixture type to brightness.
Measure the length of your walkway and note any curves, steps, or changes in elevation. These features will affect how many lights you need and where they should go. For example, steps require extra attention to prevent accidents, while curves benefit from staggered lighting to define the edge.
- Walk the path at night to identify dark zones.
- Measure the total length and note any steps or turns.
- Decide on primary goals: safety, aesthetics, or both.
Choose the Right Path Lights
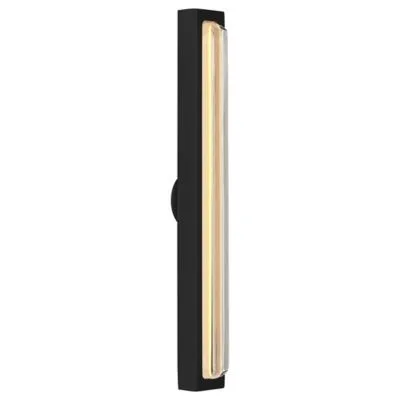
Path lights come in a variety of styles, from classic bollards to modern, low-profile fixtures. When selecting, consider the height, light output, and finish. For a contemporary look, the Moon Ray Outdoor LED Wall Sconce offers a sleek, architectural silhouette that can also be used to illuminate a gate or wall near the path. For a more traditional approach, a classic mushroom-style path light is a timeless choice.
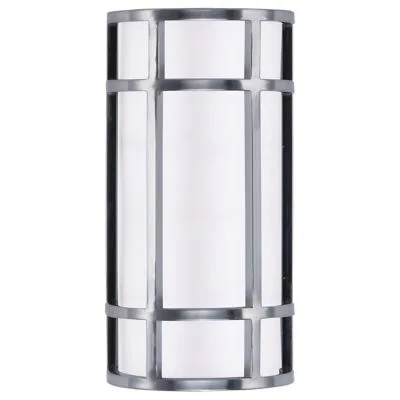
Moon Ray Outdoor LED Wall Sconce
If you have a long driveway or want to create a statement, consider the Lodi LED Pendant, which can be mounted on posts to provide overhead illumination along a path. However, for most walkways, low-level path lights (12-24 inches high) are ideal because they cast light downward, reducing glare and creating a soft, inviting glow.
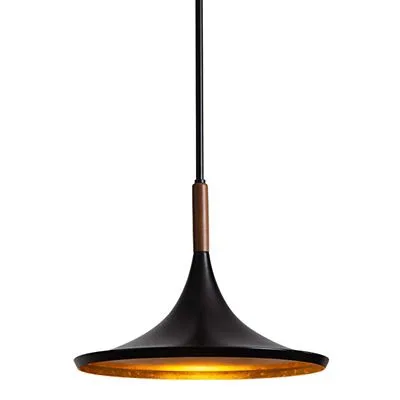
Lodi LED Pendant
- Choose fixtures that complement your home’s architecture.
- Opt for low-level lights (12-24 inches) to reduce glare.
- Consider energy-efficient LED options for long-term savings.
Determine Spacing and Placement
The golden rule for path light spacing is 6 to 8 feet apart, but this varies based on the fixture’s light spread and the path’s width. For a narrow path, 4-6 feet may be sufficient, while wider paths might need lights on both sides, staggered. The goal is to create a continuous line of light without dark gaps or overly bright spots.
When placing lights, think about the visual rhythm. Staggering lights on opposite sides of the path creates a more organic, less institutional feel. For straight walkways, alternating sides every 6-8 feet works well. For curves, place lights on the outside edge to guide the eye and define the boundary. Avoid placing lights too close to the path’s edge where they might be kicked or damaged.
- Space lights 6-8 feet apart for even illumination.
- Stagger lights on curves to define the path edge.
- Keep fixtures at least 1-2 feet away from the path edge.
Layer with Other Lighting for Depth
A landscape lighting plan isn’t just about path lights. To create a rich, layered effect, combine path lights with accent lighting, uplighting, and downlighting. For example, use a Moon Ray Outdoor LED Wall Sconce near the entrance to highlight architectural details, or place a Lodi LED Pendant above a seating area to create a focal point.
Consider adding accent lights to highlight trees, shrubs, or garden features. Uplighting a tree can add drama, while downlighting from a pergola can mimic moonlight. By layering different types of lighting, you’ll add depth and dimension to your landscape, making it feel more inviting and professionally designed.
- Use accent lights to highlight trees or garden features.
- Combine path lights with wall sconces for entrance areas.
- Experiment with uplighting and downlighting for drama.
Integrate Smart Controls for Convenience
Today’s path lights can be integrated into smart home systems, allowing you to control them from your phone or set schedules. The Adorne Smart Switch with Netatmo is a perfect addition to your landscape lighting plan, enabling you to control your path lights, sconces, and other outdoor fixtures from one app. You can set timers for dusk-to-dawn operation or sync with motion sensors for added security.
Smart controls not only enhance convenience but also help with energy efficiency. You can dim lights when full brightness isn’t needed, or turn off zones that are not in use. This flexibility ensures your landscape lighting is both beautiful and sustainable.
- Use smart switches to automate schedules and scenes.
- Integrate motion sensors for security and energy savings.
- Control multiple zones from your smartphone.
Designing a landscape lighting plan with path lights is a rewarding project that enhances both the safety and beauty of your home. By assessing your space, choosing the right fixtures, spacing them properly, and layering with other lighting, you can create an inviting outdoor environment. Don’t forget to incorporate smart controls for convenience and efficiency. Ready to start? Explore our collection, including the Moon Ray Outdoor LED Wall Sconce and the Adorne Smart Switch with Netatmo, to bring your landscape lighting vision to life.