Quick answer
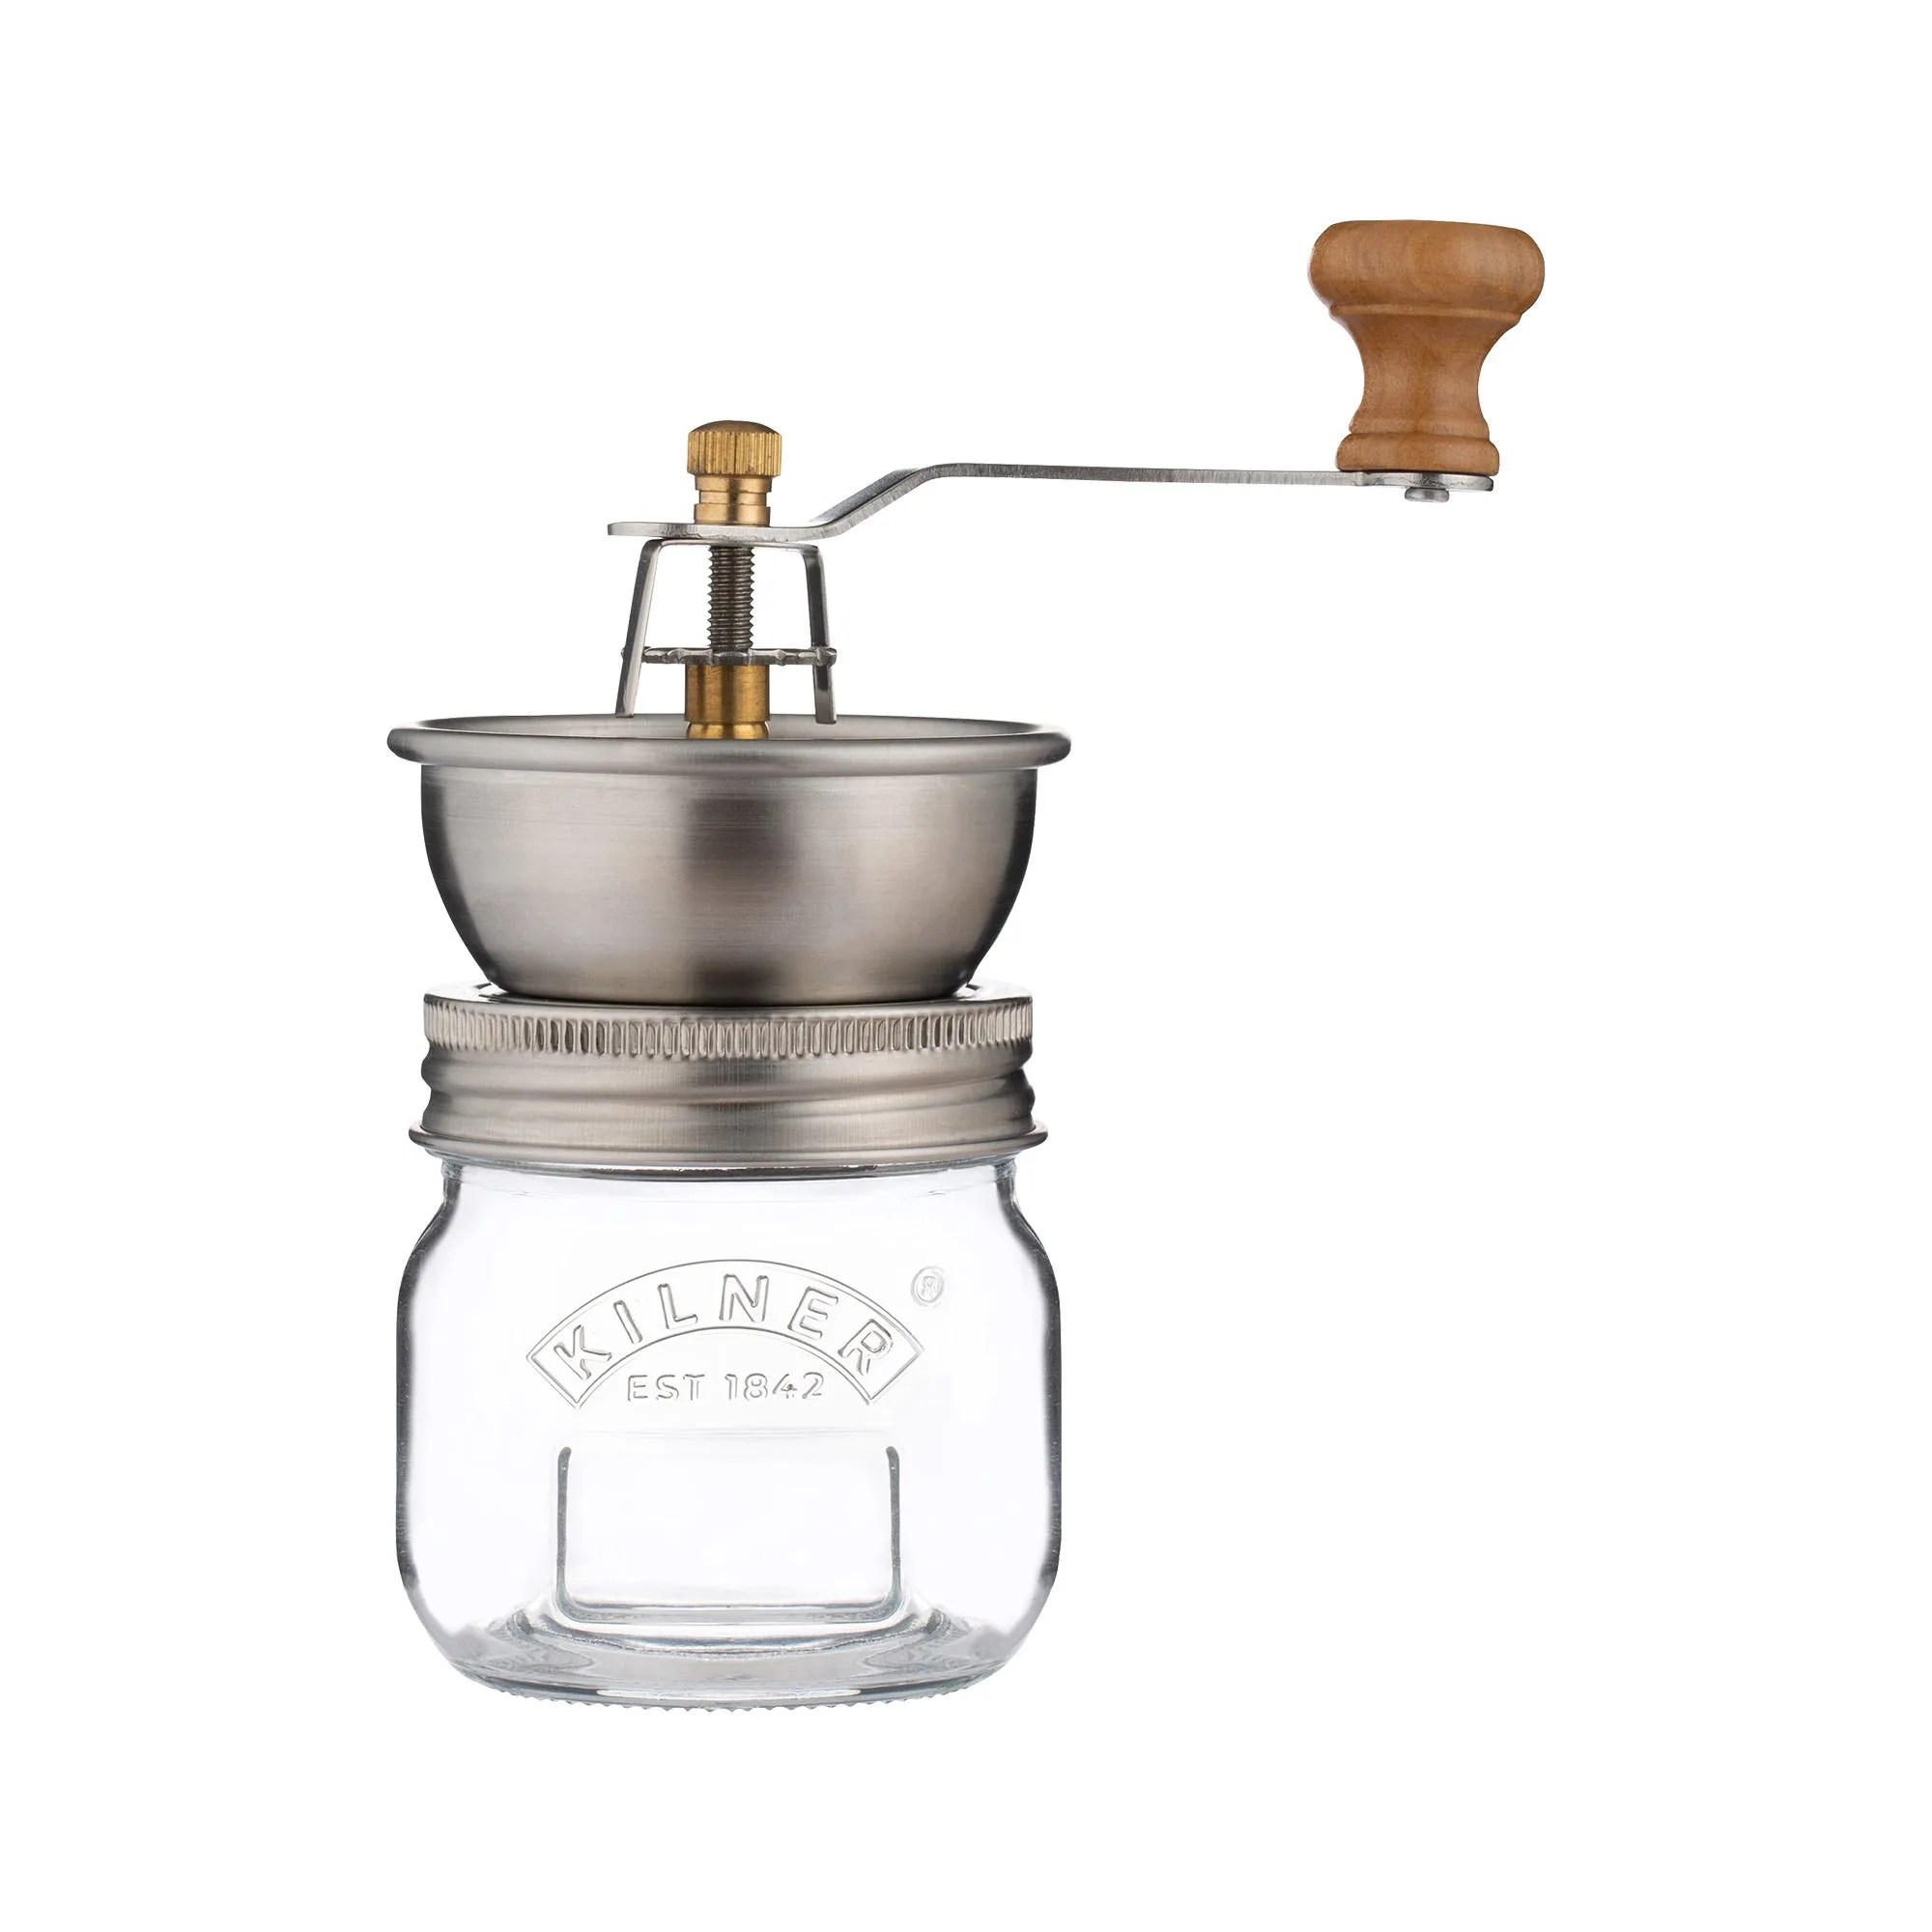
To grind coffee beans with a Kilner Coffee Grinder, fill the jar no more than halfway with whole beans, attach the grinder lid, and turn the handle clockwise. The built-in ceramic burrs produce a consistent grind suitable for drip coffee or French press. Store unused grounds in the included airtight jar.
What You Need Before You Start
You only need whole coffee beans and the Kilner Coffee Grinder itself. The grinder comes with a glass jar and an airtight lid, so you do not need a separate storage container. Choose beans roasted within the last two weeks for the best flavor. Avoid oily or flavored beans, as they can clog the ceramic burrs over time.
The grinder is manual, so no electricity or batteries are required. This makes it ideal for camping, office desks, or quiet mornings. The only tradeoff is that grinding takes a bit more effort than an electric model, but you get full control over the grind size by adjusting how fast you turn the handle.
How to Adjust Grind Size (Even Though There Are No Settings)
The Kilner Coffee Grinder does not have numbered grind settings. Instead, you control coarseness by how many times you grind the beans. For a coarse grind (French press), grind once and stop when most pieces are about the size of sea salt. For a medium grind (drip coffee), grind a second pass. For a fine grind (espresso), you will need to grind a third or fourth pass. This is a limitation compared to grinders with click stops, but it gives you flexibility once you learn your preferred texture.
Step-by-Step Guide to Grinding Coffee Beans
- Fill the jar with beans: Add whole coffee beans to the Kilner jar. Fill no more than halfway to leave room for the grinding mechanism and to prevent beans from spilling out when you attach the lid. Checkpoint: Overfilling can jam the burrs or cause grounds to escape. Stick to half full or less.
- Attach the grinder lid: Screw the grinder lid onto the jar firmly. Ensure it is hand-tight so the mechanism engages properly. The lid includes the ceramic burr assembly and the handle. Checkpoint: A loose lid will not grind evenly. Give it a final quarter turn to confirm it is snug.
- Turn the handle clockwise: Hold the jar steady with one hand and turn the handle clockwise with the other. Use a steady, moderate pace. Turning too fast can produce uneven grounds; too slow may not break the beans efficiently. Checkpoint: If the handle becomes hard to turn, you may have added too many beans or a bean is stuck. Reverse the handle slightly and try again.
- Check the grind consistency: After one full rotation of the handle, open the jar and inspect the grounds. For most brewing methods, you will need to grind a second or third pass. Pour the grounds back into the jar and repeat the process until you reach your desired coarseness. Checkpoint: Do not expect a perfect grind on the first pass. Multiple passes give you more control than a single coarse grind.
- Store or use immediately: Once ground, you can brew your coffee right away or seal the jar with the airtight lid. The included lid keeps air and moisture out, preserving freshness for up to a week. For longer storage, keep the jar in a cool, dark cabinet. Next step: Use your fresh grounds within a few days for the best flavor. Grind only what you need for each brew if possible.
About the Kilner Coffee Grinder
- Kilner® Coffee Grinder: The Kilner® Coffee Grinder is designed to help you make a great cup of coffee, and it comes complete with a Kilner® jar and airtight lid. You can grind directly into the jar and then seal it for storage, keeping your grounds fresh without transferring to another container.