Quick answer
To hang wallpaper without bubbles, prepare the wall properly, use a smoothing tool to press from center to edges, and work slowly to release trapped air before the adhesive sets.
Why bubbles happen and how to prevent them
Air bubbles usually form when adhesive dries unevenly or when the paper is not smoothed correctly during installation. The key is to work methodically and use the right tools, such as a broad smoothing brush or plastic smoother, to push air out before the paste sets.
Another common cause is a dusty or uneven wall surface. Even small bumps or debris can create pockets. Always clean and prime the wall before starting, and consider using a lining paper if the wall is very textured.
Choosing the right wallpaper for your project
Some wallpaper types are more forgiving for beginners. Non-woven or paste-the-wall papers allow you to slide and reposition strips slightly, reducing bubble risk. For a premium look, the Prima Ballerina Crane wallpaper from Bespoke Letterpress features a delicate, hand-drawn design that requires careful handling but rewards with a serene, artistic finish.
If you are new to wallpapering, start with a simpler pattern or a solid color to practice smoothing techniques before tackling intricate designs.
Step-by-step guide to hang wallpaper without bubbles
- Prepare the wall surface: Clean the wall of dust and grease, fill any holes, and apply a wallpaper primer. A smooth, primed surface helps the adhesive bond evenly and reduces bubble formation. Check for any remaining debris with a damp cloth before applying paste.
- Measure and cut the wallpaper strips: Measure the wall height and add 10 cm (4 inches) to each strip for trimming. Cut multiple strips, matching the pattern if needed, and label the order. Use a sharp utility knife and a straightedge to avoid frayed edges.
- Apply adhesive correctly: For paste-the-paper types, apply paste evenly to the back of the strip using a roller or brush, then fold the strip (paste to paste) and let it rest for the time specified by the manufacturer. This activates the adhesive and prevents curling. Over-pasting can cause bubbles; remove excess paste with a damp sponge.
- Hang the first strip: Align the top edge with the ceiling or a marked plumb line, leaving a small overlap at the top. Gently press the paper onto the wall using a smoothing tool, working from the center outward to push air to the edges. Do not stretch the paper; it may shrink as it dries and cause seams to open.
- Smooth out bubbles as you go: Use a plastic wallpaper smoother or a soft brush to work out any air pockets immediately. Start at the center of the bubble and push toward the nearest edge. For stubborn bubbles, lift the paper slightly and re-smooth. If a bubble remains after the paste has dried, inject a small amount of wallpaper adhesive with a syringe and smooth again.
- Trim excess and clean seams: Use a sharp blade and a straightedge to trim the top and bottom overlaps. Wipe away any adhesive that seeps out at the seams with a damp sponge before it dries. Avoid pressing on the seam with your fingers; use a seam roller gently to avoid flattening the texture.
Product fact
-
Prima Ballerina Wallpaper: The Prima Ballerina Crane wallpaper is sold per 10m roll, 61.5cm wide, with a catalog comparison price of USD 270.00 per roll. Knowing the roll dimensions helps you calculate how many strips you need and plan the layout to minimize waste and seams.
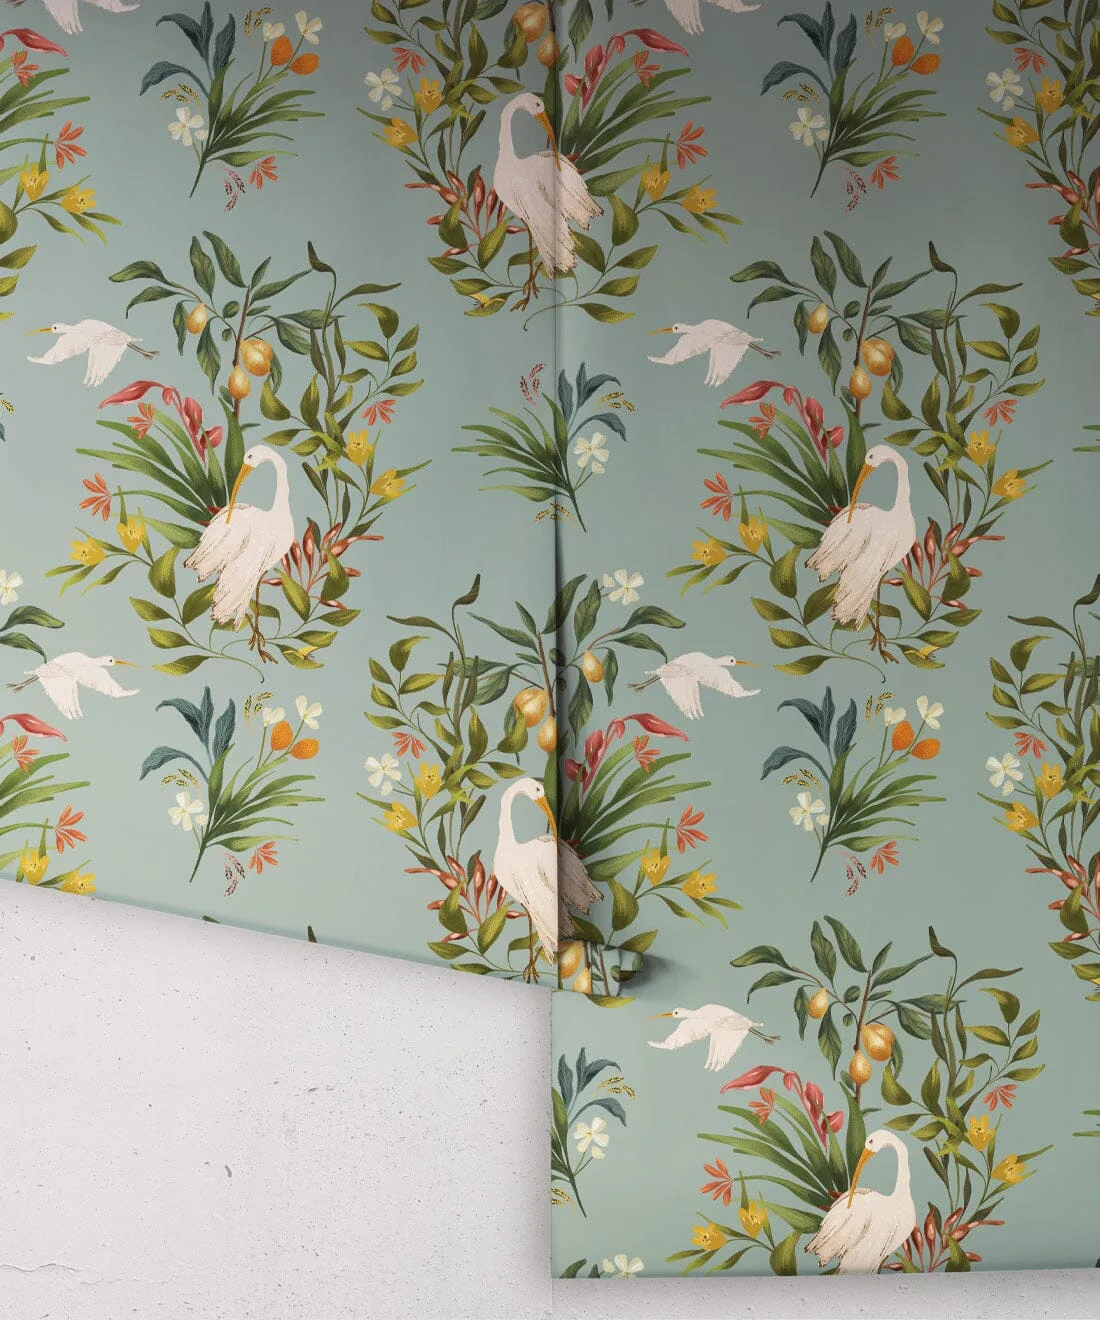
Prima Ballerina Wallpaper