Quick Answer
To install custom seat covers on a Ford Mustang, start by removing the headrests and seat brackets if needed, then slip the cover over the seat, align the seams, and secure the fasteners. For PrecisionFit covers, take your time to ensure a snug fit and check for wrinkles before finalizing.
Installing custom seat covers on your Ford Mustang not only protects your original upholstery but also gives your interior a fresh look. Whether you're upgrading to rugged Carhartt covers or waterproof Kryptek options, a proper installation ensures the covers stay in place and look great for years.
This guide walks you through the process step by step, highlighting common mistakes and checkpoints along the way. We'll also mention specific products that can make the job easier, like the Carhartt PrecisionFit® Custom Seat Covers, which are known for their tailored fit.
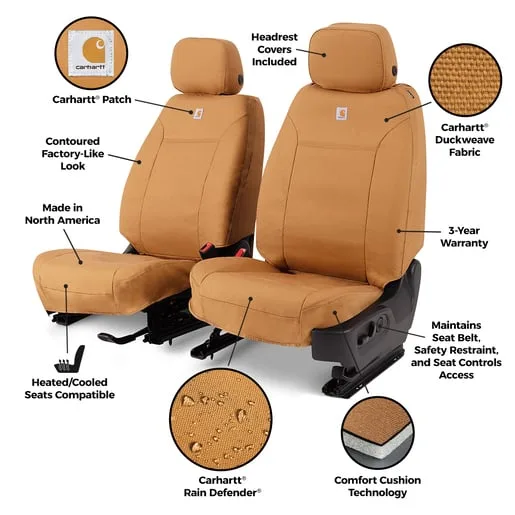
Carhartt PrecisionFit® Custom Seat Covers
Preparation: Gather Tools and Clear the Area
Before you start, park your Mustang on a flat surface and ensure the seats are clean and dry. Remove any items from the seats and pockets. You'll need a flathead screwdriver (to release clips), a trim removal tool (optional), and possibly a pair of pliers for stubborn fasteners. Having a friend to help can make the process smoother, especially for bench seats.
Check the manufacturer's instructions that come with your seat covers. Some covers, like the Carhartt PrecisionFit, may have specific steps for attaching straps or hooks. Also, note that if your Mustang has side airbags, ensure the covers are airbag-compatible and do not obstruct deployment.
- Work in a well-lit area to see all attachment points clearly.
- Take a photo of the original seat before removing anything, for reference.
Remove Headrests and Seat Brackets
Most Mustang seats have removable headrests. Press the release button and pull upward to remove them. Set them aside. If your seat covers come with separate headrest covers, you'll install those later.
Some seat covers require you to remove the seat from the vehicle for a full wrap. However, for most custom covers, you can leave the seat in place. If your cover has a bottom section that wraps under the seat, you may need to unbolt the seat from the floor to slide the cover over. Use a socket wrench to remove the bolts, but be careful not to damage the wiring for power seats.
- If you unbolt the seat, disconnect the battery first to avoid electrical shorts.
- Keep the bolts in a safe place; you'll need them later.
Position the Cover Over the Seat Back
Start with the seat back. Slip the cover over the top of the seat, aligning the seams with the seat's contours. For PrecisionFit covers, the fabric should hug the seat closely. Pull the cover down over the backrest, ensuring it covers the top and sides evenly.
If your cover has a zipper or hook-and-loop closure at the bottom, reach behind and secure it. Check that the cover is not twisted or bunched. Smooth out any wrinkles with your hands, working from the top down.
- For covers with a foam backing, like the Carhartt PrecisionFit, the foam should sit against the seat to add comfort.
Secure the Bottom Section
Now, slide the bottom cover over the seat cushion. Tuck the edges between the cushion and the seat frame. Many covers have elastic straps or hooks that attach to the underside of the seat. Reach under and fasten them securely.
For bucket seats, you may need to feed the straps through gaps and hook them to the seat frame. Ensure the cover is tight and does not shift when you sit on it. A common mistake is leaving the cover loose, which causes wrinkles and premature wear.
- If your cover has a center console, install it after the seat covers are in place.
Reinstall Headrests and Final Adjustments
If your covers include headrest covers, slip them over the headrests and reinstall them. Adjust the height to your preference. Then, do a final check: sit in the seat and move around to ensure the covers stay put. Check that all straps are tight and no fabric is pinched.
Look for any areas where the cover might rub against seat belts or moving parts. Trim any excess strap length if necessary, but avoid cutting too close to the attachment point.
- Take a test drive to ensure the covers don't shift during normal use.
Installation Steps at a Glance
- Prepare: Gather tools, clean seats, and read instructions. Checkpoint: Ensure seats are dry and you have all fasteners.
- Remove headrests and brackets: Take off headrests and, if needed, unbolt the seat. Checkpoint: Disconnect battery for power seats.
- Install seat back cover: Slide cover over backrest, align seams, and secure bottom. Checkpoint: No wrinkles or twists.
- Install bottom cover: Slide over cushion, tuck edges, and attach straps. Checkpoint: Cover is snug and doesn't shift.
- Reinstall headrests and adjust: Put headrests back, adjust, and test fit. Checkpoint: Take a test drive to confirm.
Product Facts
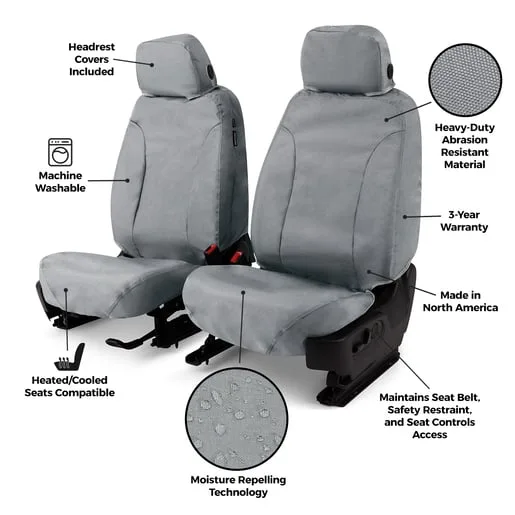
- Carhartt PrecisionFit® Custom Seat Covers: Often called the Boss Seat Covers, these Carhartt custom seat covers combine legendary durability with the trusted custom patterns of Covercraft. Compared to our Carhartt SeatSaver Custom Seat Covers, the Carhartt PrecisionFit Seat Covers offer a snug, tailored fit (vs. a more relaxed fit), a foam-backed interior for extra comfort during your drive, and a console cover* for most bucket and bench-style seats. The snug fit and foam backing make installation slightly more involved but result in a professional, wrinkle-free look that stays in place.
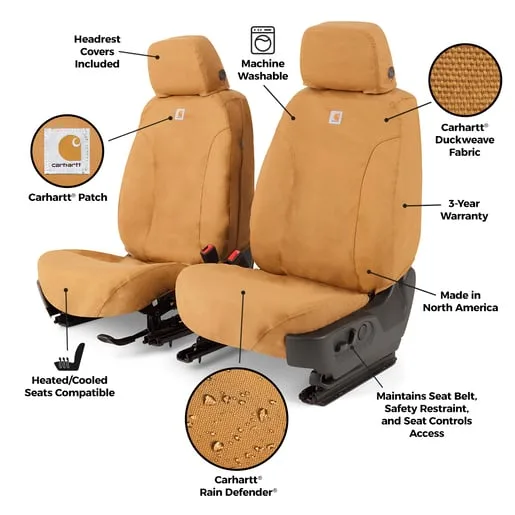
Carhartt SeatSaver Custom Seat Covers
- Kryptek Marathon Outdoor Custom Seat Covers: Crafted from our toughest Nylon material, these curve-hugging camo seat covers offer tactical camo style and unmatched durability. Machine washable for easy maintenance, these waterproof seat covers are built to withstand any challenge your adventure presents. A perfect blend of our iconic SeatSaver and PrecisionFit Seat Cover lines, Marathon seat covers provide the rugged protection of workwear with a snug, custom fit. The curve-hugging design requires careful alignment during installation to maintain the camo pattern and ensure waterproof protection.
Installing custom seat covers on your Ford Mustang is a straightforward DIY project that can save you money and keep your seats looking new. By following these steps and paying attention to the details, you'll achieve a professional fit. For a tailored look, consider the Carhartt PrecisionFit covers, or for outdoor durability, the Kryptek Marathon covers. Happy driving!