Quick Answer
Install electric poultry netting by planning a clear perimeter, setting posts securely, connecting the energiser correctly, and testing the circuit before letting your flock out.
Why Electric Poultry Netting Works
Electric poultry netting is a flexible, effective deterrent against foxes and other predators because it delivers a mild, memorable shock that trains animals to stay away. Unlike static fencing, it can be moved to rotate grazing areas, giving your flock fresh ground while keeping them protected.
The trade-off is that it requires proper installation and maintenance—vegetation touching the net can drain power, and a poor earth connection will reduce the shock. With careful setup, the payoff is reliable, portable protection that suits small flocks and free-range setups alike.
Choosing the Right Kit
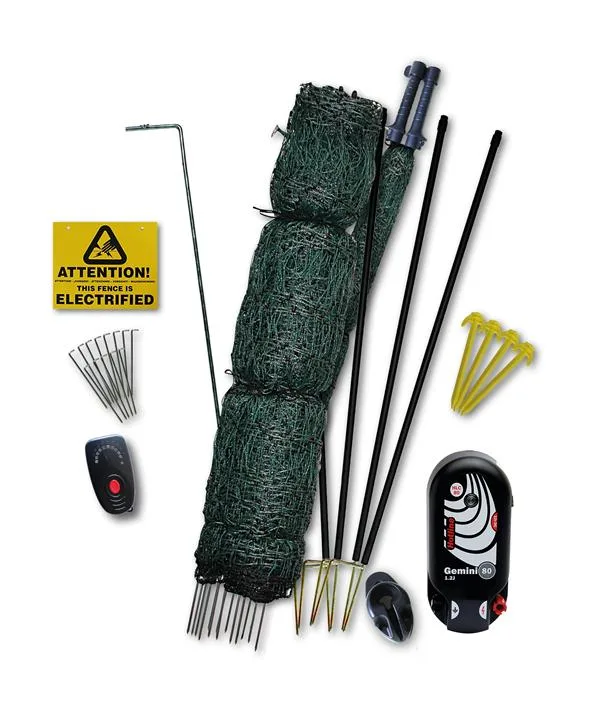
A complete kit simplifies installation because it includes the energiser, netting, and essential accessories in one package. For a small flock, a 25-metre net covers a compact run, and the included Gemini 80 energiser provides enough power for effective deterrence. Battery and solar panel options let you place the fence away from mains power, but you'll need to budget for those separately.
If your flock is larger or your space is bigger, consider a longer net or additional kits. Always match the energiser output to the net length—an underpowered unit won't deliver a reliable shock along the full run.
Installation Steps
- Plan the Perimeter: Measure the area you want to enclose, ensuring it's at least 1 metre from any structures or overhanging branches that could touch the net. Mark the corners with stakes and clear a 30cm strip of vegetation along the line. A clear perimeter prevents short circuits and makes the net easy to tension.
- Set the Posts: Insert the net's posts into the ground at regular intervals, pushing them firmly so they stand upright. Use the guy ropes on corner posts for extra stability on soft soil. Check that all posts are vertical before tensioning—crooked posts weaken the net's effectiveness.
- Unroll and Connect the Net: Unroll the net along the post line, hooking it onto each post's insulators. Connect the net's lead-out cable to the energiser, ensuring the connection is secure and off the ground. Keep the net off the ground to avoid vegetation contact and accidental earthing.
- Earth the Energiser: Drive the earth stake into moist soil near the energiser and attach the earth clamp. For best results, place the stake in a shaded area that retains moisture. A poor earth is the most common cause of weak shocks—test after rain or dry spells.
- Power Up and Test: Connect the battery or solar panel to the energiser and switch it on. Use a fence tester to check the voltage along the net—it should be at least 2,000 volts for a strong deterrent. Always test before letting your flock out; re-test after heavy rain or vegetation growth.
- Maintain the Perimeter: Regularly trim grass and weeds that touch the net, and check connections for corrosion. In winter, clear snow and ice from the net to prevent sagging. Schedule a monthly inspection to keep the fence effective year-round.
Product Facts
-
25m Electric Poultry Netting kit: The 25m Electric Poultry Netting Kit includes a Gemini 80 energiser, 25m conductive poultry net, Hot Gate system, and essential accessories, with battery and solar panels available separately. This all-in-one kit removes guesswork—you get everything needed for a secure perimeter, and the separate battery/solar options give you flexibility in power placement.
25m Electric Poultry Netting kit