Quick answer
Install the cold-side charge pipe first, leave every coupler loose until the whole run is mocked up, then tighten clamps from the turbo outlet outward. Pressure-test the system before you reinstall the bumper. Most boost leaks on the VB come from a clamp tightened too early or a coupler pushed on too far, not from the pipe itself.
Front mount intercooler piping on the Subaru WRX VB is not difficult, but it is unforgiving of sequence errors. If you tighten one clamp before the rest of the run is aligned, the pipe fights you for the next hour and you end up with a coupler that sits half on the bead.
This guide walks through the job in the order that avoids that. It covers the parts you actually need, how to route and clock the cold-side charge pipe, how to tighten couplers so they seal without cutting the silicone, and how to run a boost leak check before the bumper goes back on.
What you need before you start
You need the intercooler and its mounting brackets, the charge pipe kit, silicone couplers, and constant-tension or worm-gear clamps sized to the pipe diameter. Have a trim removal set, a socket set, a torque wrench that reads low values, and soapy water or a smoke tester for the leak check. A second pair of hands helps when you clock the pipe on the turbo outlet.
Work on a cold engine. Charge pipes hold heat long after shutdown, and silicone gets stiff when cold, which makes it easy to tear a coupler lip while you push it over a bead. Lay the pipes out on the ground in the order they will install so you can see the routing before anything is bolted down.
- Confirm your kit includes the cold-side pipe, couplers, and clamps before you remove the bumper.
- Photograph the factory routing so you can compare angles during mock-up.
Step 1: Remove the bumper and factory charge piping
Disconnect the battery negative terminal, then remove the front bumper cover and the undertray so you have clear access to the turbo outlet and throttle body. Unbolt the factory intercooler and its brackets, and set the hardware aside in a labeled bag. Keep the factory pipes intact until the new kit is mocked up, in case you need a reference angle.
Common mistake: prying on plastic clips instead of releasing them. Broken bumper tabs cause rattles that sound like a boost leak and send you chasing the wrong problem. Use a proper trim tool and work the clips free rather than pulling the cover.
- Checkpoint: nothing should still be attached to the intercooler core before you lift it out.
Step 2: Mount the intercooler and mock up the cold-side pipe
Bolt the intercooler to its brackets and leave the bracket fasteners snug, not final-tight, so the core can shift a few millimeters while you align the piping. Slide couplers onto the intercooler inlet and outlet, then fit the cold-side charge pipe into place without tightening anything. The goal here is to see where the pipe wants to sit, not to lock it down.
If you are using a pipe like the PLM GR Corolla Charge Pipe Kit (Cold Side), the same principle applies to any cold-side upgrade: the larger mandrel-bent tube changes the angle at the coupler, so the intercooler may need to move slightly to meet it. Do not force a coupler to bridge a misalignment. Move the core instead.
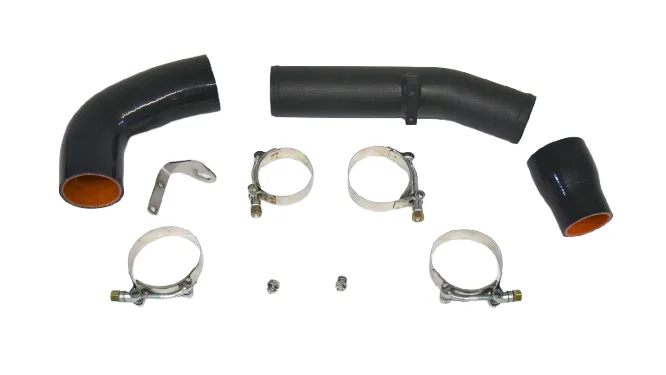
PLM GR Corolla Charge Pipe Kit (Cold Side)
- Leave every clamp loose at this stage, including the ones at the intercooler.
- Checkpoint: the pipe should sit in the couplers without pulling them off-axis.
Step 3: Clock the pipe and set coupler depth
Rotate the pipe on the turbo outlet until the run clears the fan shroud, the frame rail, and any wiring harness. Push each coupler on so it covers the bead and sits roughly centered between the two pipe ends, with about the same amount of coupler on each side. A coupler pushed fully onto one pipe leaves nothing to seal the other.
Common mistake: bottoming the coupler out on one side. That is the single most common cause of a blow-off under boost. Mark coupler depth with a paint pen before you tighten anything so you can verify it after the clamps are snug.
- Keep at least a finger-width of coupler on each pipe end.
- Checkpoint: no coupler should be stretched tight or bunched up.
Step 4: Tighten clamps in the right order
Start at the turbo outlet and work outward toward the throttle body, tightening each clamp a quarter turn at a time rather than fully seating one before moving on. This lets the pipe settle evenly instead of being pulled to one side. Finish with the clamps at the intercooler, then recheck the ones you started with.
For intercooler coupler clamp torque, there is no single number that fits every clamp and coupler combination, and the kit does not publish one. Use the clamp manufacturer's spec if it is printed on the packaging. If it is not, tighten until the clamp is firm and the silicone shows slight compression at the bead, then stop. Over-tightening cuts the coupler and creates the leak you were trying to prevent.
- Re-torque clamps after the first heat cycle, since silicone relaxes as it warms.
- Checkpoint: no clamp should be biting into the silicone or sitting on the bead.
Step 5: Run a boost leak check before the bumper goes back on
Cap the intake side and pressurize the system to a few psi, then spray soapy water on every coupler, clamp, and pipe joint. Bubbles show you exactly where the system is losing pressure. Fix those joints now, while the bumper is still off, rather than after reassembly.
This is the step most people skip, and it is the one that saves the most time. A subaru wrx vb boost leak check takes ten minutes with a spray bottle and turns a mystery drivability complaint into a five-minute fix. Once the system holds pressure, reinstall the bumper, reconnect the battery, and recheck clamp torque after your first drive.
- Listen as well as look: a hiss at the coupler is a leak even if you cannot see bubbles yet.
- Checkpoint: the system should hold pressure without dropping for at least a minute.
Install steps at a glance
- Remove bumper and factory piping: Disconnect the battery, remove the cover and undertray, and unbolt the factory intercooler and pipes. Use trim tools, not force, so you do not break clips that later sound like a leak.
- Mount intercooler and mock up the cold-side pipe: Leave bracket bolts snug and every clamp loose while you find the natural resting position of the pipe. If the coupler will not sit straight, move the intercooler instead of forcing the pipe.
- Clock the pipe and set coupler depth: Rotate for clearance and center each coupler between the two pipe ends before tightening anything. A coupler bottomed out on one side is the most common cause of a blow-off.
- Tighten clamps from turbo outward: Work in quarter turns from the turbo outlet toward the throttle body, finishing at the intercooler. Stop at firm compression; over-tightening cuts silicone and creates the leak you are preventing.
- Pressure-test before reassembly: Pressurize the system a few psi and spray soapy water on every joint to find leaks while access is easy. Recheck clamp torque after the first heat cycle, since silicone relaxes as it warms.
Parts that fit this job
- PLM GR Corolla Charge Pipe Kit (Cold Side): Increases tubing diameter from the factory 1.75 inches to a 2.25-inch mandrel-bent aluminum design, reducing pressure drop and easing load on the turbo. The larger diameter is the reason cold-side pipe angles change at the coupler, so plan on adjusting intercooler position rather than forcing the coupler to flex.
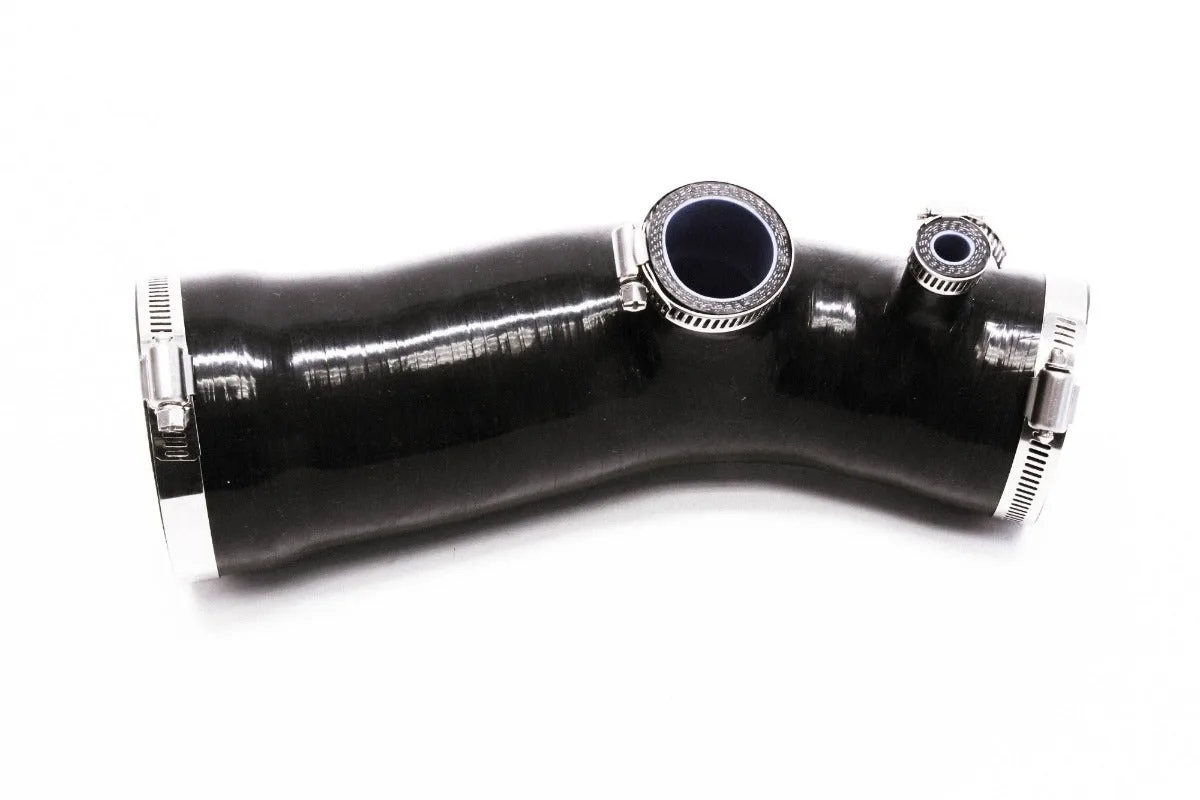
- PLM Intake Silicone Hose Kit - 2017-2021 Honda Civic Type R FK8: Made from motorsports-grade 4-ply high-temp reinforced silicone and includes two hose clamps. Reinforced silicone resists collapsing under vacuum and holds clamp tension better than thin hose, which is the same material property you want in intercooler couplers.
- PLM Block Off Kit For 35mm 38mm 2-bolt flange wastegate EWG: Includes a block off flange, gasket, and bolts for sealing a 2-bolt wastegate flange when running an internal wastegate or a single gate on a dual-gate manifold. If your piping install involves changing boost control hardware, sealing an unused flange correctly prevents a leak that mimics a charge pipe problem.
Front mount piping on the WRX VB rewards patience more than force. Mock up the whole run loose, tighten from the turbo outward, and pressure-test before the bumper goes back on. Do that and the install is a one-time job instead of a weekend of chasing leaks.