Quick Answer
To install a pendant light over a kitchen island, first turn off power, then mount the ceiling box, wire the fixture, attach it to the ceiling, and adjust the height to 30-36 inches above the counter. Always follow local electrical codes and consider using a licensed electrician if you're unsure about wiring.
Adding a pendant light over your kitchen island not only enhances the ambiance but also provides focused task lighting for meal prep and dining. Whether you're replacing an old fixture or installing new ones, the process can be straightforward if you follow the right steps. This guide walks you through the entire installation, from gathering tools to making the final adjustments.
Before you begin, it's crucial to understand the basics: you'll need a ceiling electrical box, a pendant light kit, wire connectors, a screwdriver, a voltage tester, and possibly a drill. Safety is paramount, so always turn off the power at the circuit breaker before touching any wires. If you're not comfortable with electrical work, don't hesitate to hire a professional.
Gather Tools and Materials
Start by collecting all necessary tools and materials. You'll need a voltage tester, wire strippers, screwdrivers (flathead and Phillips), a drill with bits, wire connectors (wire nuts), electrical tape, a ladder, and the pendant light fixture itself. If your ceiling doesn't have an existing electrical box, you'll also need a ceiling box rated for the weight of your light.
Check the manufacturer's instructions that come with your pendant light, as they may specify particular mounting hardware or wiring requirements. For example, some fixtures like the Bernini Pendant - Large may have unique mounting systems due to their natural materials and weight. Ensuring you have the right tools before starting will save time and frustration.
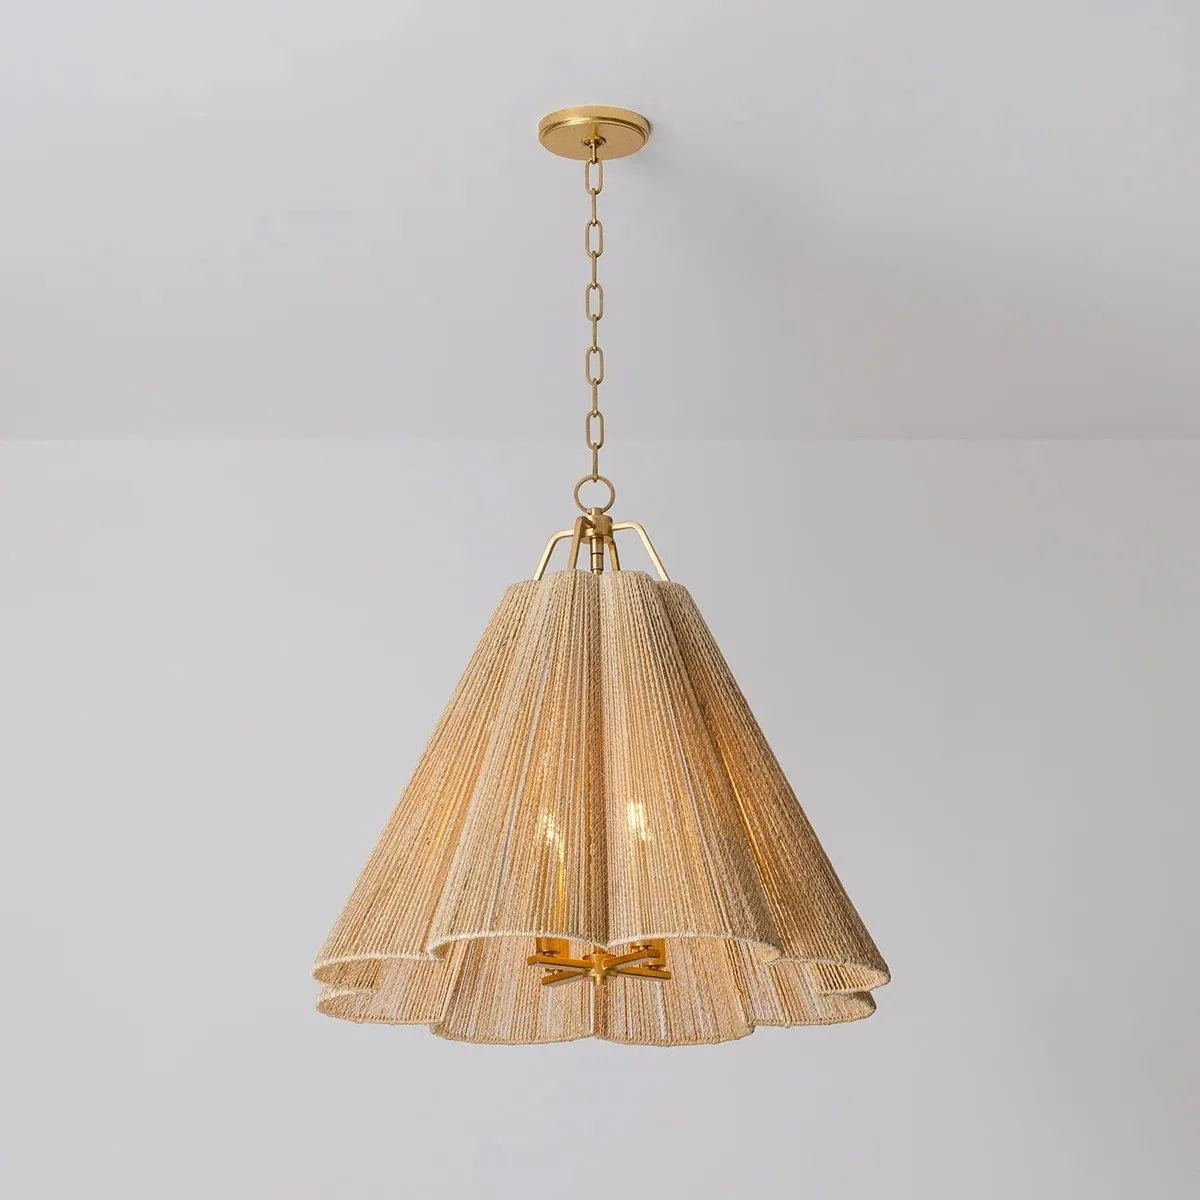
Bernini Pendant - Large
- Use a voltage tester to confirm the power is off before working on wires.
- If your pendant is heavy, consider a ceiling box with a weight rating that matches the fixture.
Turn Off Power and Prepare the Ceiling
Safety first: go to your circuit breaker and turn off the power to the room where you're working. Use a voltage tester on the existing wires to ensure they're not live. Once confirmed, you can safely remove any old light fixture and expose the ceiling box.
If there's no ceiling box, install one that is securely attached to a ceiling joist. For heavy fixtures, use a fan-rated box that can support the weight. If you're unsure about the box's capacity, consult a professional. After the box is in place, you may need to run new wiring if none exists—this is a job best left to an electrician.
- Always double-check with a voltage tester even after turning off the breaker.
- Use a stud finder to locate a joist for secure mounting of the ceiling box.
Wire the Pendant Light
Now you'll connect the pendant's wires to the house wiring. Typically, you'll have a black (hot), white (neutral), and green or bare copper (ground) wire. Strip about 3/4 inch of insulation from the ends of the pendant wires. Connect the black wires together with a wire nut, then the white wires, and finally the ground wires. Secure each connection with electrical tape for extra safety.
If your pendant has a different wiring configuration, such as a three-way switch or a dimmer, follow the instructions carefully. Some fixtures, like the Drake Glass Pendant - Small, may have a straightforward wiring process, but always double-check. After all connections are made, gently tuck the wires into the ceiling box, ensuring no bare wires are exposed.
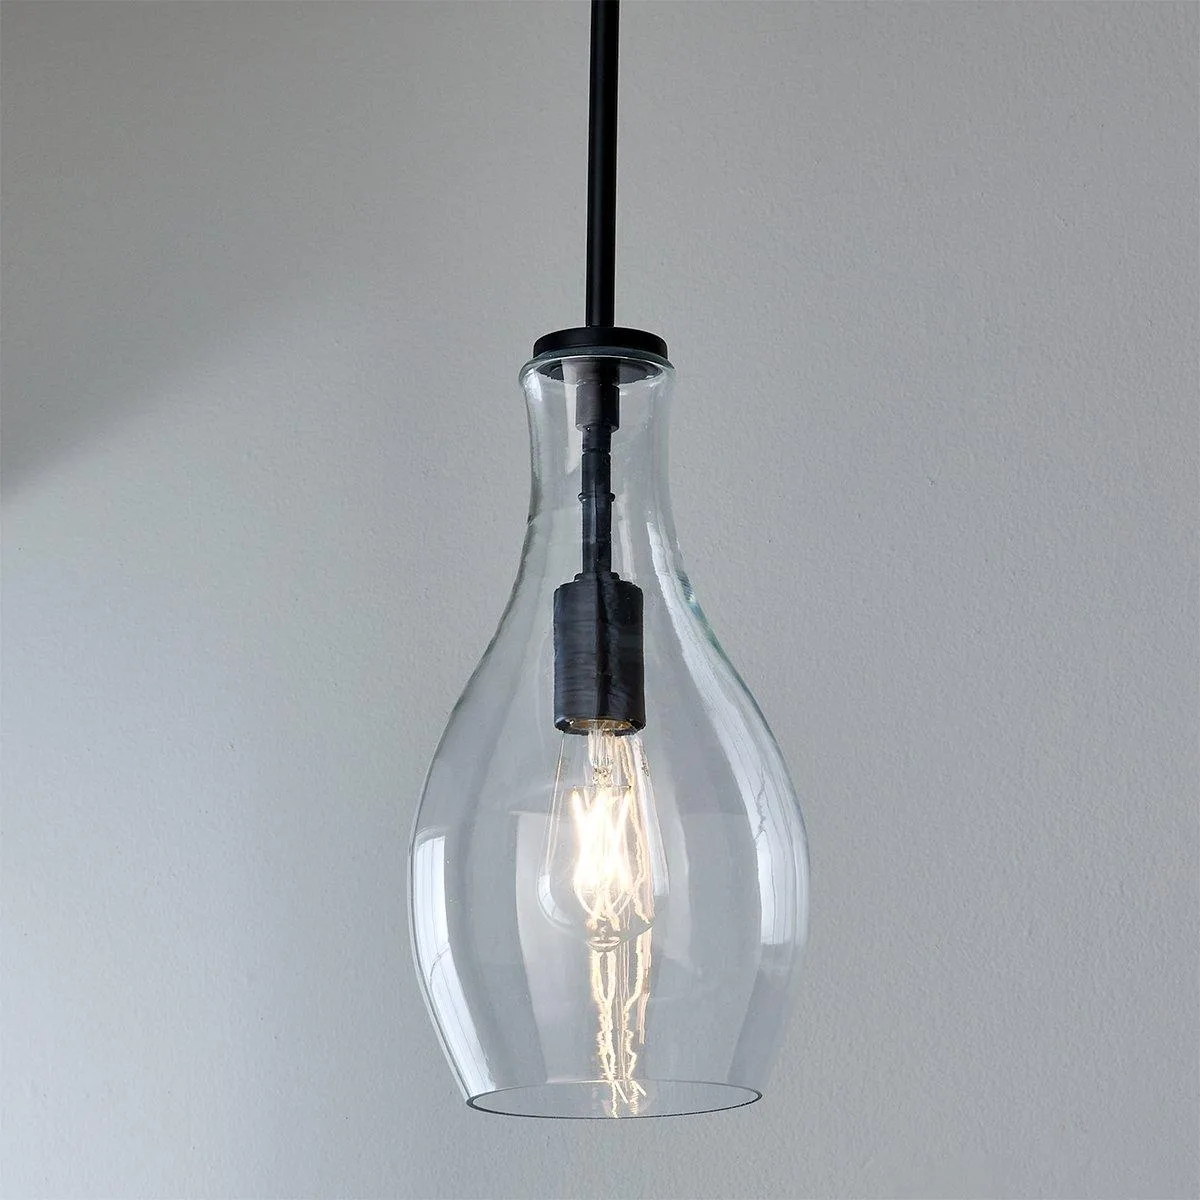
Drake Glass Pendant - Small
- Match the wire colors: black to black, white to white, and ground to ground.
- Use wire nuts that are appropriately sized for the gauge of your wires.
Mount the Pendant and Adjust Height
With the wiring complete, you can now mount the pendant to the ceiling. This usually involves attaching a mounting bracket to the ceiling box, then lifting the fixture and securing it in place. For larger or heavier pendants, you may need a second person to help hold the fixture while you make the connections.
Once mounted, adjust the height of the pendant. The standard height for a pendant over a kitchen island is 30 to 36 inches above the countertop. If you have a vaulted ceiling or a particularly tall island, you might need to adjust accordingly. Some pendants have adjustable cords or chains, making this step easier. For example, the Quiana Fluted Glass Pendant features a graceful design that may benefit from a specific height to showcase its fluted glass.
- Measure from the bottom of the pendant to the countertop to ensure correct height.
- For a dramatic look, consider hanging multiple pendants at different heights.
Install Bulbs and Test
After the pendant is securely mounted, install the appropriate light bulbs. Check the fixture's label for the maximum wattage and type of bulb recommended. Once the bulbs are in, turn the power back on at the breaker and test the light. If it doesn't work, turn off the power and re-check your wiring connections.
Finally, step back and admire your work. Ensure the pendant is level and the height is correct. If everything looks good, you're done! If you encounter any issues, don't hesitate to consult the manufacturer's instructions or seek professional help.
- Use LED bulbs for energy efficiency and longer lifespan.
- If the light flickers, it may indicate a loose connection—turn off power and recheck.
Step-by-Step Installation Checklist
- Step 1: Turn off power: Go to the circuit breaker and switch off the power to the room. Use a voltage tester to confirm no electricity is flowing. Never work on live wires.
- Step 2: Prepare the ceiling: Remove any existing fixture and ensure the ceiling box is securely mounted. If needed, install a new box rated for the fixture's weight. A sturdy box prevents sagging or accidents.
- Step 3: Wire the pendant: Connect the house wires to the pendant wires: black to black, white to white, and ground to ground. Use wire nuts and electrical tape. Double-check connections before proceeding.
- Step 4: Mount the pendant: Attach the mounting bracket to the ceiling box, then secure the pendant. For heavy fixtures, get help. Ensure the pendant is level.
- Step 5: Adjust height: Set the pendant 30-36 inches above the countertop. Adjust the cord or chain as needed. Measure from the bottom of the pendant to the counter.
- Step 6: Install bulbs and test: Install the correct bulbs, turn the power back on, and test the light. If it doesn't work, recheck wiring. Enjoy your new lighting!
Pendant Light Options from Our Store
- Bernini Pendant - Large: Products from our Bernini collection utilize natural abaca rope to shade light in glamorous arrays. The shade that surrounds the dainty central framework also contains a scalloped profile to add an extra dimension of style. Due to the natural materials used, each piece is unique and may vary in tone. When installing this pendant, keep in mind that the natural materials may require gentle handling, and the unique tone means each fixture is one-of-a-kind.
- Drake Glass Pendant - Small: This pendant's clear glass shade extends above the socket for a unique and trendy look. The simple metal hardware and clear glass makes this fixture a winner for any stylish look. The clear glass and simple hardware make this pendant easy to install and maintain, and its small size is perfect for compact islands.
Installing a pendant light over your kitchen island is a rewarding DIY project that can transform the look and functionality of your space. By following these steps and prioritizing safety, you'll have a beautiful new light in no time. If you're in the market for a new pendant, consider exploring our collection, such as the Bernini Pendant - Large, which adds a natural, glamorous touch to any kitchen.