Quick answer
Thread the knob on by hand first, then tighten it gently until it seats against the boot collar or shifter shaft. Most M10x1.5 knobs need only a firm hand-tight snug, not a breaker bar. If the knob bottoms out before it feels secure, add a jam nut or thread adapter rather than forcing it.
Installing a shift knob sounds like a two-minute job, but the details decide whether it stays tight and looks right for years. The M10x1.5 thread is common on Honda and Acura shifters, and it is also where most install mistakes happen: cross-threading, over-tightening, or ignoring how the boot collar sits.
This guide walks through the process in order, with the checkpoints that matter. It applies to the ESCO-Ti shift knobs and other M10x1.5 knobs, and it covers what to do when the knob does not line up the way you want.
Confirm the thread size before you start
The M10x1.5 marking means a 10mm nominal diameter with a 1.5mm thread pitch. That is the standard for many Honda and Acura shifters, but not all of them. If you are unsure, check the shifter shaft or the old knob for a stamp, or measure the thread pitch with a gauge. A knob that threads on a few turns and then binds is usually the wrong pitch, not a defective knob.
Once you know the thread size, check whether your shifter uses a boot collar or a threaded shaft. A boot collar sits over the shifter boot and can change how far the knob threads down. If you are using a POCO or POCO-Insulated knob, the Satin Black Aluminum Shift Boot Collar for POCO Shift Knobs is made for that setup and includes zip ties for installation.
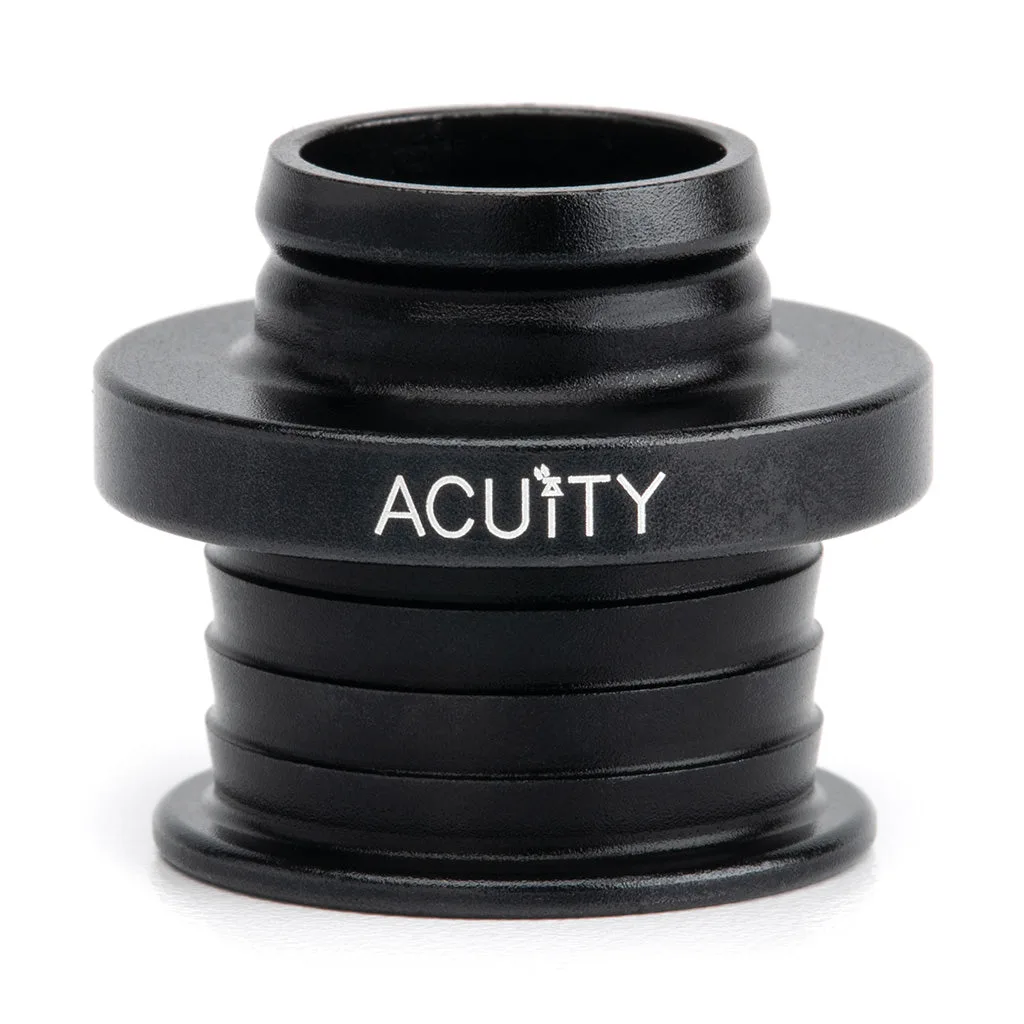
Satin Black Aluminum Shift Boot Collar for POCO Shift Knobs
- Do not force a knob past the first few turns; stop and verify the pitch.
- Keep the original knob or a thread gauge handy for comparison.
Prepare the shifter shaft and boot
Clean the threads with a soft brush or a rag and a small amount of brake cleaner if they are greasy. Any grit left on the threads will transfer into the knob and make it feel rough. If your shifter has a boot collar, slide it down the shaft out of the way so you have full access to the threads.
Check that the boot is not twisted or pinched. A boot that sits too high can stop the knob before it seats, which makes you think the threads are wrong. On Honda and Acura shifters, the boot often needs to be pulled down slightly to expose enough thread.
- A clean thread is easier to tighten and less likely to gall.
- Keep the boot collar loose until the knob is in place.
Thread the knob on by hand
Start the knob by hand. Turn it counterclockwise until you feel the thread drop into the starting groove, then turn it clockwise. It should spin on smoothly with light finger pressure. If it stops after one or two turns, back it off and start again. Cross-threading is the most common cause of a knob that never sits straight.
For a knob like the ESCO-Ti Shift Knob in Burnt Titanium Finish (M10X1.5), the laser-etched gear pattern needs to face the driver. Thread it down until it is close, then adjust the final position during tightening. Do not use tools at this stage.

ESCO-Ti Shift Knob in Burnt Titanium Finish (M10X1.5)
- If the knob will not start by hand, check the first thread on the shaft for burrs.
- Never use pliers or a strap wrench to start a knob.
Seat the knob and align the pattern
Once the knob is threaded on, turn it until it contacts the boot collar or the top of the shifter shaft. At this point, check the alignment of any etched pattern or logo. If it is off by a quarter turn, you have two options: add a thin washer or jam nut to change the stop point, or use a thread adapter. Forcing it further will only damage the threads or the finish.
The ESCO-Ti knobs are approximately 310 grams with a 40mm diameter and 70mm height, so they have enough mass to feel substantial without being oversized. That weight also means you will feel it if the knob is not seated squarely, so take the extra minute to get it right.
- A jam nut is the cleanest way to set final orientation.
- If the knob bottoms out early, a thread adapter adds the needed length.
Tighten the knob without damaging it
Tighten the knob by hand until it is snug. The goal is to stop it from rotating during shifts, not to crush the threads. Titanium and aluminum knobs can be marked by aggressive tools, and over-tightening can crack a boot collar or distort a thin jam nut. A firm hand-tight turn is enough for most M10x1.5 setups.
If you use a jam nut, tighten the nut against the knob with a wrench while holding the knob steady. Then check that the boot collar still sits correctly. The Satin Black Aluminum Shift Boot Collar for POCO Shift Knobs is 6061 aluminum with a satin black anodized finish, so it is light and does not need much torque to stay put.
- Stop tightening as soon as the knob stops moving freely.
- Re-check tightness after the first few drives.
Check the boot collar and final fit
Slide the boot collar up and secure it. If you are using a POCO or POCO-Insulated knob, the collar is designed for those knobs only and includes three lay-flat zip ties. Trim the zip ties flush so they do not catch on your hand or the boot. Make sure the boot is not stretched or pinched under the collar.
Take the car for a short drive and run through the gears. The knob should stay aligned and not rotate. If it moves, tighten it another small increment. If it still moves, the threads may be worn or the knob may need a thread adapter.
- A boot collar that is too tight can pull the boot out of shape.
- Check alignment again after the first drive.
Installation steps at a glance
- Verify thread size: Confirm the shifter is M10x1.5 by checking the shaft or old knob. A knob that binds after a few turns is usually the wrong pitch. Checkpoint: the knob should start by hand with no resistance.
- Clean and prepare: Wipe the threads and slide the boot collar down. Make sure the boot is not twisted or blocking the threads. Checkpoint: full thread engagement is visible.
- Thread on by hand: Start the knob counterclockwise to find the thread start, then turn clockwise. Do not use tools. Checkpoint: the knob spins on smoothly.
- Align the pattern: Turn the knob until it contacts the collar or shaft, then adjust with a jam nut or washer if the etched pattern is off. Checkpoint: the pattern faces the driver without forcing.
- Tighten gently: Hand-tighten until snug. If using a jam nut, hold the knob steady and tighten the nut against it. Checkpoint: the knob does not rotate during shifts.
- Secure the boot collar: Slide the collar up and fasten it. For POCO knobs, use the included lay-flat zip ties and trim them flush. Checkpoint: the boot sits naturally and the collar does not pinch.
Product facts that affect installation
- ESCO-Ti Shift Knob in Burnt Titanium Finish (M10X1.5): Approximately 310 grams with a 40mm diameter and 70mm height, made from 6AL4V titanium with a burnt brushed finish. The weight and size give a substantial feel, but they also mean the knob must be seated squarely to avoid vibration or misalignment.
- Satin Black Aluminum Shift Boot Collar for POCO Shift Knobs: 6061 aluminum construction with a satin black anodized finish, compatible with all ACUiTY POCO and POCO-Insulated shift knobs, and includes three lay-flat zip ties. It only fits POCO and POCO-Insulated knobs, so check your knob model before ordering. The included zip ties make installation clean without extra hardware.
A correct shift knob install comes down to clean threads, hand-tightening, and a final alignment check. Take your time, and the knob will stay put and look right for the life of the car.