Quick answer
Installing a swing beam add-on kit lets you add extra swings to your existing swing set without replacing the entire structure. The key is choosing a compatible hardware kit and following precise steps for safe, secure attachment.
Why Add a Swing Beam to Your Set?
Adding a swing beam is a cost-effective way to increase play capacity. Instead of buying a whole new set, you install a separate beam that can hold multiple swings, giving more kids a place to swing at once.
A hardware-only kit like the Swing Beam Add On - Hardware-Only Kit provides the brackets and hangers, but you supply the lumber and swings. This approach saves money and lets you customize the beam length and height to fit your yard.
What You Need Before Starting
Before you begin, gather all materials. The kit includes brackets, bolts, and hangers, but you'll need pressure-treated lumber for the beam (typically a 4x6 or 6x6), swings, and basic tools like a drill, socket wrench, level, and tape measure.
Check your local building codes for swing set clearance requirements. Also ensure the ground is level and free of obstructions where the beam will be placed.
Step-by-Step Installation Process
- Step 1: Prepare the Site and Gather Materials: Clear the area where the swing beam will go. Lay out all hardware from the kit and confirm you have the correct lumber (e.g., a 4x6 or 6x6 pressure-treated beam). Common mistake: using untreated lumber that will rot quickly. Always use pressure-treated or naturally rot-resistant wood.
- Step 2: Assemble the A-Frame Brackets: Attach the A-Frame Bracket to the support posts using the provided carriage bolts. Ensure the bracket is level and the bolts are snug but not fully tightened yet. Checkpoint: Verify the bracket is centered on the post. An off-center bracket will cause the beam to sit crooked.
- Step 3: Install the Triangle Support Brace: Position the Triangle Support Brace between the A-Frame legs and the beam. This brace adds lateral stability. Use the 5.5" carriage bolts to secure it. Common mistake: skipping the brace or using the wrong bolt size. The brace prevents the beam from twisting under load.
- Step 4: Mount the Beam: Lift the beam into the A-Frame bracket. Use a level to ensure the beam is horizontal. Tighten all bolts securely with a socket wrench. Checkpoint: Double-check the beam is level front-to-back and side-to-side. An unlevel beam causes swings to hang crooked.
- Step 5: Attach the Swing Hangers and Spring Clips: Screw the Iron Ductile Swing Hangers into the beam at desired spacing (at least 24 inches apart). Attach the Spring Clips to the hangers. Common mistake: spacing hangers too close together, which can cause swings to collide. Leave enough room for safe swinging.
- Step 6: Hang the Swings and Test: Attach your chosen swings to the spring clips. Test each swing by gently pulling and releasing. Check all hardware for tightness after the first few days of use. Checkpoint: Re-torque all bolts after 48 hours. Wood can compress slightly, causing bolts to loosen.
Product Used in This Guide
-
Swing Beam Add On - Hardware-Only Kit: Kit includes 1 A-Frame Bracket, 1 Triangle Support Brace, 6 Iron Ductile Swing Hangers, 6 Spring Clips, and galvanized hardware. Lumber and swings are not included. You must supply your own beam lumber and swings, which lets you choose the exact size and style for your yard and budget.
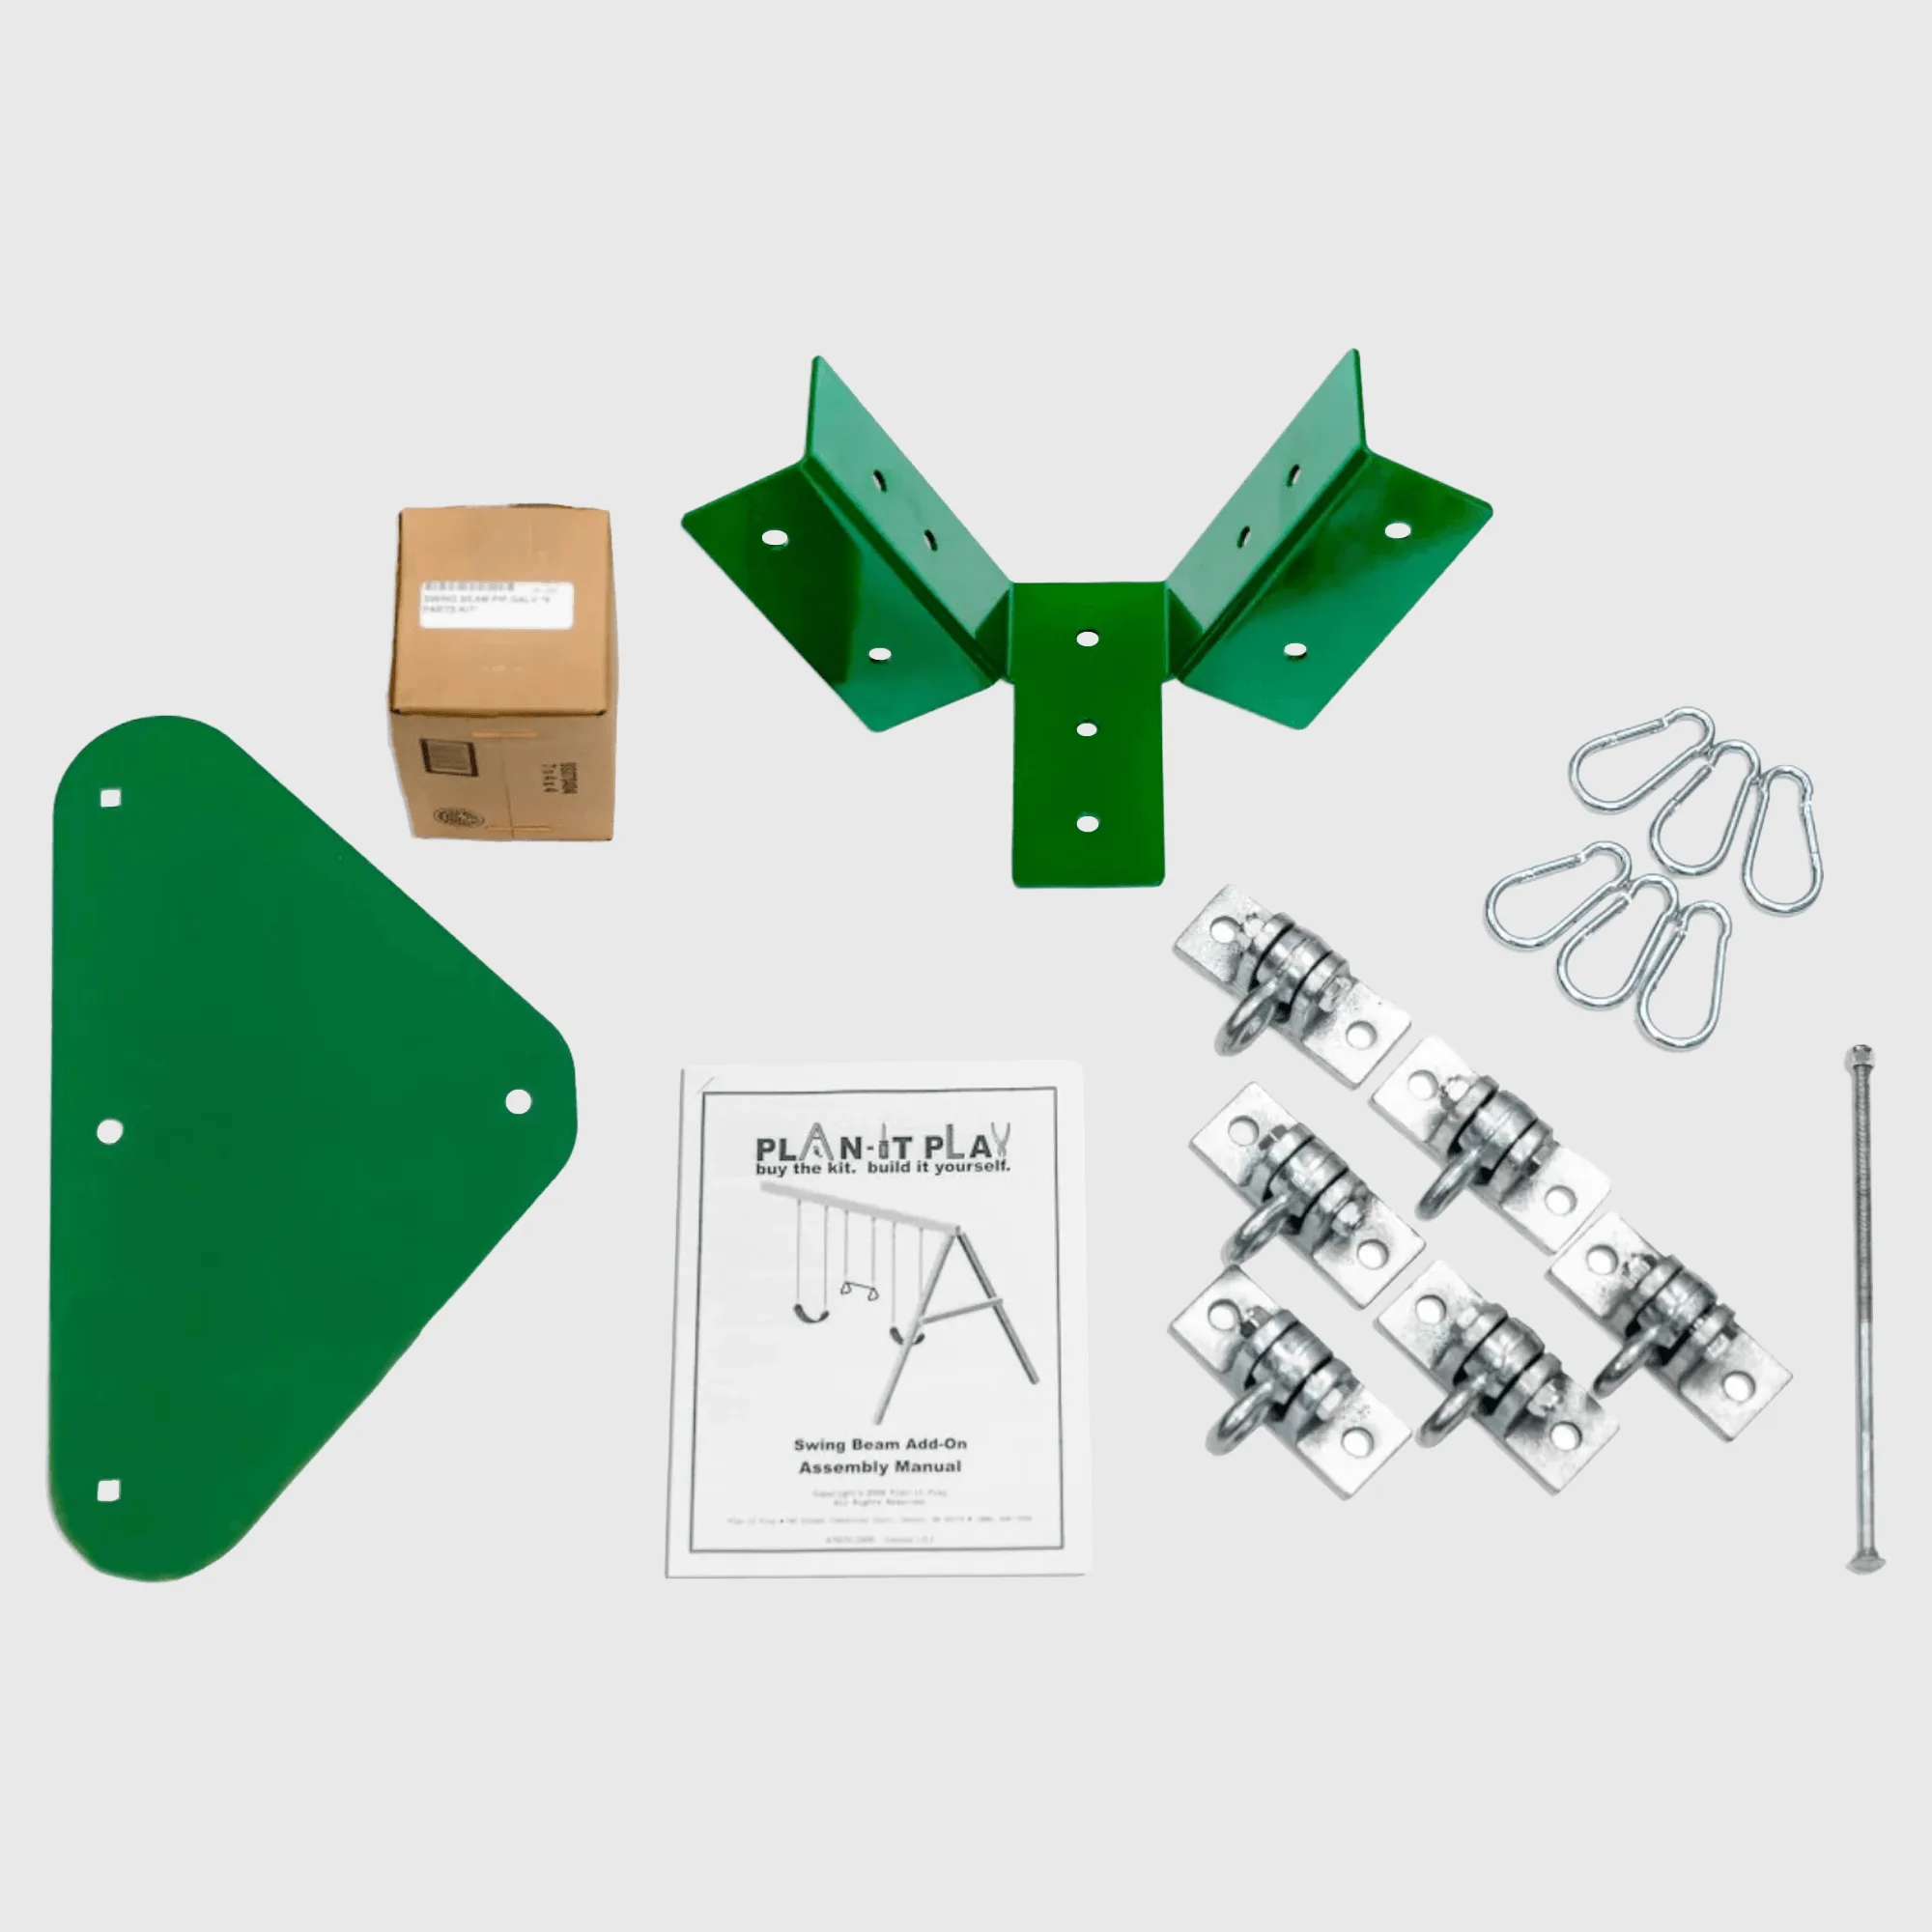
Swing Beam Add On - Hardware-Only Kit