Quick answer
Most iron-on patches lift because heat or pressure never reached the adhesive, the fabric was too textured or stretchy, or the bond has simply aged. Re-press the patch with firm, even pressure on a hard surface, then add a few hand stitches at the corners and edges. If the patch has already curled hard or the adhesive is gone, stitch it down rather than reheating it again.
A patch that lifts at one corner is annoying. A patch that peels off in the wash is worse, especially when you spent time lining it up. The good news is that most iron on patch peeling off problems are diagnosable, and the fix is usually pressure and stitching rather than a new patch.
This guide separates the symptom you are seeing from the likely cause, the corrective action, and the point where you should stop ironing and sew instead. It uses a hand-embroidered patch with an ultra-hold backing as the working example, because that construction shows exactly where heat-set adhesives succeed and where they need backup.
Why heat-set patch adhesive fails
Heat-activated backing works by melting into the fabric weave, then cooling into a mechanical grip. If the iron is too cool, the adhesive never fully flows. If the iron is too hot, the backing can scorch or become brittle. If you press on a soft ironing board, the fabric sinks away from the patch and pressure is lost. All three produce the same result: a patch that looks attached but lifts at the edges.
Fabric type matters just as much. Smooth cotton and denim give adhesive plenty of surface to grab. Stretchy knits, fleece, ribbed cuffs, and heavily textured canvas move and flex, so the bond breaks under normal wear. That is not a defective patch; it is a mismatch between the adhesive and the material.
- Press on a hard, heat-safe surface, not a padded ironing board.
- Use firm downward pressure for the full time, not a light glide.
- Let the patch cool completely before moving the garment.
Match the symptom to the cause
A corner lifting right after application usually means uneven pressure. The iron missed that spot, or the fabric bunched underneath. Re-press that area specifically with the tip of the iron and steady pressure. A patch that lifts after the first wash often means the adhesive never bonded deeply enough, or the wash was too hot and too rough.
A patch that curls at the edges over weeks is showing adhesive fatigue. Ultra-hold backings are strong, but they can degrade over time, especially with repeated washing and drying. A patch that slides sideways on a knit is fighting the fabric's stretch, and no amount of reheating will fix that permanently.
- Lifting immediately: pressure or heat problem.
- Lifting after washing: bond depth or laundry problem.
- Curling over time: adhesive aging, add stitches.
- Sliding on stretch fabric: fabric mismatch, stitch it down.
How to re-bond a patch that is lifting
Set your iron to the heat level your fabric can tolerate, with no steam. Place the garment on a hard surface, position the patch, and cover it with a thin cotton cloth or parchment. Press straight down with both hands for 20 to 30 seconds, focusing on the lifting edge. Do not move the iron back and forth; you want pressure, not motion.
Flip the garment and press the back of the fabric for another 15 to 20 seconds. This drives heat through the weave from the reverse side. Let everything cool flat before you try the patch. If the edge still lifts after two attempts, stop reheating. Repeated heat cycles can damage both the adhesive and the embroidery threads.
- No steam: moisture interferes with the adhesive.
- Thin cloth between iron and patch protects the stitching.
- Cool flat, not hanging, so the adhesive sets in place.
When to stop ironing and stitch instead
Stitching is the permanent fix, and for many patches it should be the first step, not the last. A few hand stitches at the corners and mid-edges take ten minutes and hold through years of washing. Use a matching thread and small stitches that catch the patch border without covering the embroidery.
Stop ironing and commit to stitching when the patch has already curled, when the backing feels smooth and glossy with no tack, when the garment is stretchy or heavily textured, or when the patch sits on a high-friction area like a knee or elbow. Those conditions defeat heat-set adhesive no matter how carefully you press.
- Stitch corners first, then the middle of each edge.
- Use a thimble on thick fabrics like denim.
- Wash inside out on cold and air dry to extend the bond.
Patch adhesion diagnosis
- Corner lifted right after ironing: Heat or pressure did not reach that spot evenly. Re-press on a hard surface with firm, still pressure for 20 to 30 seconds, then cool flat. If it lifts again after two presses, move to stitching.
- Patch came loose in the wash: The bond was shallow, or the wash was too hot and abrasive. Re-bond once, then wash inside out on cold and air dry. Two wash failures means the adhesive is done. Stitch it.
- Edges curling after weeks of wear: Ultra-hold adhesive can degrade over time, especially on garments that flex. This is expected aging, not a bad patch. Add corner and edge stitches now to stop the curl spreading.
- Patch slides on a knit or fleece: Stretchy, textured fabrics defeat heat-set adhesive because the surface moves under the bond. Skip reheating. Stitch the patch down or choose a smoother fabric.
What a hand-embroidered patch actually gives you
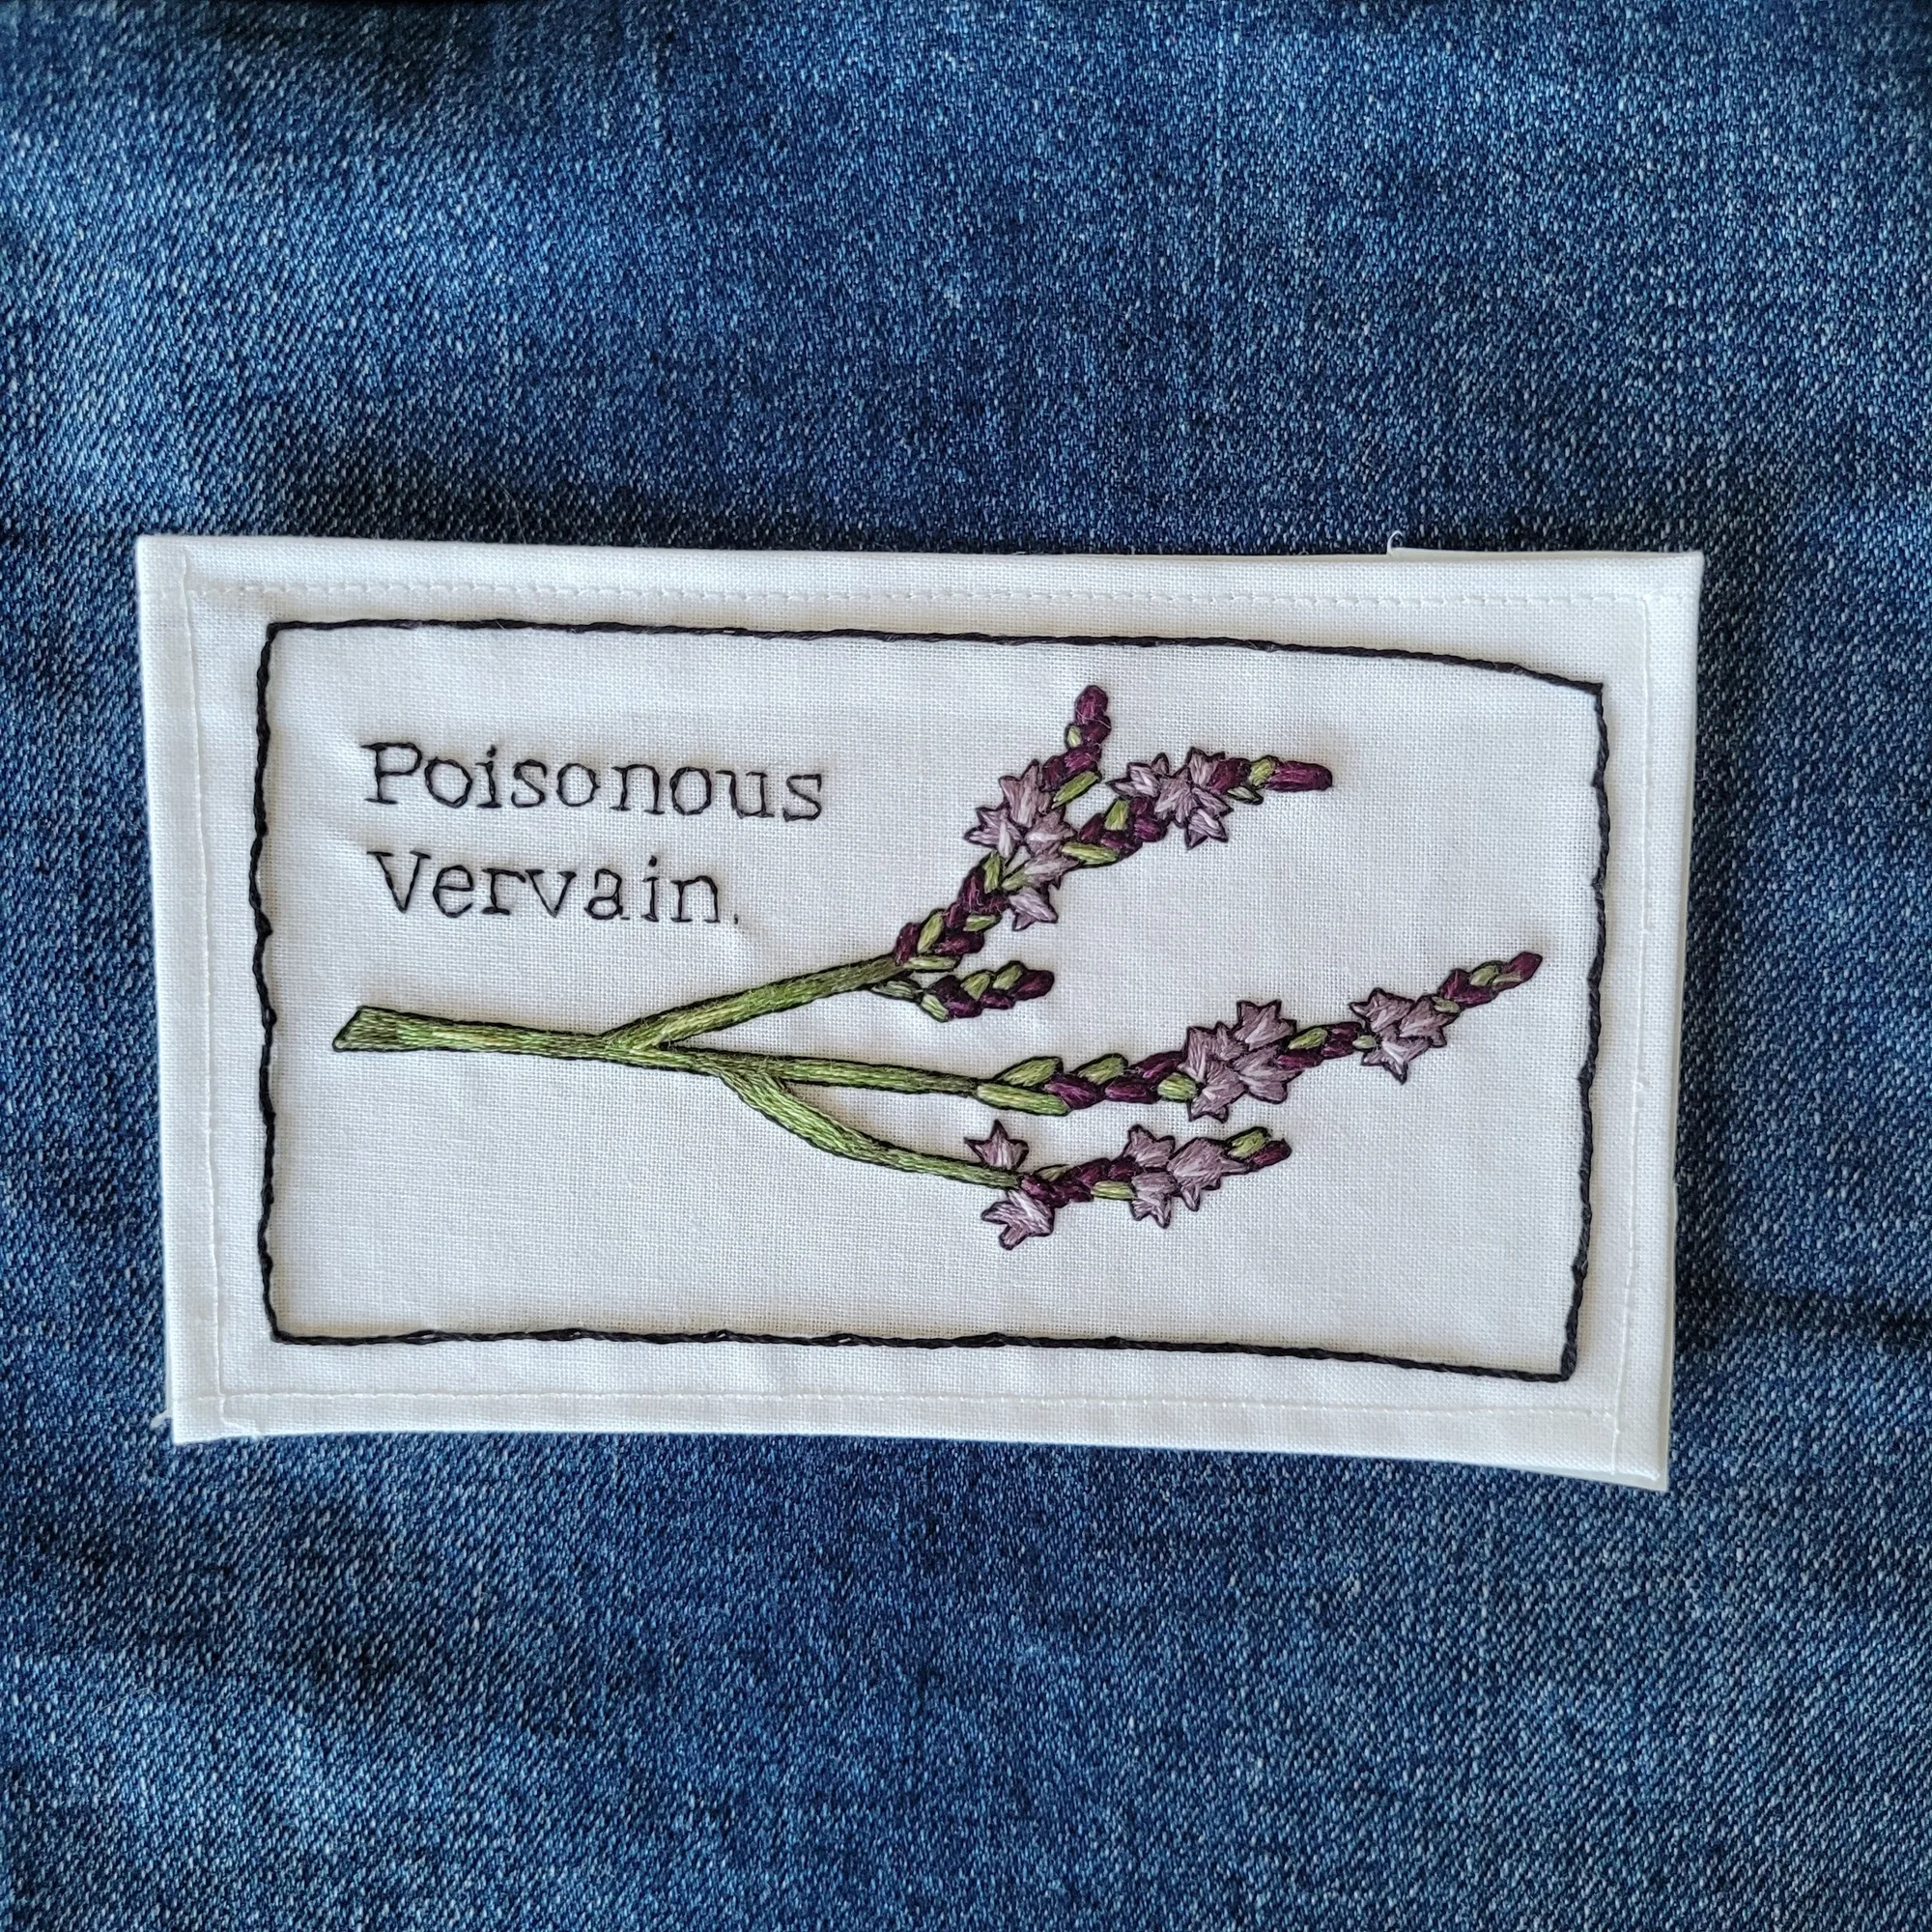
- Vervain | hand Embroidered iron-on Patch: Hand stitched on off-white cotton fabric with a Heat-n-Bond ultra-hold backing, designed for ironing onto flat articles of clothing once the paper back is removed. The ultra-hold backing handles the initial bond, but the maker recommends adding a few stitches because the adhesive can degrade over time. That is your signal to stitch proactively rather than wait for a peel.
- Lady Lazarus | Waterproof Vinyl Sticker: Printed on glossy waterproof adhesive vinyl and laminated for extra protection, but not UV proof, so it will fade with prolonged sun exposure. If you decorate a jacket or bag alongside a patch, remember that vinyl stickers and heat-set patches fail for different reasons. Sun fades the sticker; heat and washing stress the patch. Treat them separately.
Most patch peeling is a pressure, fabric, or aging problem, not a reason to buy a replacement. Re-press once with firm heat and no steam, then add a few hand stitches so the patch stays put for good. If it has already curled or the backing feels slick, go straight to the needle.