Quick answer
You can safely mix eitech accessories from different sets as long as the connecting hardware matches: same screw diameter and thread, same nut type, and axles that fit the same bearing holes. Sort your parts by size first, test-fit one connection before building, and never force a screw that starts to bind. If a part doesn't seat with light finger pressure, it belongs to a different size class.
Combining eitech sets is one of the best ways to get more out of the system. A school kit, a vehicle set and a few loose accessories can become something none of them could build alone. But cross-set building only stays fun when the parts actually fit together, and that comes down to a handful of measurable details rather than brand names or box colors.
This guide walks through a safe order of operations: identify what you have, check the critical dimensions, test one joint, then scale up. It also covers what to do when a part is missing from the catalog data, so you don't guess and damage a thread.
scale
Why mixing sets usually works, and where it fails
eitech is a metal construction system, so the parts that matter most are the fasteners and the axles, not the decorative pieces. Screws, nuts and axles are designed to work across the range, which is why a bracket from one set can often bolt straight onto a beam from another. The failure points are almost always dimensional: a screw that is slightly too long bottoms out in a blind hole, or an axle that is slightly too thick will not pass through a bearing.
The practical rule is to treat every new combination as a test joint before you treat it as a build. That single habit prevents the two most common problems: cross-threading a nut onto a screw that does not match, and forcing an axle until the hole deforms. Both are avoidable with a few seconds of checking.
- Keep mixed parts in separate small trays until each combination has passed a test fit.
- If a screw needs more than light finger pressure to start, stop and re-check the size.
What to check before you combine eitech sets
Start by grouping parts by function: screws, nuts, axles, wheels, brackets and beams. Within each group, compare diameter and length side by side. Screws of the same diameter but different lengths are usually interchangeable as long as the longer one does not bottom out, and shorter screws are safer in tight corners. Nuts should spin on by hand for at least two full turns before you need a tool.
Axles deserve extra attention because they carry load. Roll them on a flat surface to check they are straight, then slide them through the bearing holes of the set you want to combine. A straight axle that passes through cleanly with a little clearance is a green light. If it binds, do not sand or force it; use the axle that came with that frame instead.
- Line up screws head-to-head to compare length quickly.
- Test axles in the destination frame, not just in the frame they came from.
Accessories that are safe to swap, and ones to keep paired
Structural parts such as angled plates, beams and brackets are the safest to swap because they only need matching hole spacing and screw diameter. Wheels and tires are usually safe too, provided the axle diameter matches the wheel hub. Decorative or themed pieces, such as the food pieces in a play set, are not structural at all and can be combined freely without affecting build strength.
The parts to keep paired are the ones that were matched at the factory for a specific load: a wheel with its axle, or a gear with its shaft. Swapping those between sets can introduce wobble that is hard to diagnose later. If you do swap them, test the assembly under a light push before adding more weight.
- Swap beams, plates and brackets freely; keep gears and wheel-axle pairs together where possible.
- A wobbly wheel is usually a mismatched axle, not a bent frame.
How to test-fit a cross-set connection
Pick the single joint that carries the most load in your planned build and assemble it first, on its own, before the rest of the model exists. Tighten it fully, then try to rotate or wiggle the parts by hand. A good joint holds firm with no visible gap and no creaking. A bad joint either stays loose no matter how much you tighten, or feels gritty as the screw turns.
If the test joint fails, change one variable at a time: a different screw length, then a different nut, then a different bracket. Changing everything at once makes it impossible to know which part was wrong. Once one joint passes, the same combination will usually pass everywhere else in the build.
- Test the highest-load joint first, not the easiest one.
- Change one part at a time when a joint fails.
Keeping mixed parts organized after the build
Once you have proven a combination works, label it. A small piece of tape on a tray, or a zip bag with the set name written on it, saves you from re-testing the same combination next month. This matters most if you build with children, because parts migrate between boxes quickly and a mismatched screw usually ends up in the wrong tray.
Store fasteners by size rather than by set. Size-based storage makes cross-set building faster because you can reach for a screw length directly instead of hunting through three original boxes. Keep the original instructions with each set so you can still rebuild it as designed.
- Store by size, not by set, once you start mixing regularly.
- Keep original instructions even if the parts live in shared trays.
Safe mixing steps, in order
- Step 1: Sort every part by function and size: Empty both sets into separate trays and group screws, nuts, axles, brackets and wheels. Line up screws by length and nuts by diameter so mismatches are visible before you build. Checkpoint: you should be able to grab any screw and know its length class without measuring.
- Step 2: Verify screw and nut compatibility by hand: Thread a nut onto a candidate screw with your fingers only. It should turn smoothly for at least two full turns. If it grabs, squeaks or stops, that pair is wrong. Common mistake: using a tool to force the first turn, which cross-threads the nut.
- Step 3: Test axles in the destination frame: Slide each axle through the bearing holes of the frame you plan to use, not the frame it came from. A straight axle should pass with slight clearance and no binding. If it binds, use the axle from that frame instead of sanding or forcing.
- Step 4: Build and tighten one high-load joint first: Assemble the single joint that will carry the most weight, tighten it fully, then wiggle it by hand. It should hold firm with no gap and no gritty feel. Common mistake: building the whole model before discovering the weakest joint.
- Step 5: Change one variable at a time if the joint fails: Try a different screw length first, then a different nut, then a different bracket. Re-test after each single change so you know exactly which part caused the problem. Checkpoint: once one joint passes, the same combination will usually work across the build.
- Step 6: Label and store proven combinations by size: Bag or tape the combinations that passed, and move fasteners into size-based trays rather than keeping them in their original set boxes. Common mistake: mixing everything into one unlabeled box and re-testing every part next time.
Catalog facts worth knowing when you mix parts
- School building kit 1: Ideally suited as teaching material for craft lessons in primary school, suitable for group work with up to a maximum of 3 students per box, and up to 3 models can be built at the same time. This is the set most likely to be combined with others in a classroom, so check that group builds share one consistent screw and axle size before splitting parts across tables.
- Stacking game set - stacking tower - pastel: Made from high-quality beech wood, with a sturdy base and several smooth, colored rings of varying sizes that develop understanding of proportions and colors while training fine motor skills. Wooden play pieces like these are not part of the metal fastener system, so they can sit alongside an eitech build without any compatibility check at all.
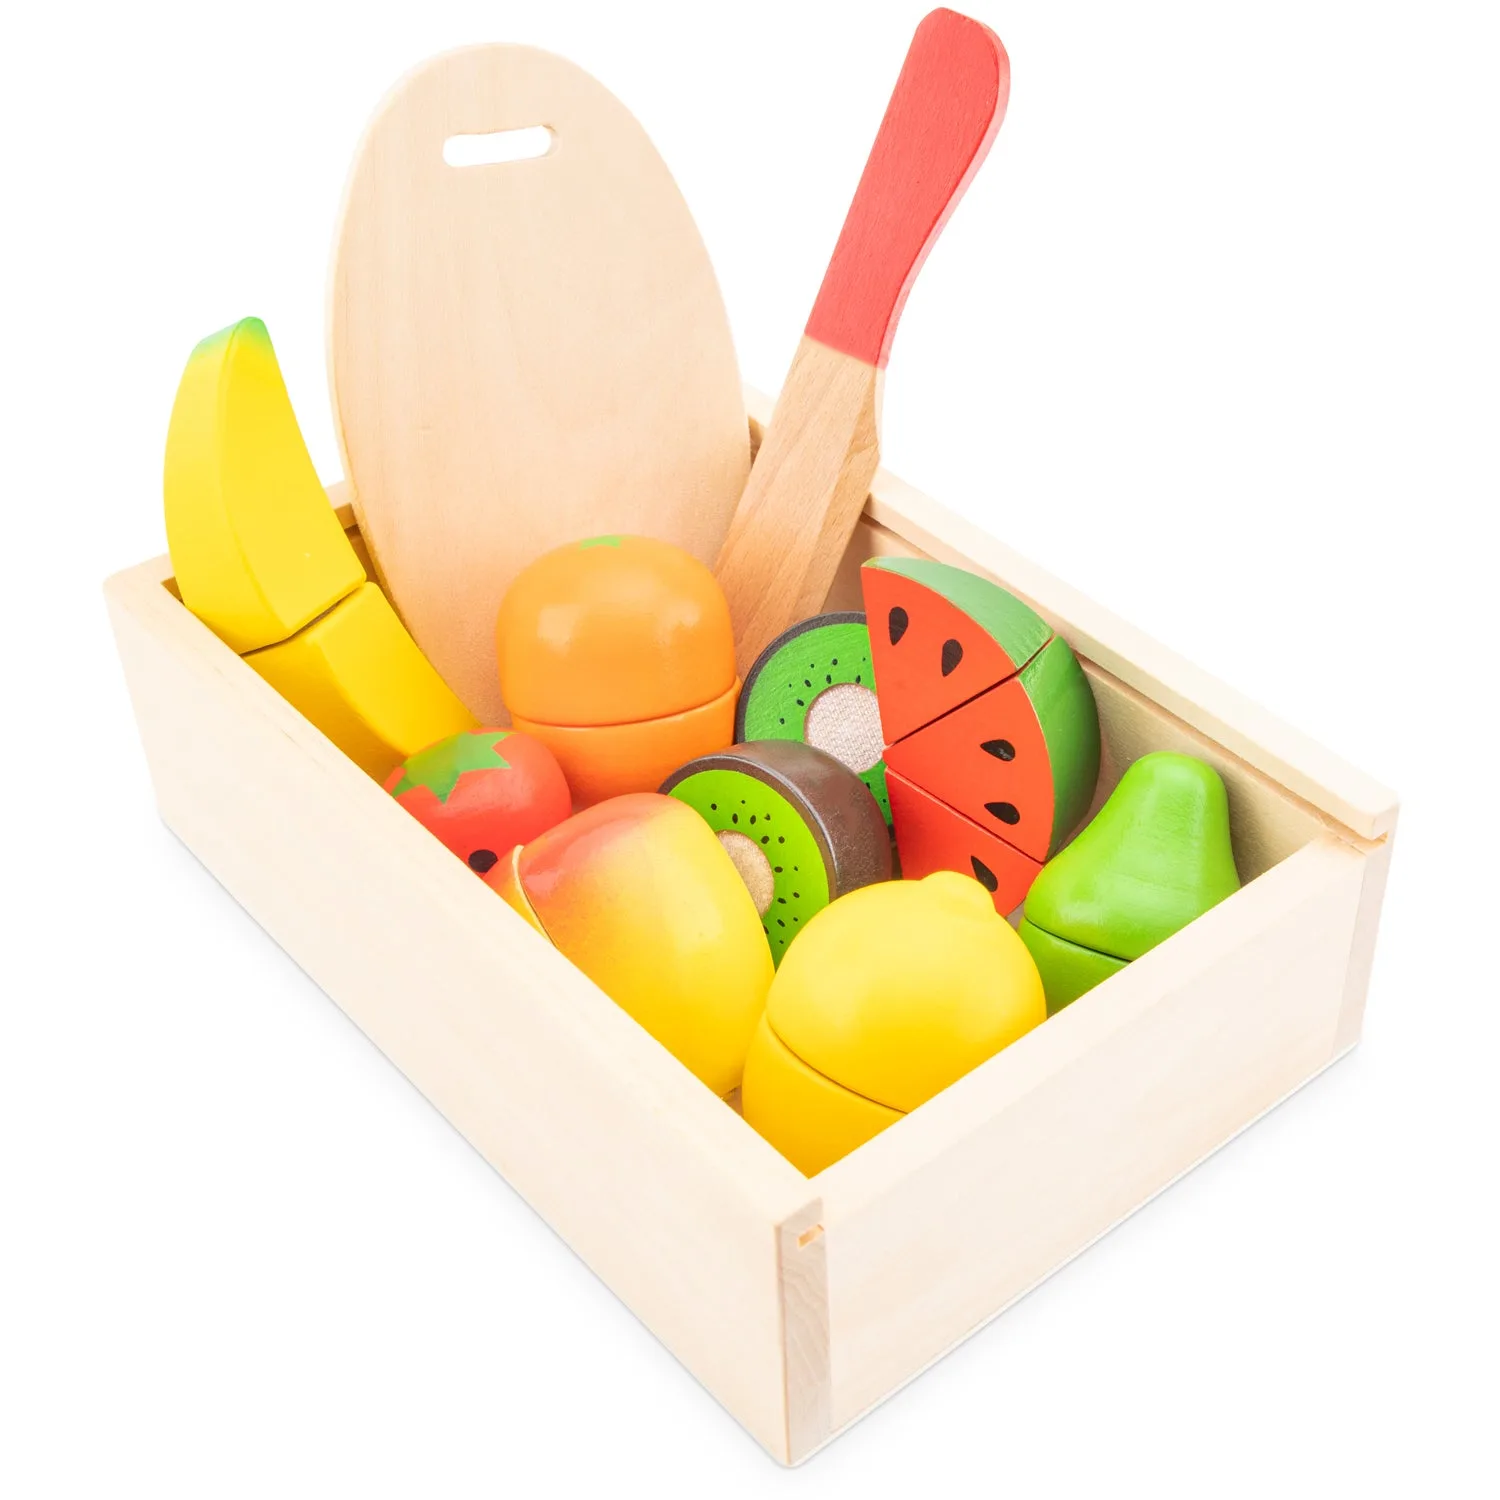
- Cutting set - fruits in wooden box: Comes with a cutting board and a fake (wooden) kitchen knife for cutting the food in half, and the pieces can be reassembled using the hook-and-loop fastener. Hook-and-loop play pieces have no screws or axles, so mixing them with construction parts is purely a matter of storage, not fit.
Mixing eitech parts across sets is safe when you check diameter and thread first, test one joint before building, and store proven combinations by size. Do those three things and cross-set building stops being a gamble and becomes the fastest way to expand what you can make.