Quick answer
Mount the detector high on the windshield, just below the rearview mirror and below the tint band, so the lens sits in the wiper sweep and the body stays out of your primary sightline. Use a bracket that lets the detector sit as close to the glass as possible, then aim it level and parallel to the road before tightening everything down.
A radar detector only helps if it can see the road and you can still see the road. Most bad installs fail one of those two tests: the detector sits too low and blocks the view, or it sits too high behind tint and loses sensitivity.
This guide walks through a windshield mount install in order, with the checkpoints that keep the install clean and legal. The same steps apply whether you are using a suction cup, a permanent adhesive bracket, or a RAM radar detector mount with a ball and socket base.
Pick the mounting location before you pick the hardware
Start by sitting in the driver's seat in your normal driving position. Look at the windshield and find the band where the wiper sweeps and where the glass is clear of tint, dots, and antenna lines. The detector needs a clear forward view through that band, and the body should sit below the rearview mirror so it does not add to the visual clutter in your primary sightline.
Check your state or province rules at the same time. Some places restrict windshield-mounted devices or require them to sit below a certain height, so confirm the legal zone before you commit to a spot. If windshield mounting is restricted, a dash or visor clip is the alternative, and the placement logic stays the same: clear view forward, out of your sightline.
- Sit in the driver's seat and mark the clear wiper-sweep zone with a piece of tape before mounting anything.
- Keep the detector body below the rearview mirror housing, not beside or above it.
- Check local rules on windshield obstructions before drilling, gluing, or clamping.
Choose a bracket that matches your windshield and your weight
Suction cups work well on smooth glass and are easy to move between vehicles, but they lose grip in heat and on dirty glass. Adhesive or permanent brackets hold better in hot climates but are harder to relocate. A ball and socket mount with a small base gives you the most adjustment, which matters when you are trying to keep the detector level and close to the glass.
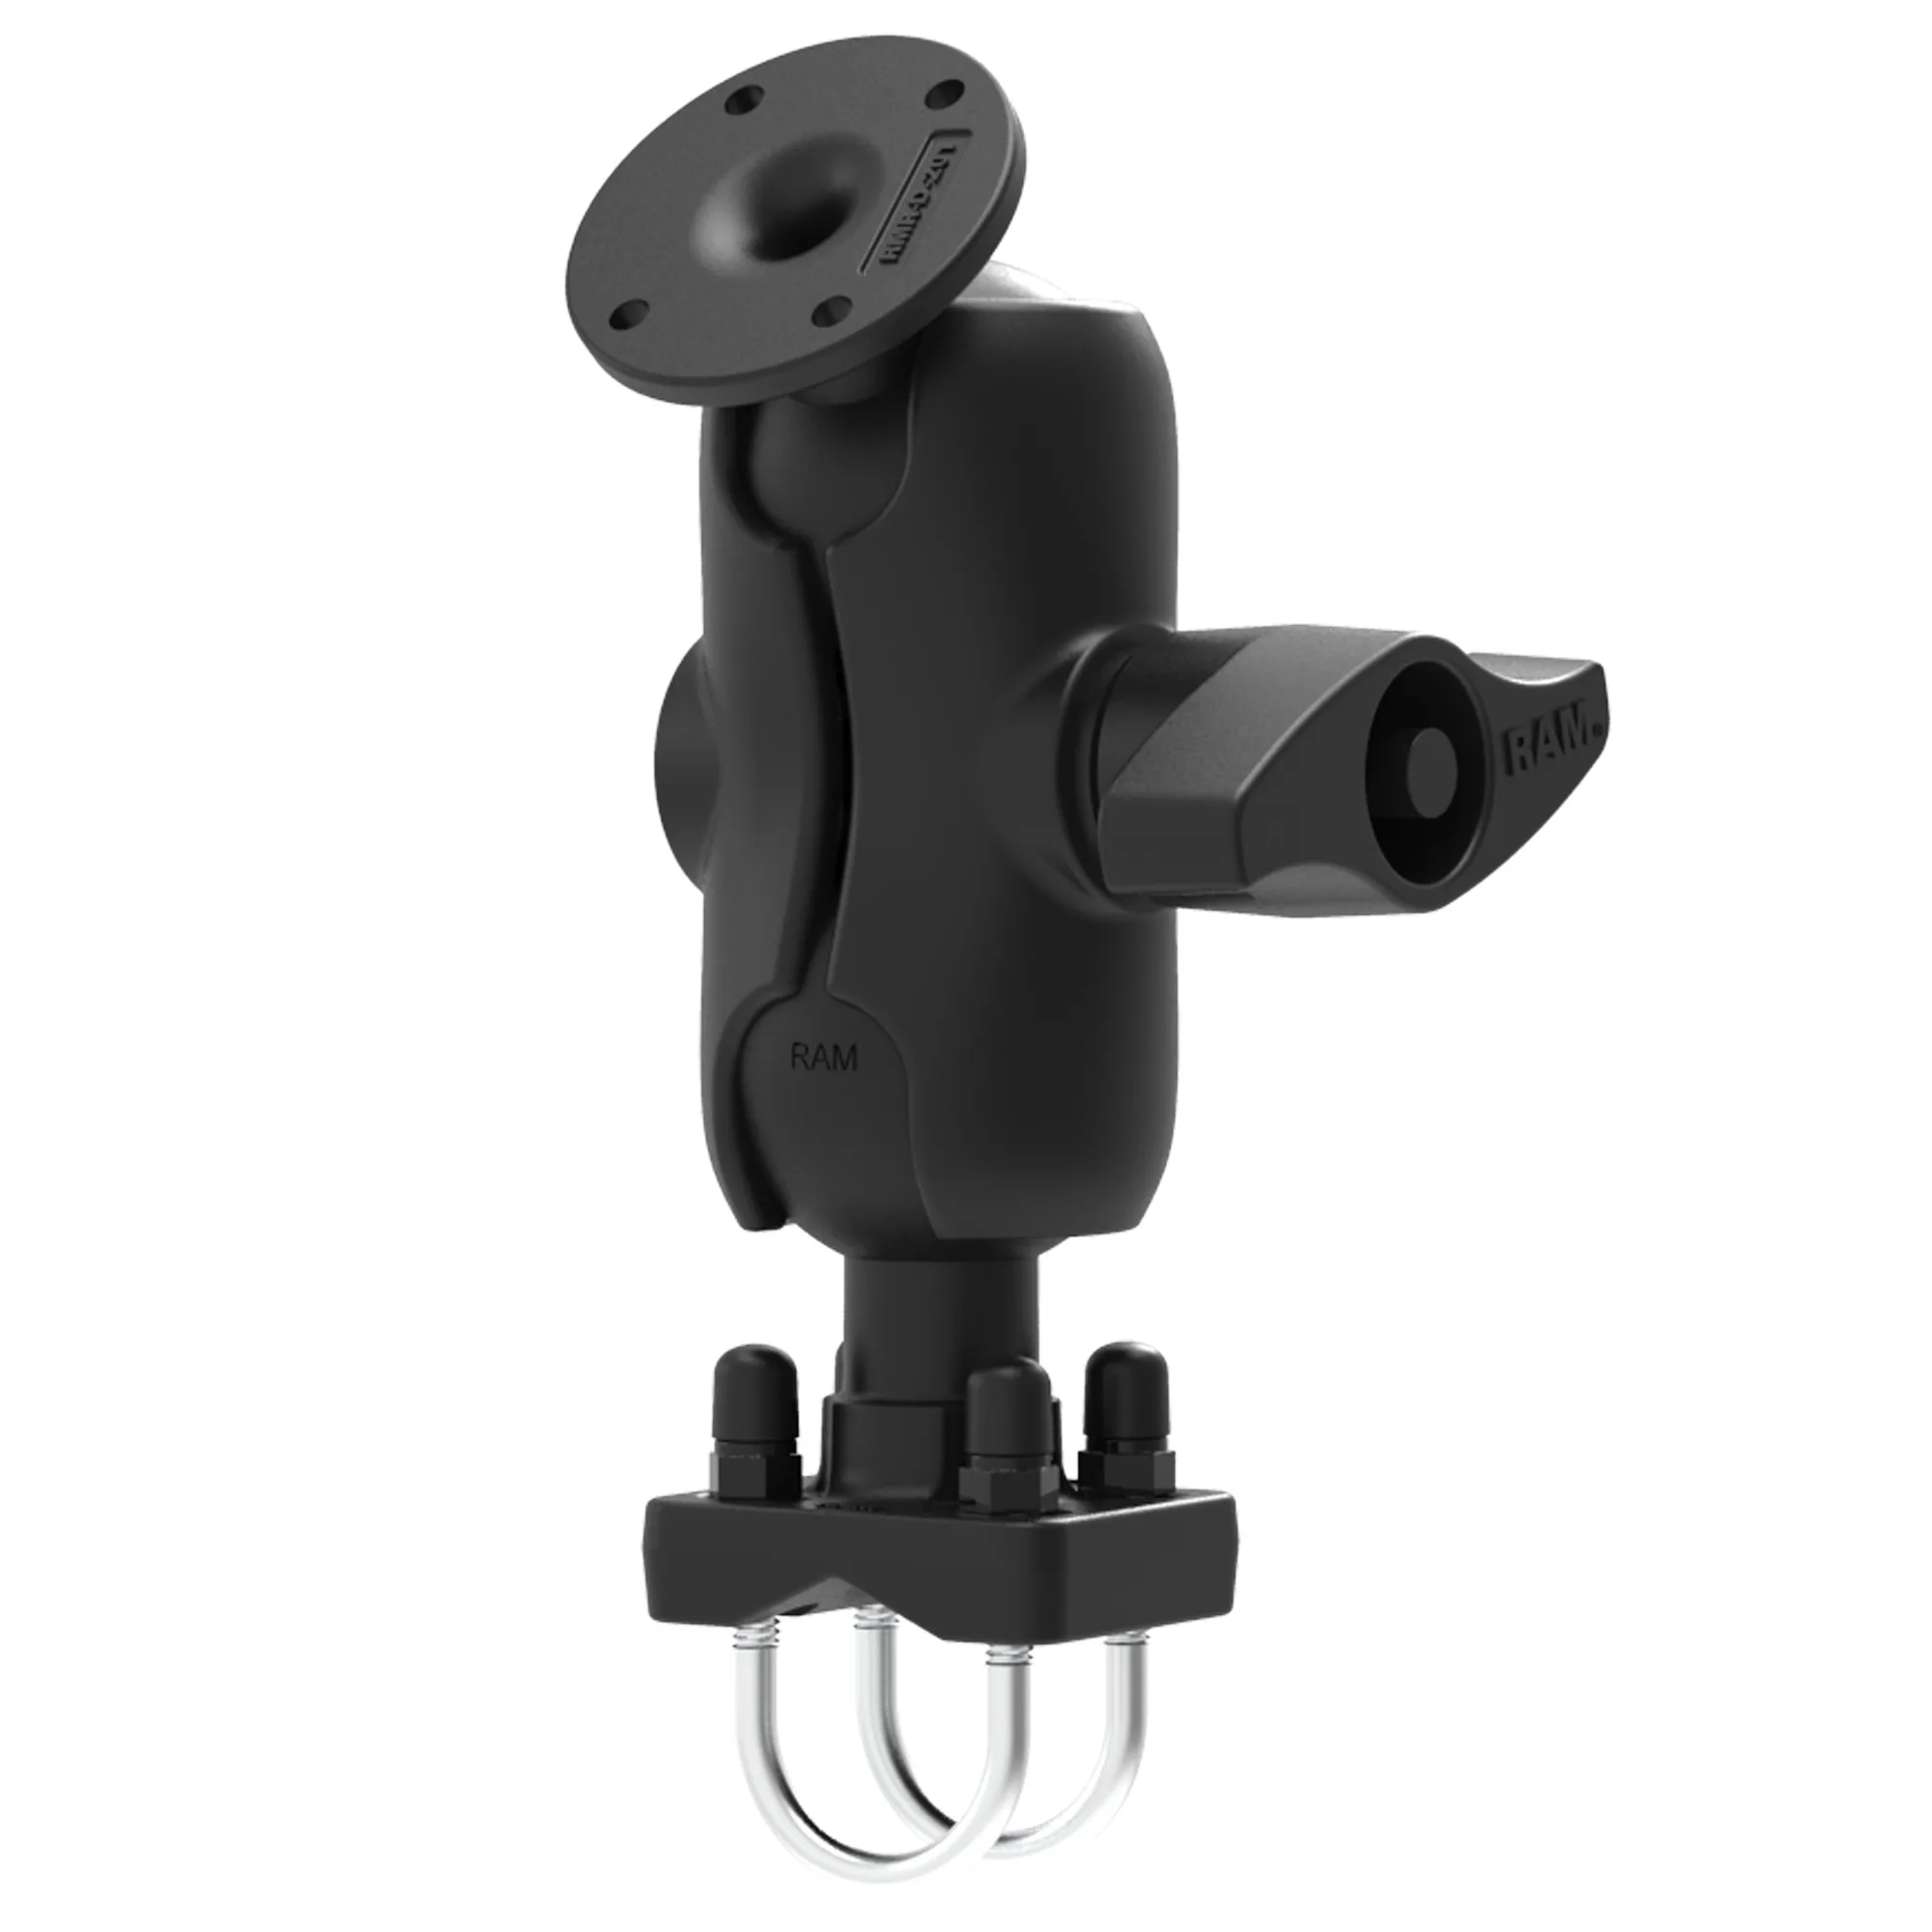
Weight is the deciding factor. A lightweight detector can ride on a small suction cup or a compact ball base. A heavier unit, or one with a remote display, needs a base with more surface area and a shorter arm so it does not sag or vibrate. If you are mounting to a rail or a bar instead of glass, a U-bolt rail base with a round AMPS plate gives you a solid anchor point and a standard bolt pattern for the detector cradle.
- Clean the glass with alcohol before applying any suction cup or adhesive pad.
- Use a short arm when possible; longer arms amplify vibration and droop.
- Match the base size to the detector weight rather than to the smallest bracket that fits.
Install the base, then set the angle before you tighten
Attach the base first and let it settle. For suction cups, press firmly and give the cup a few minutes to seat before hanging the detector. For adhesive or clamp bases, follow the cure time on the instructions. Then attach the arm and cradle loosely so you can still move the detector by hand.
Sit in the driver's seat again and aim the detector level and parallel to the road. A detector pointed at the hood or at the sky loses range. Once the angle looks right from your normal seating position, tighten the joint. Recheck the angle after tightening, because many ball joints shift slightly as they lock.
- Aim level and straight down the road, not angled toward the shoulder or the sky.
- Tighten the joint, then recheck the angle from the driver's seat.
- If the detector droops after a few days, the arm is too long or the joint is too small for the weight.
Route the cable so it does not cross your view
Power cables are the most common source of a blocked view. Run the cord along the headliner, down the A-pillar, and into a power source or fuse tap rather than letting it hang across the windshield. Leave a small service loop near the detector so you can adjust the angle without pulling the plug loose.
If you use a coiled cord, keep the coil tucked behind the mirror or along the pillar. A straight cord with a right-angle plug often looks cleaner and puts less strain on the detector's power port. Avoid running the cable through the wiper path, where it can snag or wear.
- Route the cable along the headliner and A-pillar, not across the glass.
- Leave a small loop at the detector so angle adjustments do not stress the plug.
- Keep the cord out of the wiper sweep to prevent snags and wear.
Test the install in real driving conditions
Take a short drive on a road with known false sources, such as automatic doors or speed signs. Watch for consistent alerts and check that the detector is not falsing because it is pointed at your own vehicle's lane-keeping camera or adaptive cruise sensor. If alerts seem short or inconsistent, the detector may be too low, too far from the glass, or angled off-axis.
Check the view from the passenger seat and from a normal seated position. You should be able to see the road clearly with the detector in your peripheral vision, not in the center of your view. If it blocks any part of your forward sightline, move it up, closer to the glass, or to the side of the mirror.
- Drive a familiar route and compare alert behavior to your previous setup.
- Check the sightline from the passenger seat, not just from the driver's seat.
- If the detector blocks any part of your forward view, relocate it before your next drive.
Install steps at a glance
- Mark the clear zone: Sit in your normal driving position and mark the wiper-sweep area below the rearview mirror where the glass is free of tint and dots. Checkpoint: the detector body should sit below the mirror, not beside it.
- Match the base to the weight: Choose a suction, adhesive, or clamp base sized for your detector, and keep the arm short to reduce vibration and droop. Checkpoint: if the detector sags after tightening, the base or arm is too small.
- Set the angle before locking: Attach the arm and cradle loosely, aim the detector level and parallel to the road from the driver's seat, then tighten the joint. Checkpoint: recheck the angle after tightening, because ball joints shift as they lock.
- Route the cable out of view: Run the cord along the headliner and A-pillar with a small service loop at the detector, and keep it clear of the wiper path. Checkpoint: no cable should cross your forward sightline.
- Test on a known route: Drive a familiar road and compare alert behavior to your previous setup, then check the sightline from the passenger seat. Checkpoint: if the detector blocks any part of your forward view, relocate it before your next drive.
Mounting hardware that fits this job
- RAM® Double U-Bolt Rail Mount with Round AMPS Plate: The RAM® Double U-Bolt Rail Mount with Round AMPS Plate is a complete mounting kit designed to attach to rails and hold a device via a round AMPS plate, and it includes a short arm. If your vehicle has a rail or bar instead of a clean windshield area, this gives you a solid anchor and a standard AMPS bolt pattern for a detector cradle without adding a long, vibrating arm.
- RAM® Universal Forklift Post Mount with Round Plate & Accessory Option: The RAM® Universal Forklift Post Mount with Round Plate & Accessory Option is designed to secure tablets and one additional accessory, such as a keyboard, to forklifts, and it includes a steel reinforced square clamp base and a D size AMPS plate with ball. This shows the same clamp-and-plate approach used in industrial vehicles, which is useful if you are adapting a detector or accessory mount to a post or bar rather than glass.
A good radar detector mount install comes down to three things: a clear view forward for the detector, a clear view forward for you, and a bracket that holds the angle you set. Start with the location, match the base to the weight, and test on a road you know before you trust it.