Quick answer
Paint your dark age archers in small batches, finishing the bow and quiver before the body, then base the whole unit on consistent 25mm round bases with a simple earth-and-tuft finish. This keeps the unit visually coherent and table-ready without overworking each figure.
Why archers reward a different painting order
Archers carry more thin, awkward shapes than spearmen or swordsmen: the bow stave crosses the torso, the quiver sits at the hip or back, and the drawing hand often obscures part of the chest. If you paint the body first, you will keep knocking the bow or struggling to reach the chest behind it.
Painting the bow and quiver separately before attaching them, or at least before final highlighting, lets you keep the wood grain and fletching crisp. It also means you can paint a dozen bows in one sitting while the bodies dry.
Basing decisions that affect the whole unit
Most dark ages wargames use 25mm round bases for infantry, but check your ruleset before you glue anything. Archer units often look best when the front rank is slightly staggered, with a few figures turned to suggest a shooting line.
Avoid mixing base sizes within the same unit. If you plan to use the archers as skirmishers in one game and ranked infantry in another, agree on a single base size with your opponent first. The figures are 28mm plastic, so a 25mm round base gives a stable footprint without crowding the bow.
Step-by-step painting and basing process
- Clean and assemble in sub-assemblies: Remove mould lines from the bow, quiver and hands before gluing. Leave the bow arm and quiver off the body if you can, or blu-tack them in place for painting. Common mistake: gluing the bow across the chest before painting, which makes the chest and belt almost impossible to reach. Check that every bow arm can be removed or rotated before you prime.
- Prime in a thin coat: Use a light grey or white primer so that skin tones and linen tunics stay bright. Spray in short bursts from 20–30 cm and rotate the figure. Common mistake: over-priming until the fine detail on the hands and bowstring disappears. If detail looks soft, strip and re-prime rather than adding more paint.
- Block in the body and clothing: Paint the tunic, trousers and shoes in flat colours, then add the belt and any leather straps. Keep the palette limited to two or three earth tones per figure so the unit looks like a levied force rather than a uniformed army. Common mistake: painting each figure in a completely different scheme, which makes the unit look scattered on the table. Repeat one tunic colour across at least three figures to tie the unit together.
- Paint the bow and quiver before final assembly: Coat the bow stave in a mid-brown, then add a lighter brown highlight along the upper edge. Paint the quiver in a darker leather tone and pick out the fletching in two or three muted colours. Common mistake: painting the bow and quiver the same brown as the tunic, so they disappear against the body. Hold the bow against the figure before gluing to check the contrast.
- Paint skin and hands last: Use a simple base, shade and highlight on the face and hands. Keep the eyes minimal: a dark line and a tiny light dot is enough at table distance. Common mistake: painting large white eyes that make the archers look startled rather than focused. If the face looks wrong, repaint the skin base and start again before adding eyes.
- Attach the bow and quiver: Glue the painted bow arm and quiver into place with a small amount of superglue or plastic glue. Hold each part for ten seconds and check that the bow does not cross another figure’s base. Common mistake: using too much glue, which squeezes out onto the painted hands. Dry-fit the whole unit on its bases before the glue sets.
- Base the unit consistently: Glue each archer to a 25mm round base, then texture the base with fine sand or textured paste. Paint the base rim a single earth colour across the whole unit. Add two or three static grass tufts per base, avoiding the area directly in front of the bow. Common mistake: mixing base rim colours within the same unit, which breaks visual cohesion. Base the whole unit in one session so the texture and tufts match.
Product facts
-
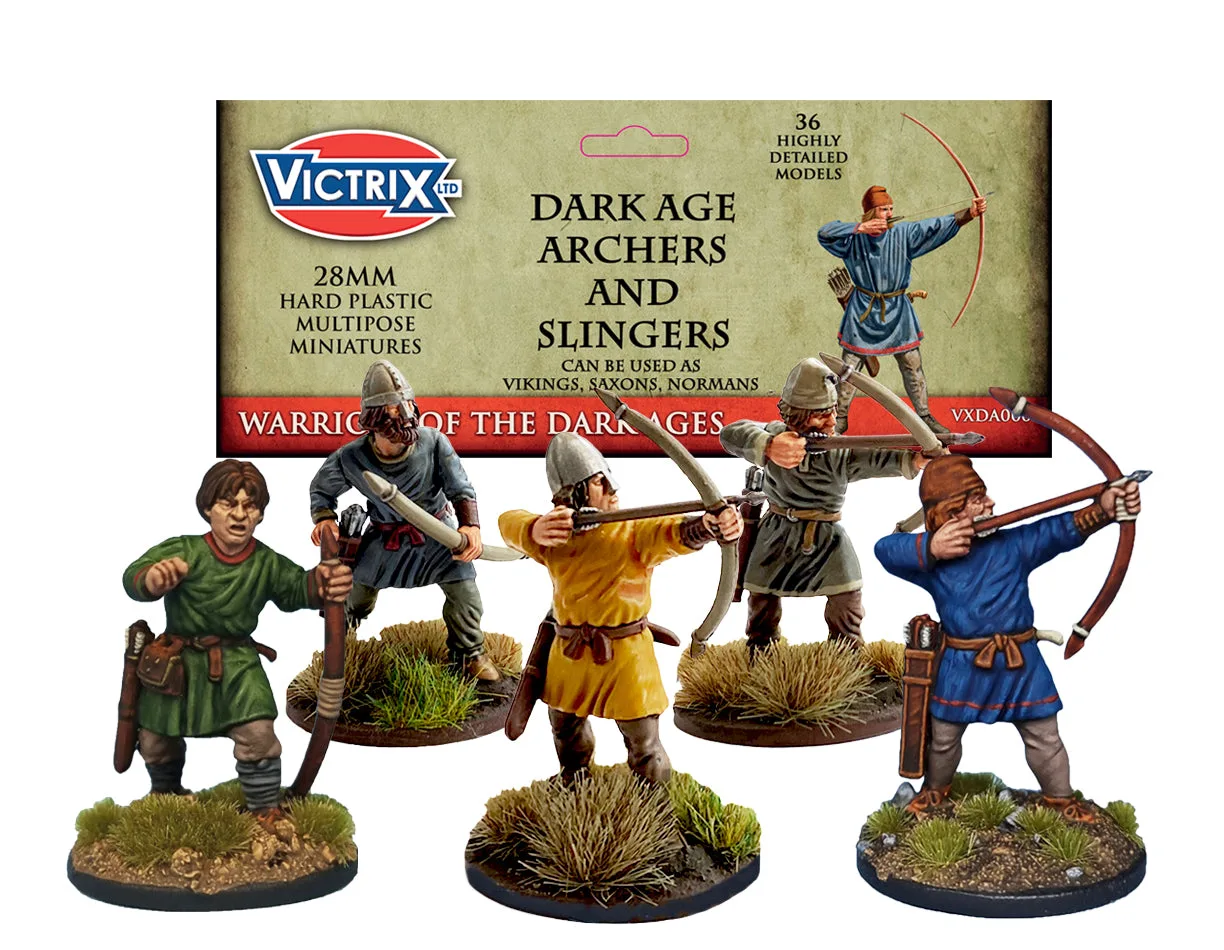
Dark Age Archers: The Dark Age Archers set includes 36 highly detailed 28mm plastic figures: 24 archers and 12 slingers, plus daggers and axes for light infantry conversions. You can build a full archer unit and a small slinger screen from one box, so plan your painting batches around both weapon types.
Dark Age Archers