Quick answer
Shoot dice in soft, diffused daylight near a window, place the camera slightly above the dice so the top faces and inked numbers stay readable, and use a plain background that contrasts with the resin. A phone camera plus a white foam board and a second board as a bounce card is enough to produce clean dice photos for Instagram without buying a lighting kit.
Dice are small, shiny, and full of fine detail, which is exactly why they are hard to photograph well. A phone flash flattens the colors, a dark tabletop swallows the edges, and the numbers that make a set readable disappear into glare. The fix is not expensive gear; it is a repeatable setup you can rebuild in five minutes on any table.
This guide walks through a full shoot from setup to export, with checkpoints for the mistakes that ruin most dice photos. The same process works for a single polyhedral set or a full collection, and it keeps resin dice photography honest: the goal is a photo that looks like the dice in your hand, not a photo that looks like a different product.
Set up a small, controlled shooting space
You do not need a studio. Clear a table near a window that gets indirect daylight, and avoid direct sun because hard light creates blown-out highlights on glossy resin. Tape a sheet of white foam board to a wall or a box behind the dice so it curves down onto the table as a seamless backdrop, then place a second white board opposite the window to bounce light back into the shadow side.
Keep the space small and consistent. A 60 cm by 60 cm area is plenty for a 7-piece set, and a fixed spot means you can compare shots across multiple sets without relearning the light. If you shoot at night, use two diffused lamps at roughly 45 degrees instead of one overhead light, which flattens the dice.
- Checkpoint: if you can see a sharp reflection of a window frame or lamp bulb on a die face, soften or move the light before shooting.
- Mistake to avoid: shooting on a glass table, which doubles reflections and makes the dice look like they are floating.
Arrange the dice so the numbers and finish read clearly
How you place the dice matters more than the camera. For a full 7-piece set, fan the dice in a shallow arc with the D20 in front and slightly turned so its top face and one side face are both visible. Turn each die so the highest number faces the camera when possible; a D20 showing 20 is a stronger photo than one showing 3, and readers notice.
Leave a little space between dice so shadows do not merge into one dark blob, and avoid stacking unless you are deliberately showing a set. If you are photographing a collection, group by color family or by set rather than scattering everything, because a chaotic pile reads as clutter at thumbnail size.
- Checkpoint: zoom out on your phone until the whole arrangement fits with margin, then step closer only if the numbers are still readable.
- Mistake to avoid: rotating dice after you have focused, which shifts the focal point and softens the numbers.
Choose a background that flatters the resin
Contrast is the whole game. Deep blue or black dice disappear on a black cloth, and pale translucent dice vanish on white. Match the background to the dominant color of the set: a mid-gray or warm neutral works for almost everything, a dark slate makes gold and red inking pop, and a soft pastel suits clear or pale resin. Textured fabric and matte paper beat glossy surfaces because they scatter light instead of reflecting it.
If you want a styled shot, add one prop only. A dice tray, a character sheet, or a candle gives context without competing with the dice. More than one prop usually pulls attention away from the set you are trying to show.
- Checkpoint: squint at the frame. If the background is the first thing you notice, change it.
- Mistake to avoid: using a busy patterned surface under small dice, which hides the edges of the shapes.
Use a phone camera like a macro lens
Most modern phones shoot dice well if you respect two limits: focus distance and depth of field. Move the phone close, then tap the screen on the front die to lock focus, and if your camera app has a macro or close-focus mode, use it. Shoot at the phone's native focal length rather than zooming, because digital zoom softens the inked numbers.
Hold the phone slightly above the dice, around 30 to 45 degrees, so you see the top faces and a hint of the sides. A straight-down overhead shot works for flat lays but hides the depth of sharp-edged dice, while a very low angle makes the dice look like towers. Steady the phone against a book or use a small tripod if your hands shake.
- Checkpoint: tap to focus, then take three frames at slightly different distances and pick the sharpest.
- Mistake to avoid: using the flash, which creates a hot spot on glossy resin and washes out inking.
Edit for accuracy, not for drama
A few small adjustments are enough: lift shadows slightly so the dark sides of the dice keep detail, reduce highlights to recover glare, and nudge contrast. Avoid heavy saturation or color grading, because it changes the color of the resin and misleads anyone who might buy the same set. If you sell or trade dice, accurate color is the whole point of the photo.
Crop tight enough that the dice fill most of the frame, straighten the horizon if you shot at an angle, and export at the resolution your platform prefers. Instagram favors vertical 4:5 or square crops for feed posts, so shoot with a little extra room and crop later rather than composing perfectly in camera.
- Checkpoint: compare the edited photo side by side with the dice in your hand under the same light.
- Mistake to avoid: sharpening aggressively, which creates halos around the numbers and edges.
Your dice photo shoot, step by step
- Step 1: Build the light: Set up near a window with indirect daylight, curve a white foam board into a seamless backdrop, and place a second board opposite the window as a bounce card. Checkpoint: no sharp reflections of windows or bulbs on any die face.
- Step 2: Stage the set: Fan the dice in a shallow arc with the D20 in front, turn high numbers toward the camera, and leave small gaps so shadows do not merge. Checkpoint: every die is fully visible and at least one number per die is readable.
- Step 3: Pick a contrasting background: Choose a matte mid-gray, warm neutral, or dark slate surface based on the dominant resin color, and add at most one prop for context. Checkpoint: the dice, not the background, are the first thing you notice.
- Step 4: Focus and frame: Move close, tap to lock focus on the front die, shoot at native focal length from about 30 to 45 degrees above the dice, and take three frames at slightly different distances. Checkpoint: the inked numbers are sharp at 100 percent zoom.
- Step 5: Edit for accuracy: Lift shadows, reduce highlights, add light contrast, and crop to a vertical or square format without heavy saturation or sharpening. Checkpoint: the edited photo matches the dice in your hand under the same light.
Dice that photograph well and why
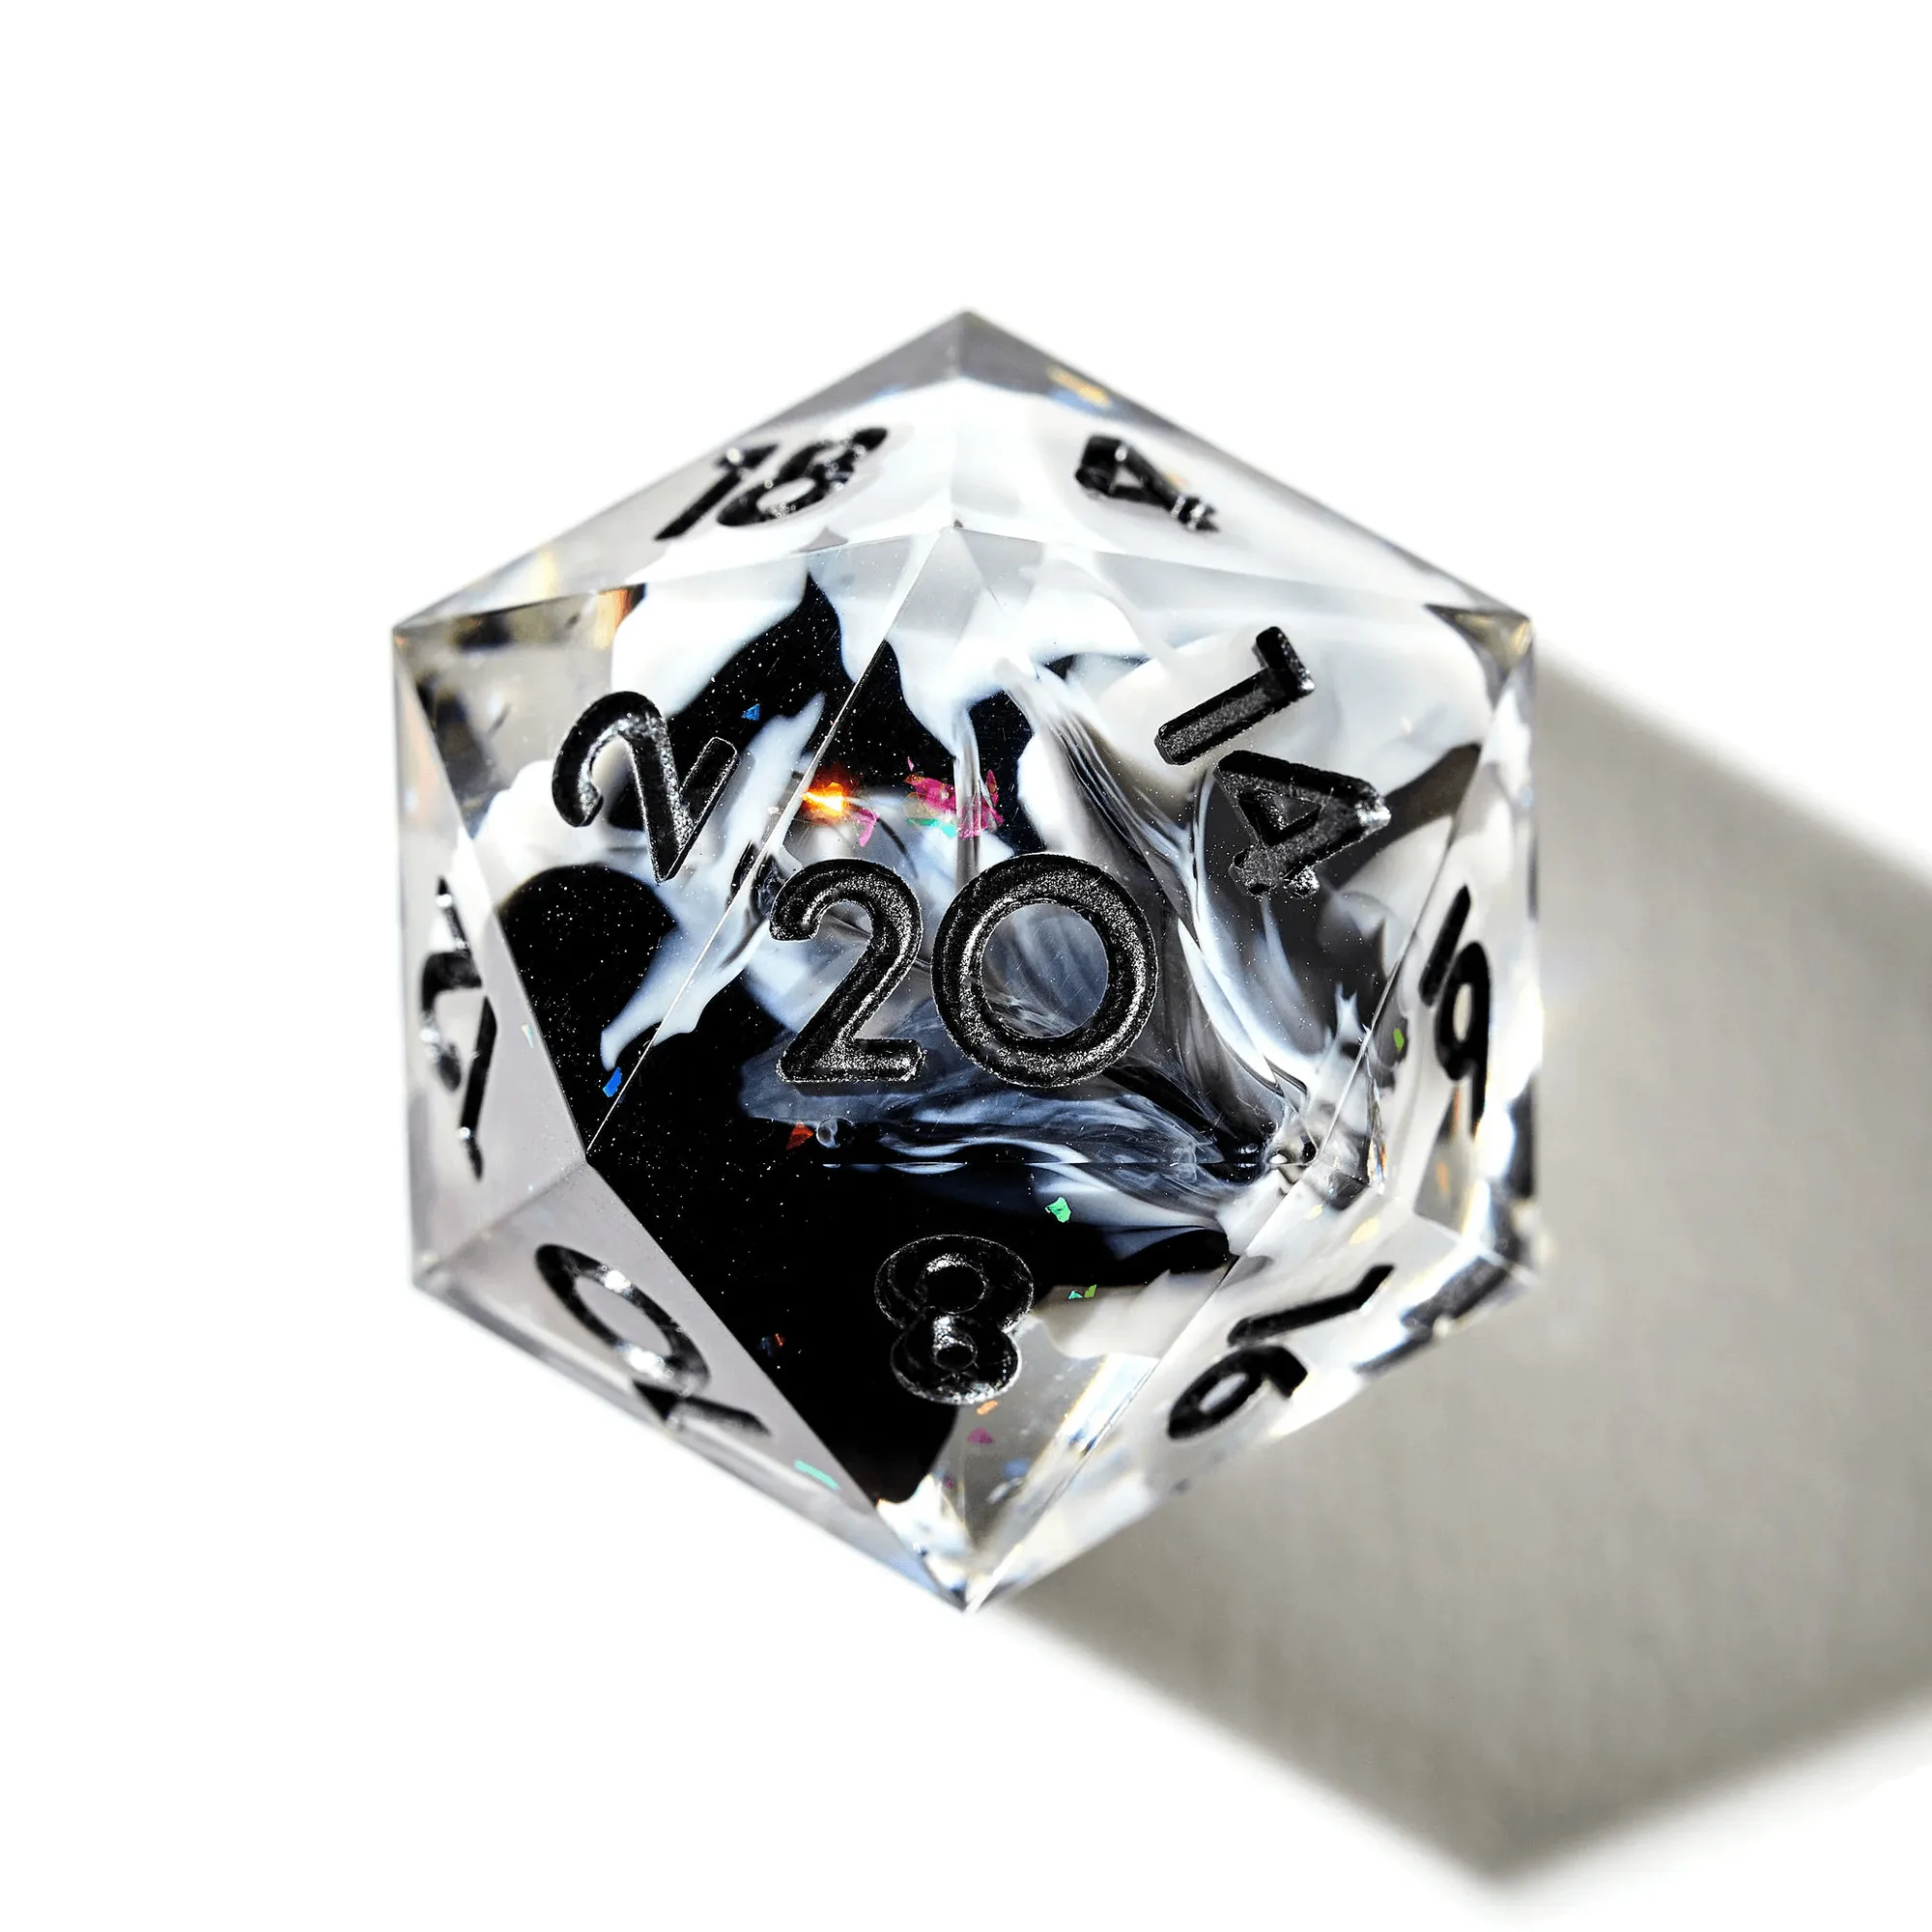
- Alien Worlds 7-Piece Terraform Dice Set: Clear resin shell encasing a unique white landscape within, with splashes of black resin for contrast and black-inked numbers. The internal landscape gives you something to focus on inside the die, so a close macro shot rewards you with detail that a plain resin set cannot offer. Black inking also stays readable against a light background.
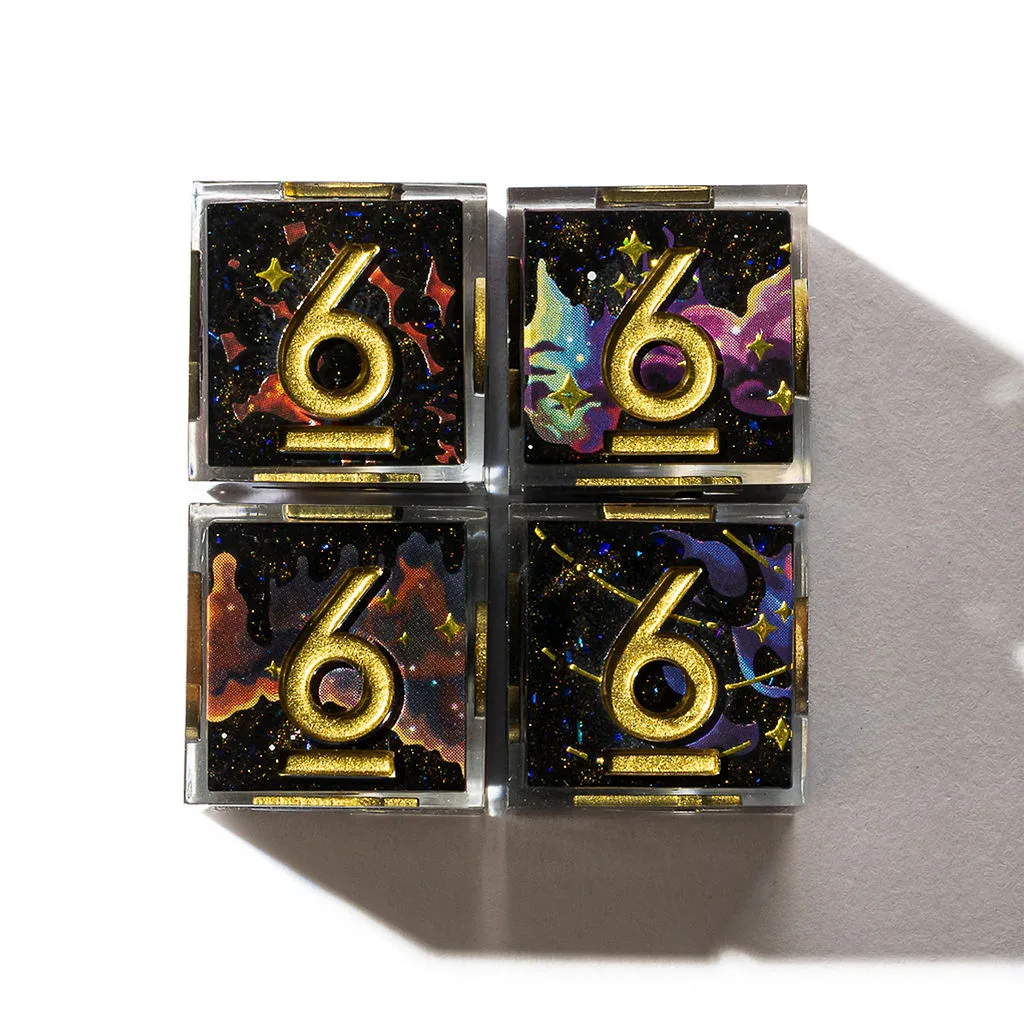
- Cosmic Storm 4-Piece D6 Dice Set: Space-black resin base with red and black cosmic decals on each face and gold-inked numbers. Gold inking on a dark base is one of the easiest combinations to light, but it also means a dark background will erase the dice. Pair this set with a mid-gray or warm neutral surface so the gold numbers carry the photo.
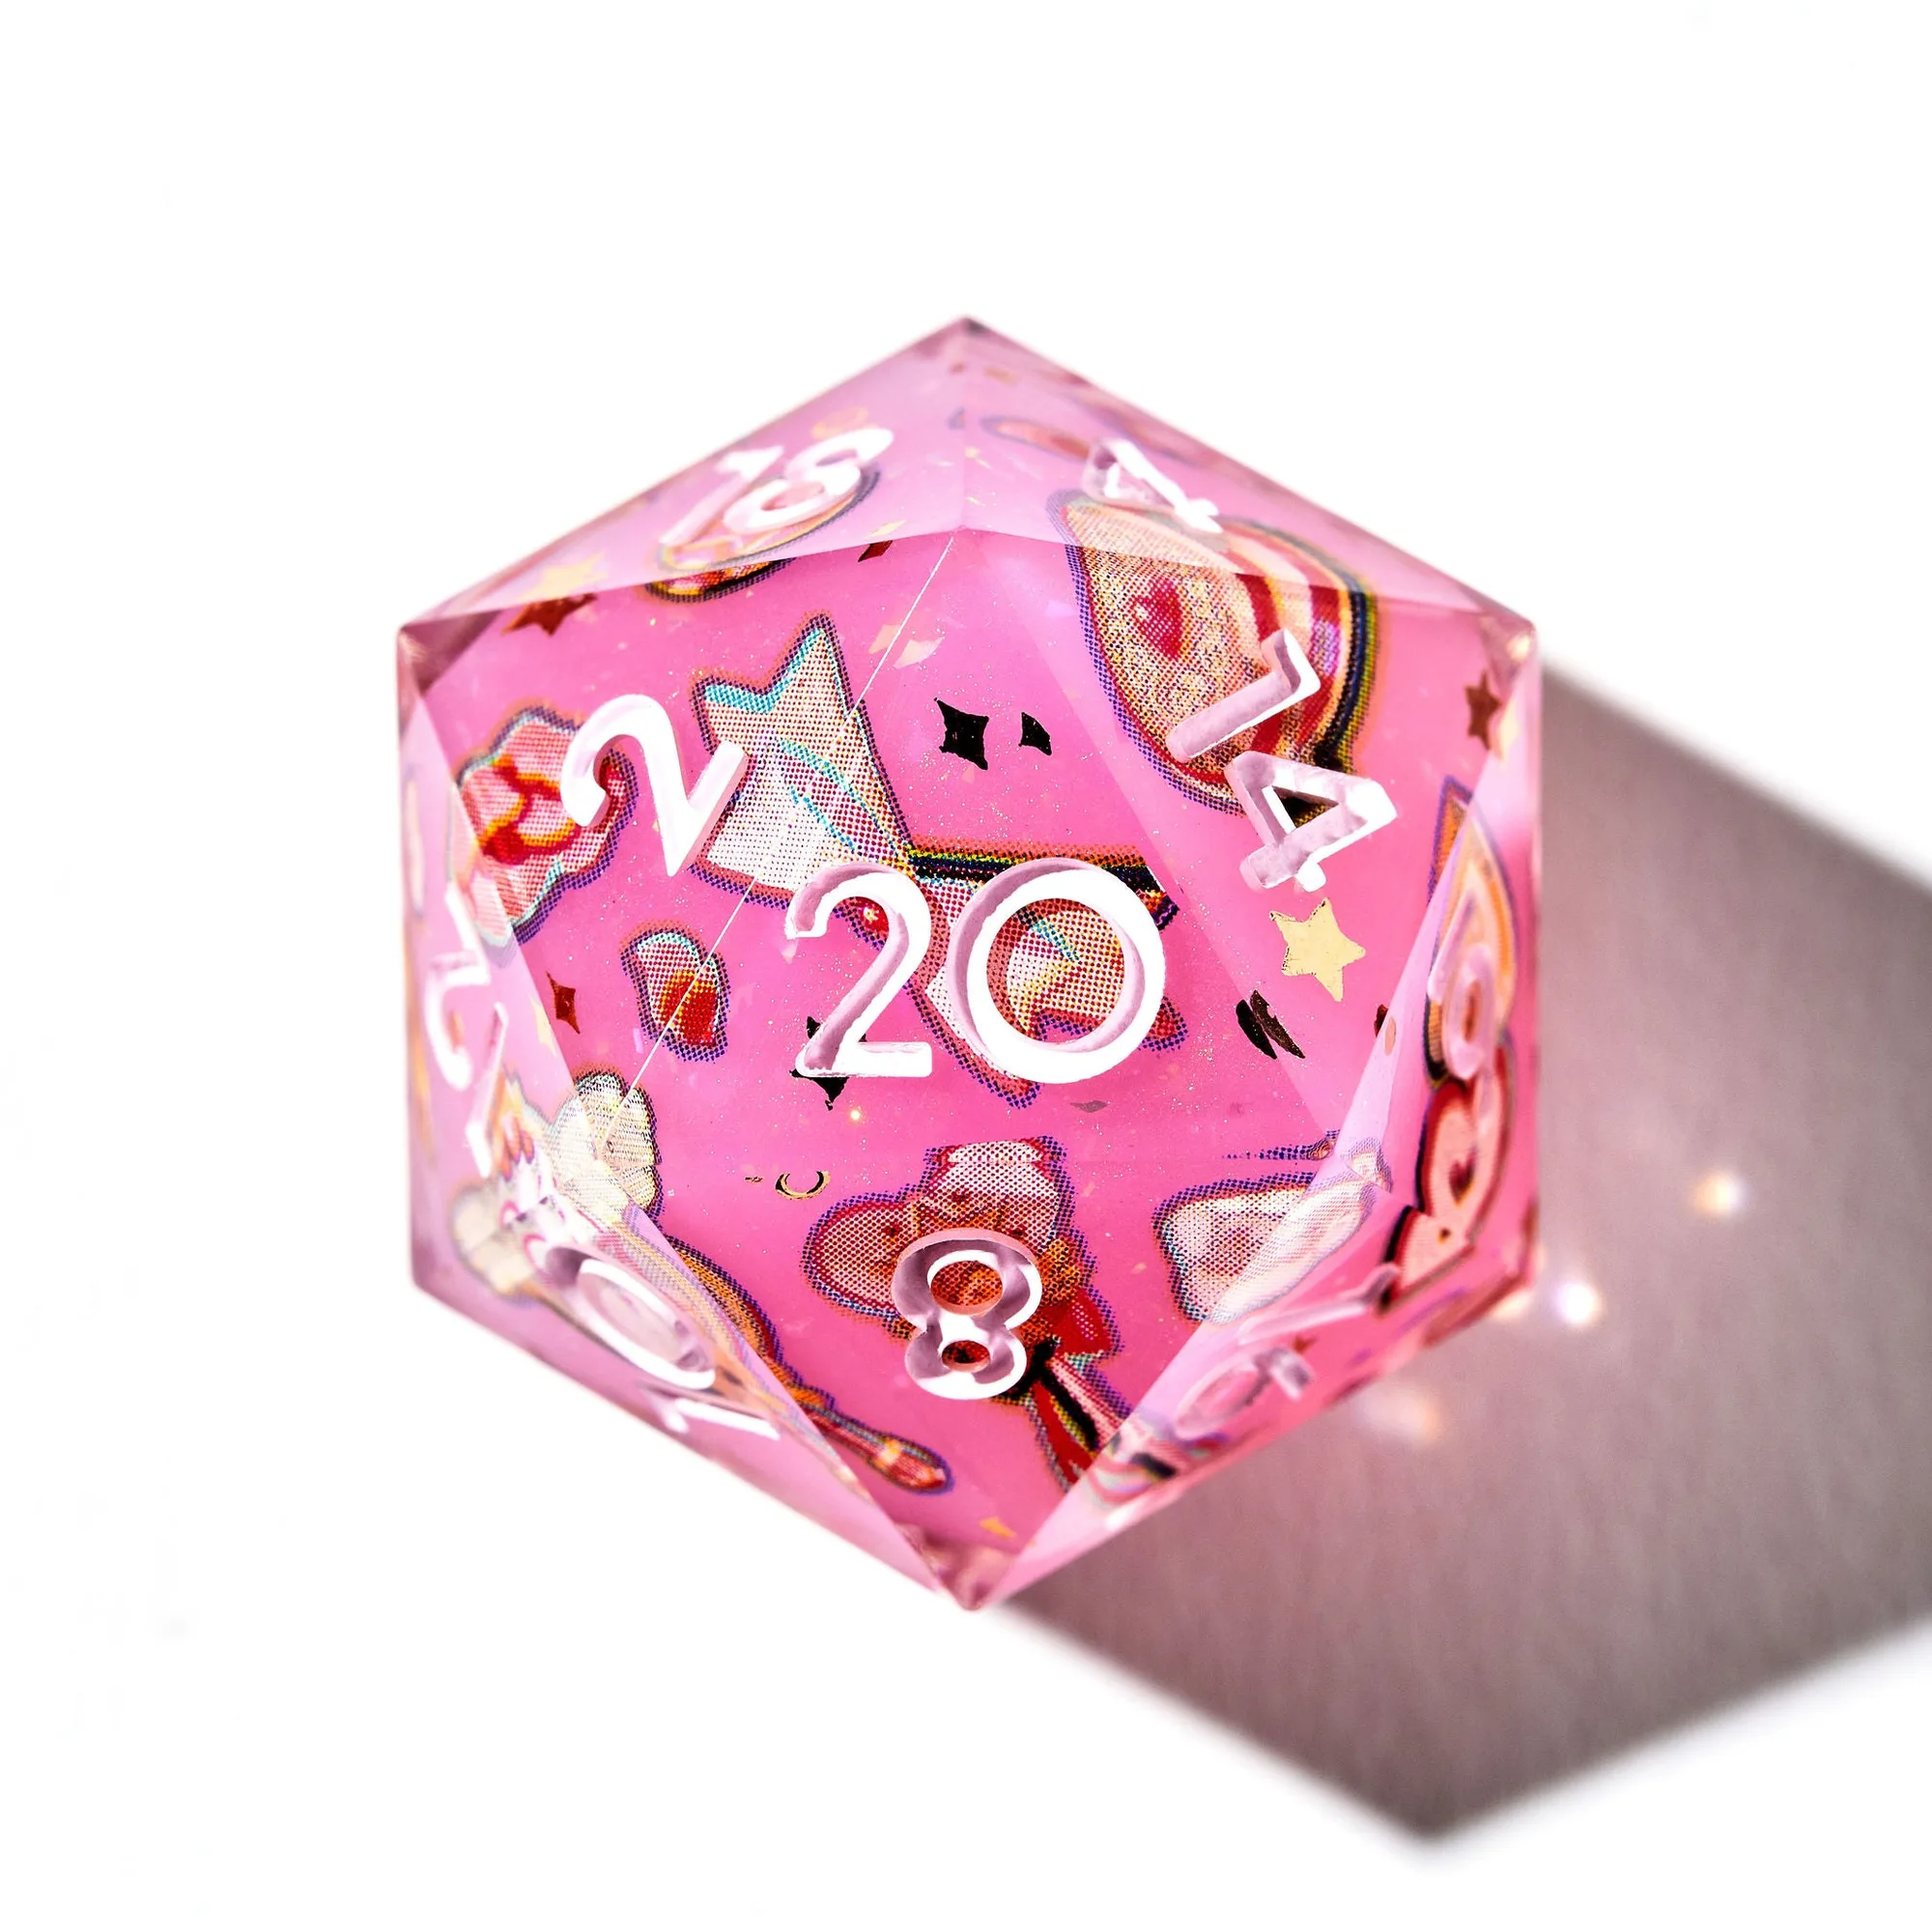
- Magical Girl Iconic 7-Piece Dice Set: Sharp-edged RPG dice set inspired by traditional anime in the mahō shōjo subgenre, with one D4, D6, D8, D10, D%, D12, and D20. Sharp edges catch light along the corners, which makes the dice look crisp in photos, but those same edges also create hard highlights. Soft, diffused light keeps the edges defined without blowing them out.
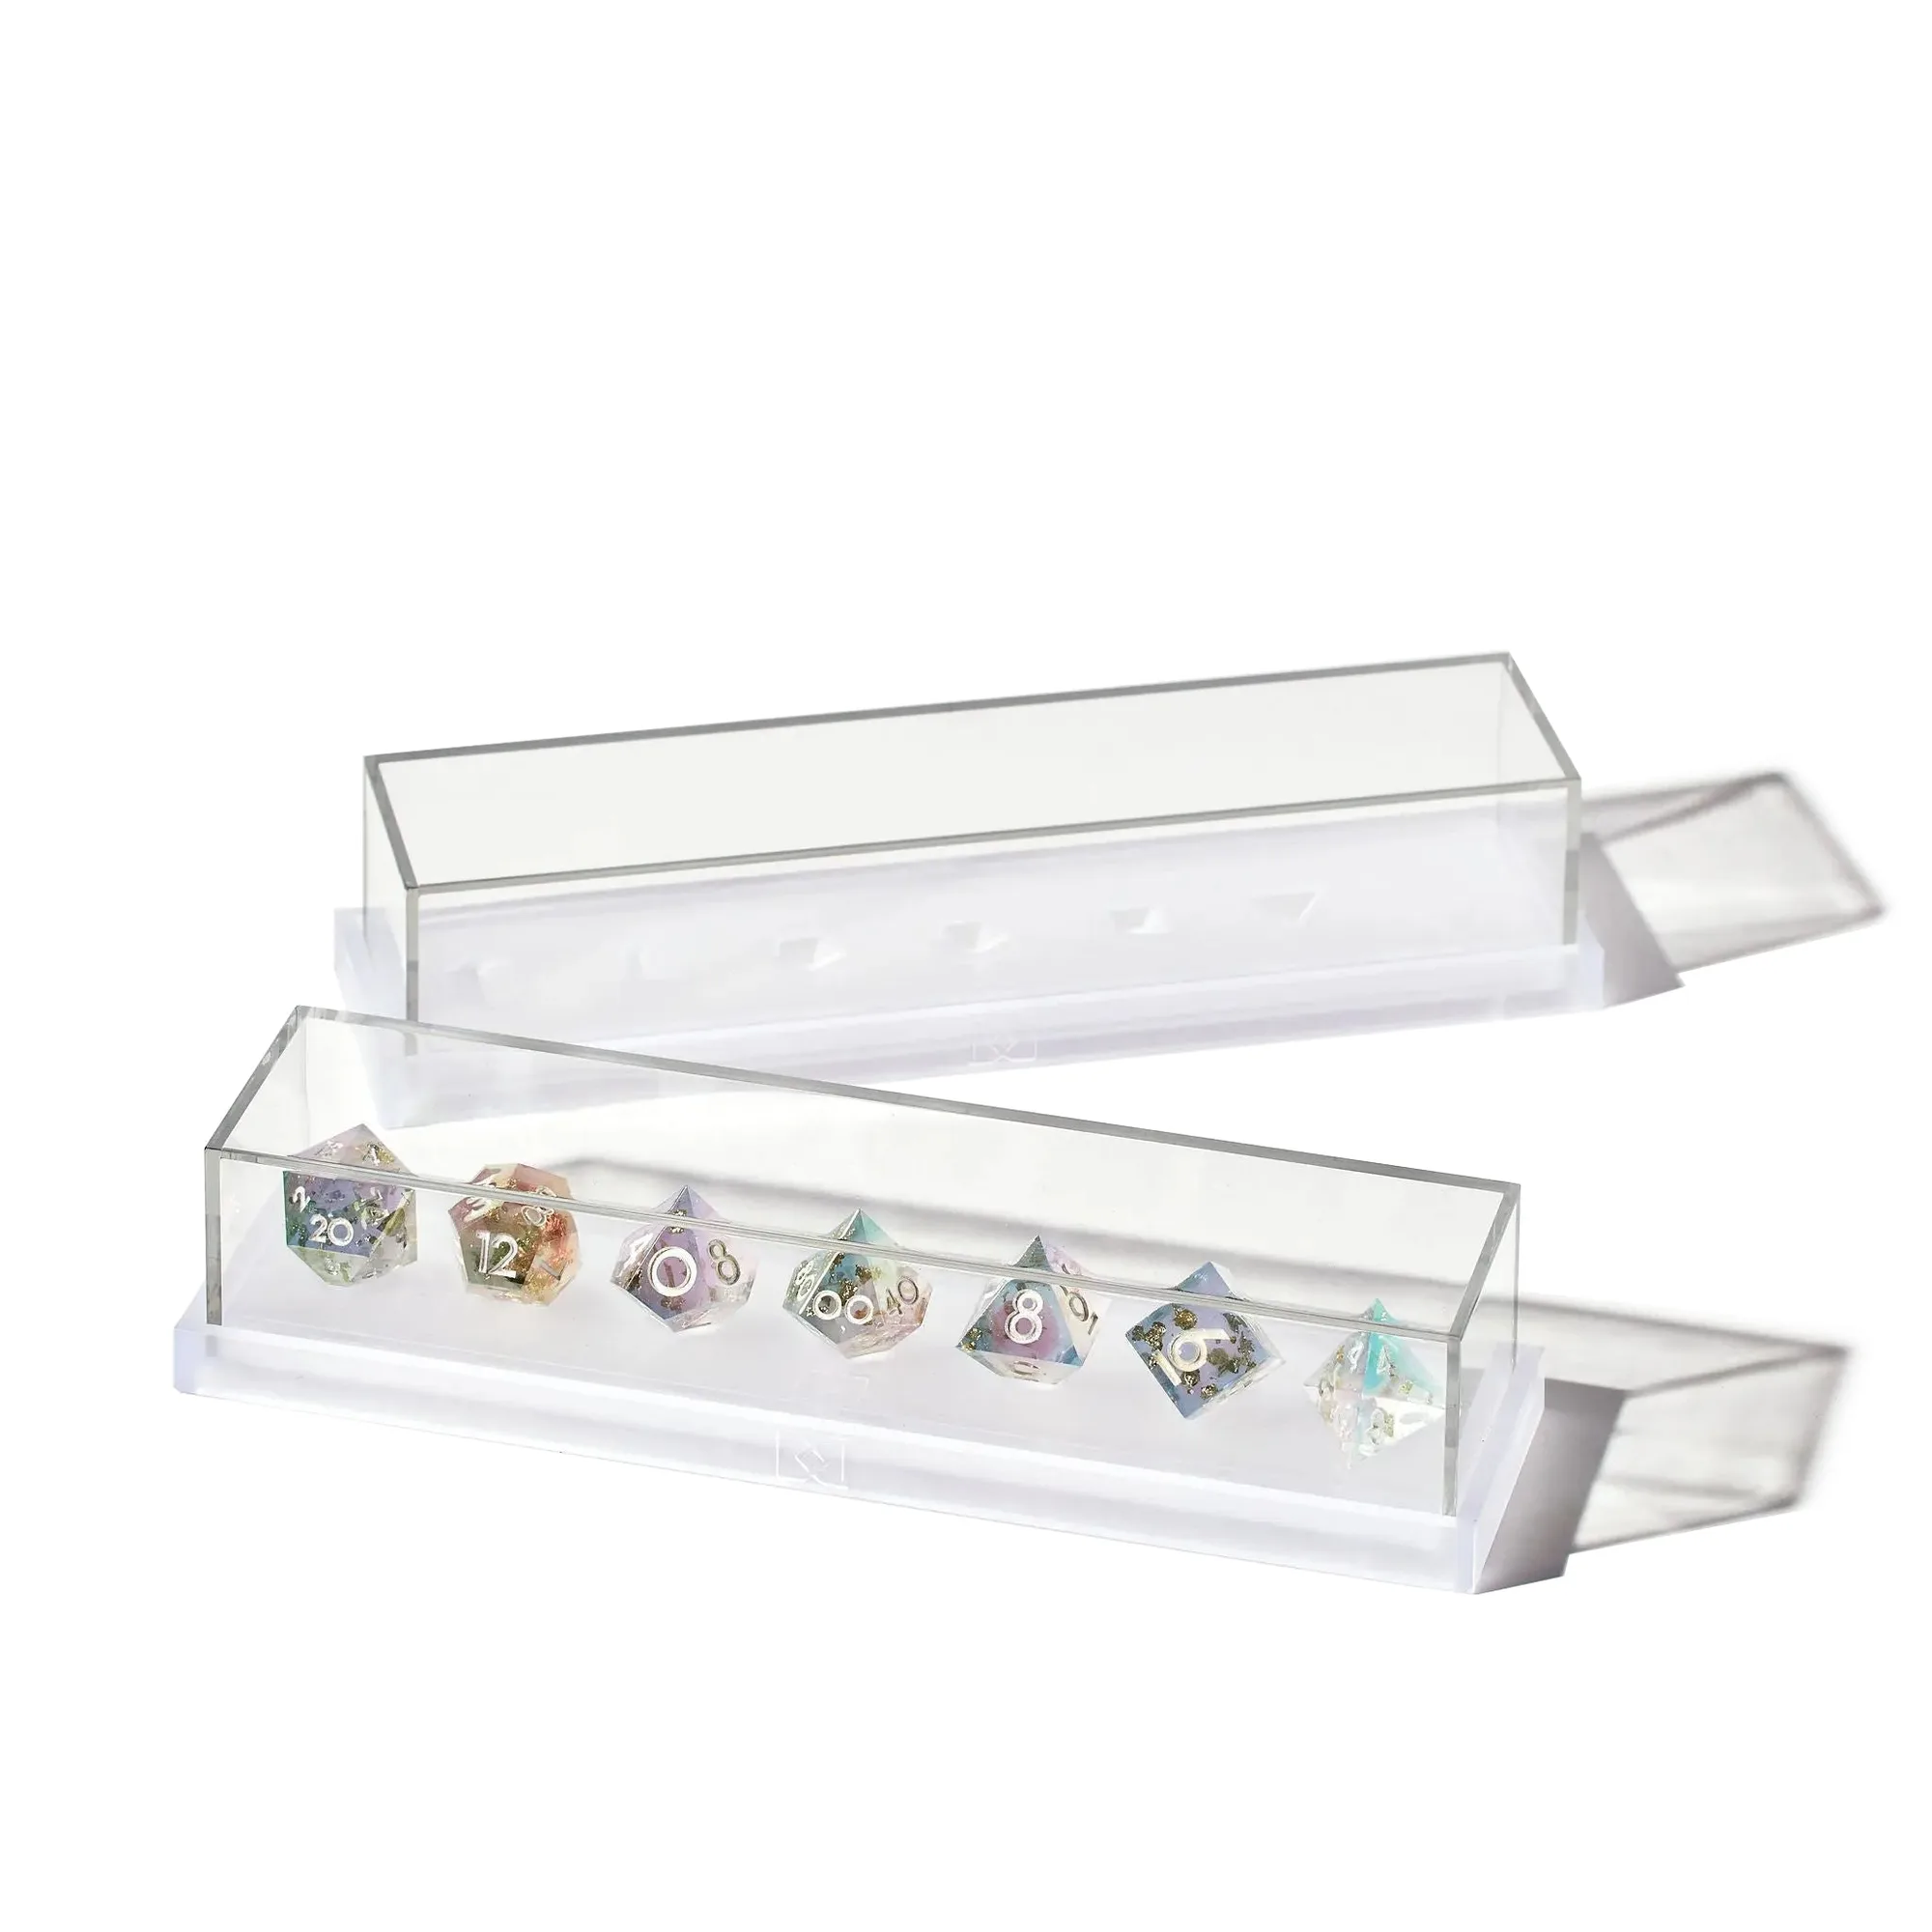
- Modular Dice Display Box: Innovative stackable design tailor-made to fit any 7-piece polyhedral dice set, for storing, protecting, and displaying dice. A display box gives you a clean, repeatable backdrop for collection photos and keeps sets organized between shoots, so you can photograph one set at a time without digging through a bag.
Good dice photos come from controlled light, honest color, and a setup you can repeat, not from expensive gear. Build the window setup once, keep your backgrounds consistent, and your collection will look as good on a phone screen as it does on the table.