Quick answer
You can fix a leaking garden hose connector by replacing the worn washer or O-ring using a simple repair kit like the Melnor Repair Kit 20 PC—no special tools needed.
Why connectors leak and when to repair vs. replace
Most hose connector leaks are caused by a flattened or missing rubber washer inside the female end. The washer creates a watertight seal against the male threads. Over time, heat and pressure deform it, leading to drips or sprays at the connection point.
If the connector itself is cracked, bent, or stripped, replacement is the better option. But if the metal or plastic body is intact and only the seal is failing, a $5 repair kit can fix it in under 10 minutes.
Step-by-step repair process
- 1. Disconnect and inspect the hose: Turn off the water and detach the hose from the spigot and any attachments. Look inside the female connector for the old washer—if it's missing, cracked, or flattened, you need a replacement. A common mistake is trying to repair a connector without first checking if the washer is actually the problem.
- 2. Remove the old washer: Use a small flathead screwdriver or a pick to gently pry out the old washer from the groove inside the connector. Be careful not to scratch the metal or plastic seating surface. If the washer is stuck, apply a drop of penetrating oil and let it sit for a minute before prying.
- 3. Select the correct replacement washer: Compare the old washer with the sizes in your repair kit. The Melnor Repair Kit 20 PC includes multiple washer sizes—choose one that fits snugly into the groove without bulging out. Using a washer that is too thick will prevent the connector from threading fully, causing a leak rather than fixing it.
- 4. Install the new washer: Press the new washer evenly into the groove with your fingers. Make sure it sits flat and flush against the bottom of the groove. Do not use tools that could tear the rubber. A twisted or partially seated washer will leak immediately when water pressure is applied.
- 5. Reattach and test the connection: Hand-tighten the hose connector onto the spigot or attachment. Turn the water on slowly and check for drips. If it still leaks, tighten slightly more with a wrench—but avoid overtightening, which can damage the washer. If the leak persists after tightening, the connector threads may be damaged and the entire fitting should be replaced.
Product used in this guide
-
Melnor Repair Kit 20 PC: The Melnor Repair Kit 20 PC includes 20 essential pieces such as washers and end caps to fix common leaking connections. It gives you multiple sizes of washers and spare parts in one box, so you can match the right piece to your connector without guessing.
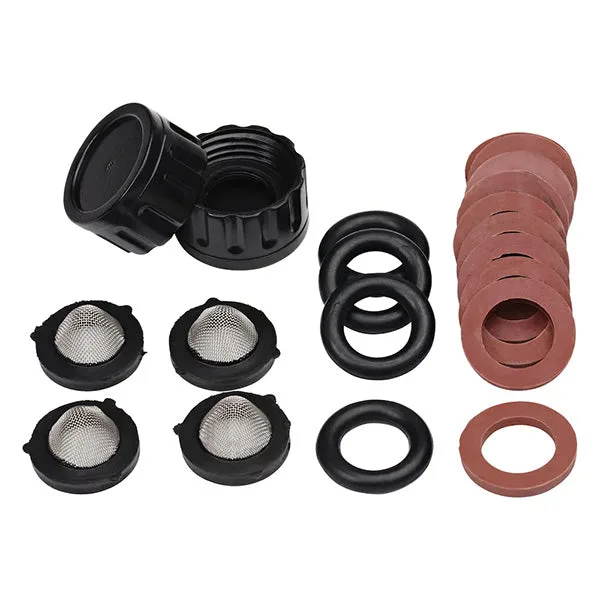
Melnor Repair Kit 20 PC