Quick answer
To replace a CFL light bracket on a studio light head, unplug the light, remove the old bracket, align the replacement bracket with the mounting holes, and secure it with the original screws. This restores the mounting structure for your CFL bulbs.
When to replace the bracket
A cracked, bent, or loose bracket can make your CFL light head unstable or unsafe to use. Replacing it restores full functionality and prevents damage to the bulb or fixture. The bracket is a simple mechanical part, so the repair is straightforward if you have basic tools.
What you need
You'll need a replacement bracket compatible with your 4-light or 5-light head CFL setup, a Phillips-head screwdriver, and a clean work surface. The original screws are usually reusable, so keep them aside during removal.
Step-by-step replacement process
- 1. Unplug and prepare: Disconnect the studio light from power. Remove any CFL bulbs and set them aside safely. Place the light head on a stable, non-slip surface. Never work on a plugged-in light. Accidental power-on can cause shock or bulb breakage.
- 2. Remove the old bracket: Use a Phillips-head screwdriver to remove the screws holding the bracket to the light head. Keep the screws in a small container. Gently pull the bracket away from the fixture. Screws can be small and easy to lose. Work over a tray or towel to catch them.
- 3. Align the new bracket: Position the replacement bracket so its mounting holes line up with the holes on the light head. The bracket should sit flush against the fixture without forcing it. If the holes don't align, double-check that the bracket is the correct model for your 4-light or 5-light head. Do not enlarge holes or force screws.
- 4. Secure with screws: Insert the original screws through the bracket into the light head. Tighten them evenly in a cross pattern (like tightening a car wheel) to keep the bracket level. Over-tightening can strip the threads or crack the bracket. Stop when the screw is snug and the bracket is firm.
- 5. Reinstall bulbs and test: Screw the CFL bulbs back into the sockets. Plug the light in and turn it on briefly to confirm the bulbs are secure and the bracket holds them steady. If the bracket wobbles or the bulbs don't align properly, recheck the screw tightness and bracket orientation before using the light.
Replacement bracket option
-
Replacement Light Bracket for 4 Light Head and 5 Light Head CFL Lights: This replacement light bracket is designed for use with 4-light head and 5-light head CFL lighting setups. It directly fits the mounting pattern of common studio CFL heads, so you don't need to modify or adapt the fixture.
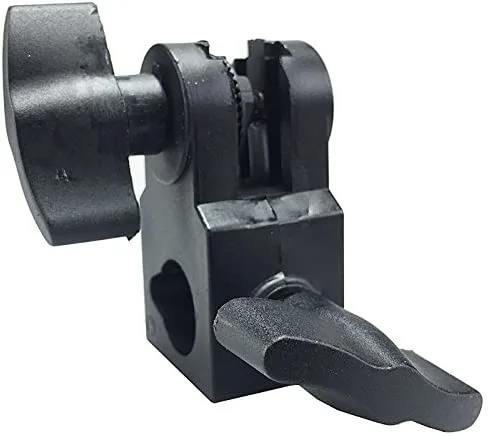
Replacement Light Bracket for 4 Light Head and 5 Light Head CFL Lights