Quick Answer
Pick two sturdy trees about 12 to 15 feet apart, wrap your straps at chest height, and clip the hammock so it hangs with a gentle sag. Sit in it slowly before you commit your full weight. Most beginner problems come from hanging the hammock too high or pulling it too tight, not from the straps themselves.
A hammock that hangs wrong feels like a banana peel waiting to happen. A hammock that hangs right is the easiest nap you will take all week. The difference is rarely the hammock. It is the setup: tree distance, strap height, hang angle, and how you test the whole thing before you climb in.
This beginner hammock setup walks through the order that works: choose trees, wrap straps, clip in, adjust, test. Each step includes the mistake that trips up most first-timers. Once you run through it twice, you will be able to hang in under five minutes.
Before You Start: What You Actually Need
You need three things: a hammock, a suspension system, and two suitable trees or posts. Many hammocks sold today include their own suspension, so check your box before buying anything extra. The Double Deluxe Hammock with Suspension Straps | Prints, for example, ships with two ready-to-hang hammock straps, two nautical-grade carabiners, and a stuff sack, so it is a complete first setup out of the box.
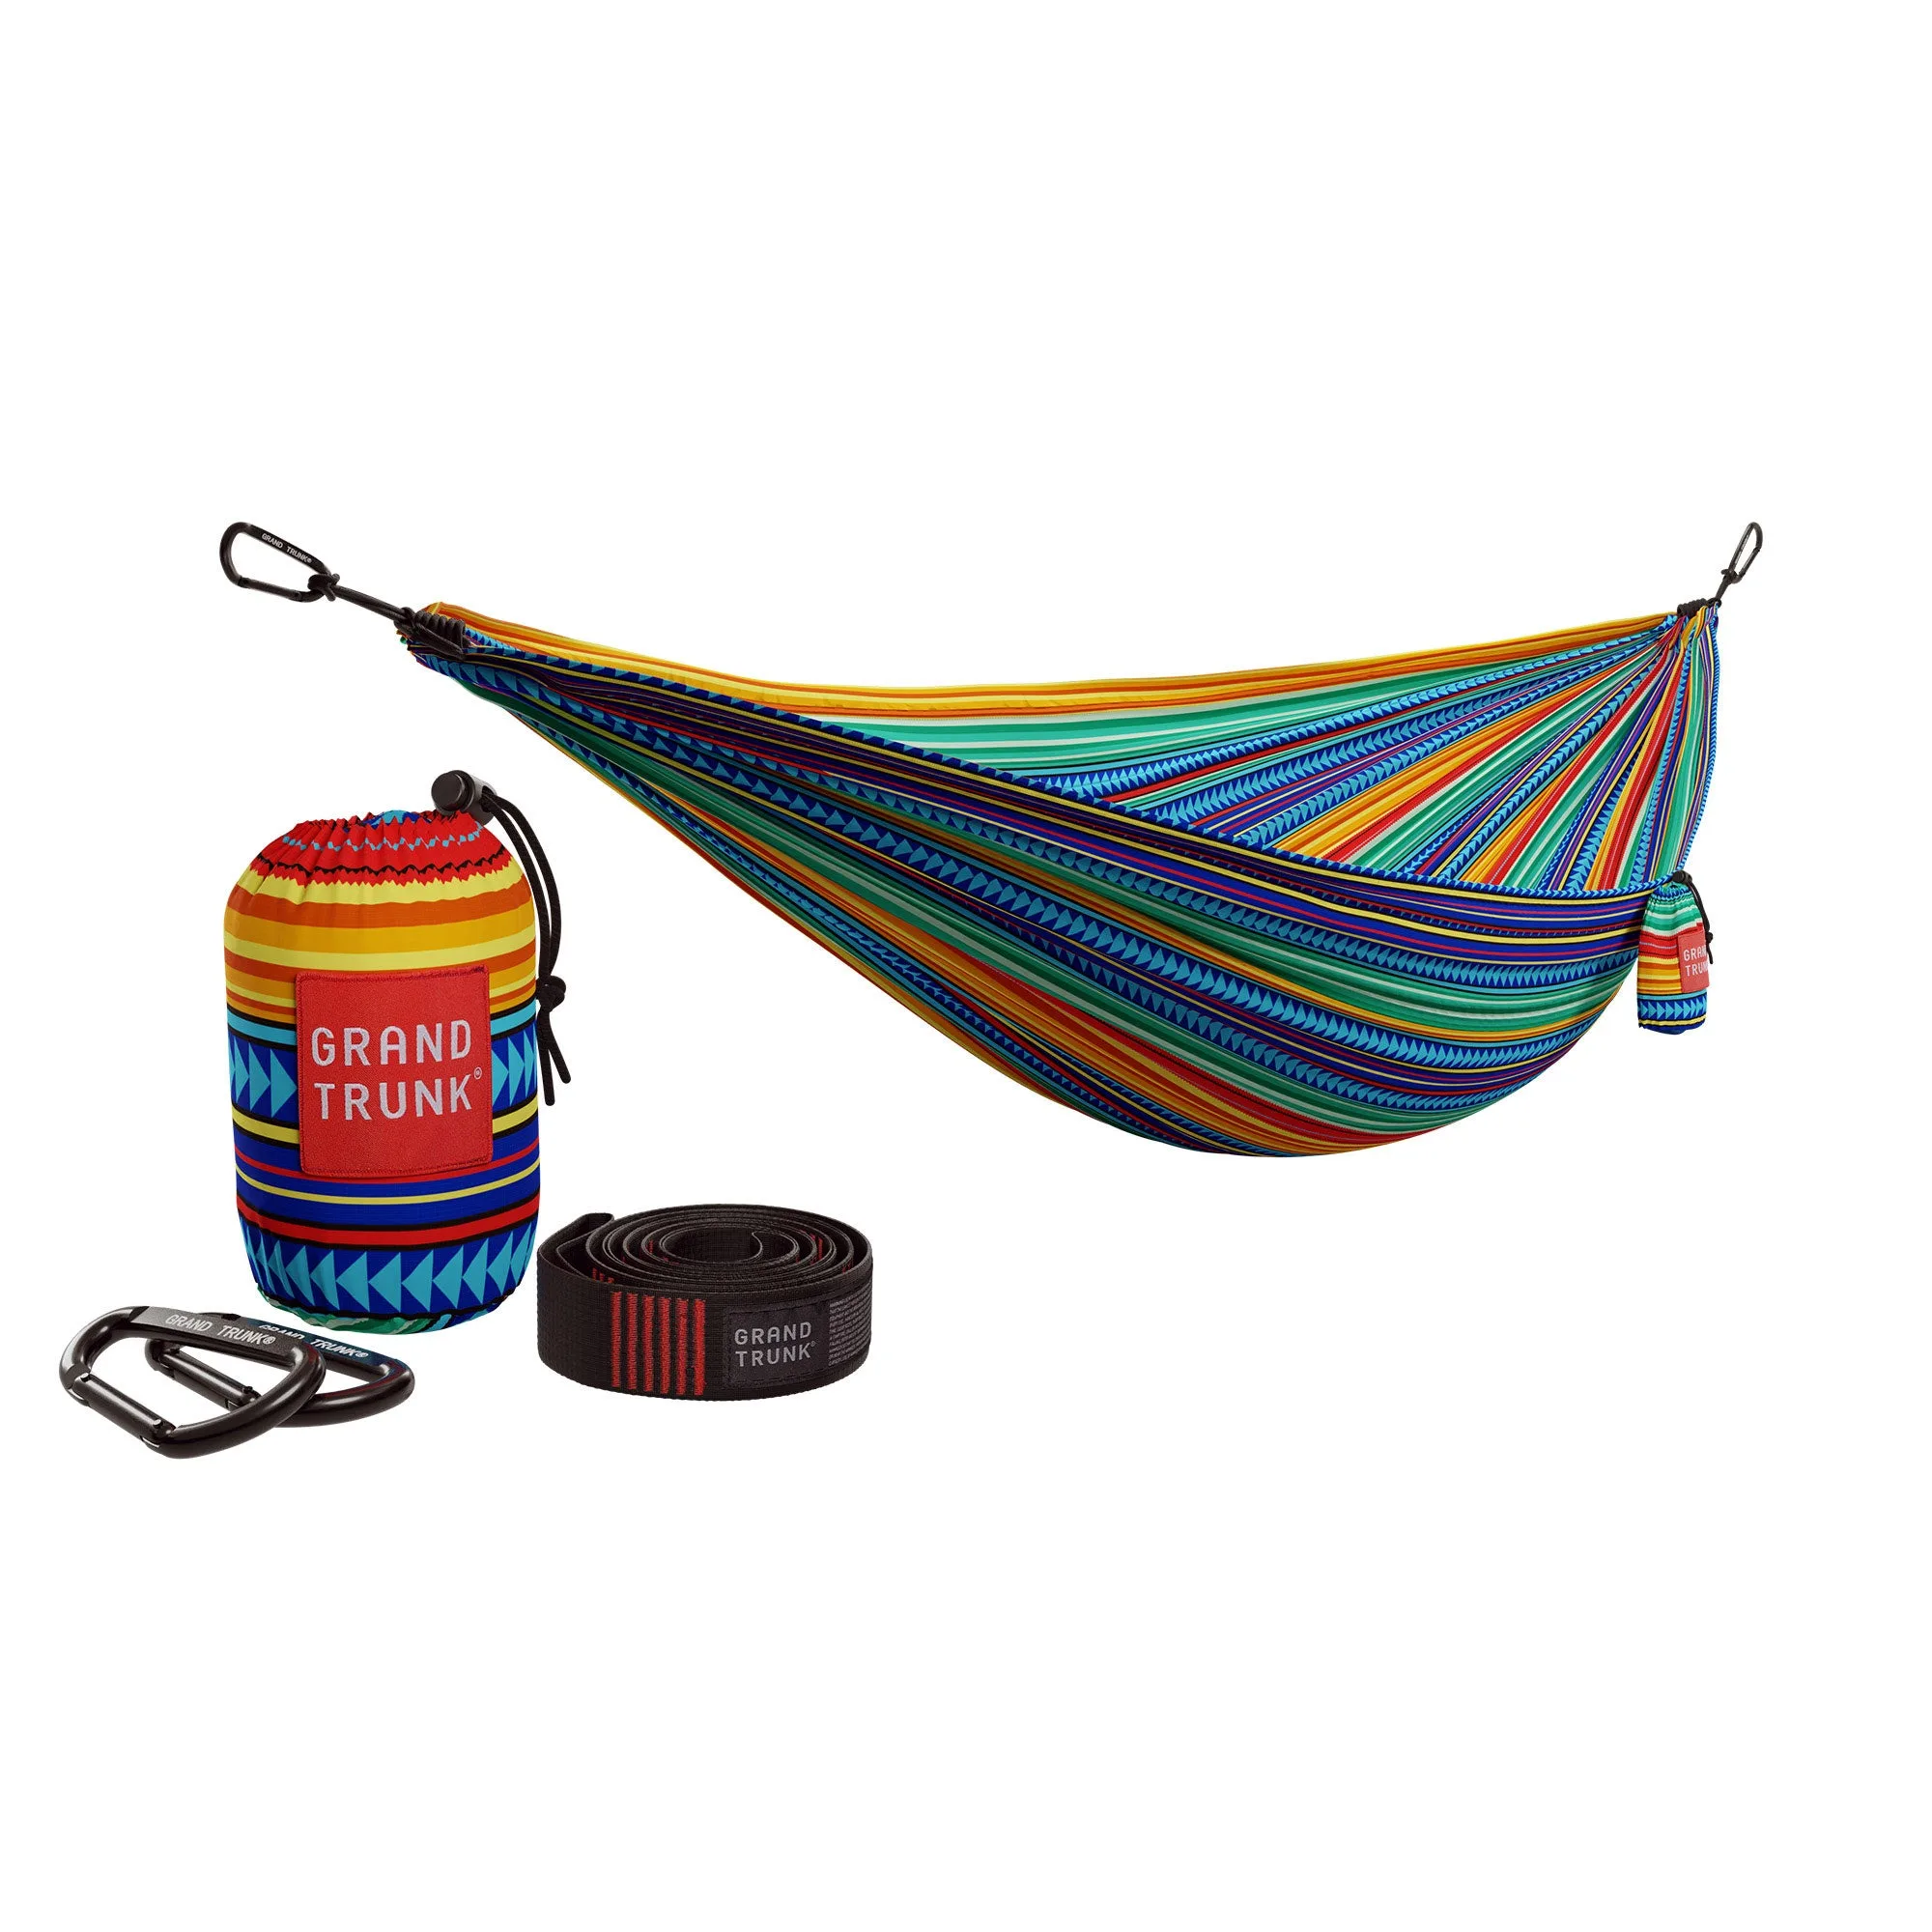
Double Deluxe Hammock with Suspension Straps | Prints
If your hammock uses a starter rope kit instead, you can upgrade to dedicated straps later. The Tree Slings Hammock Hanging Kit is pre-knotted for easy hanging and adjusting height, and the straps are wide enough to meet the width requirements for state and national parks. That matters because thin ropes and cords can damage tree bark, and some parks will ask you to take them down.
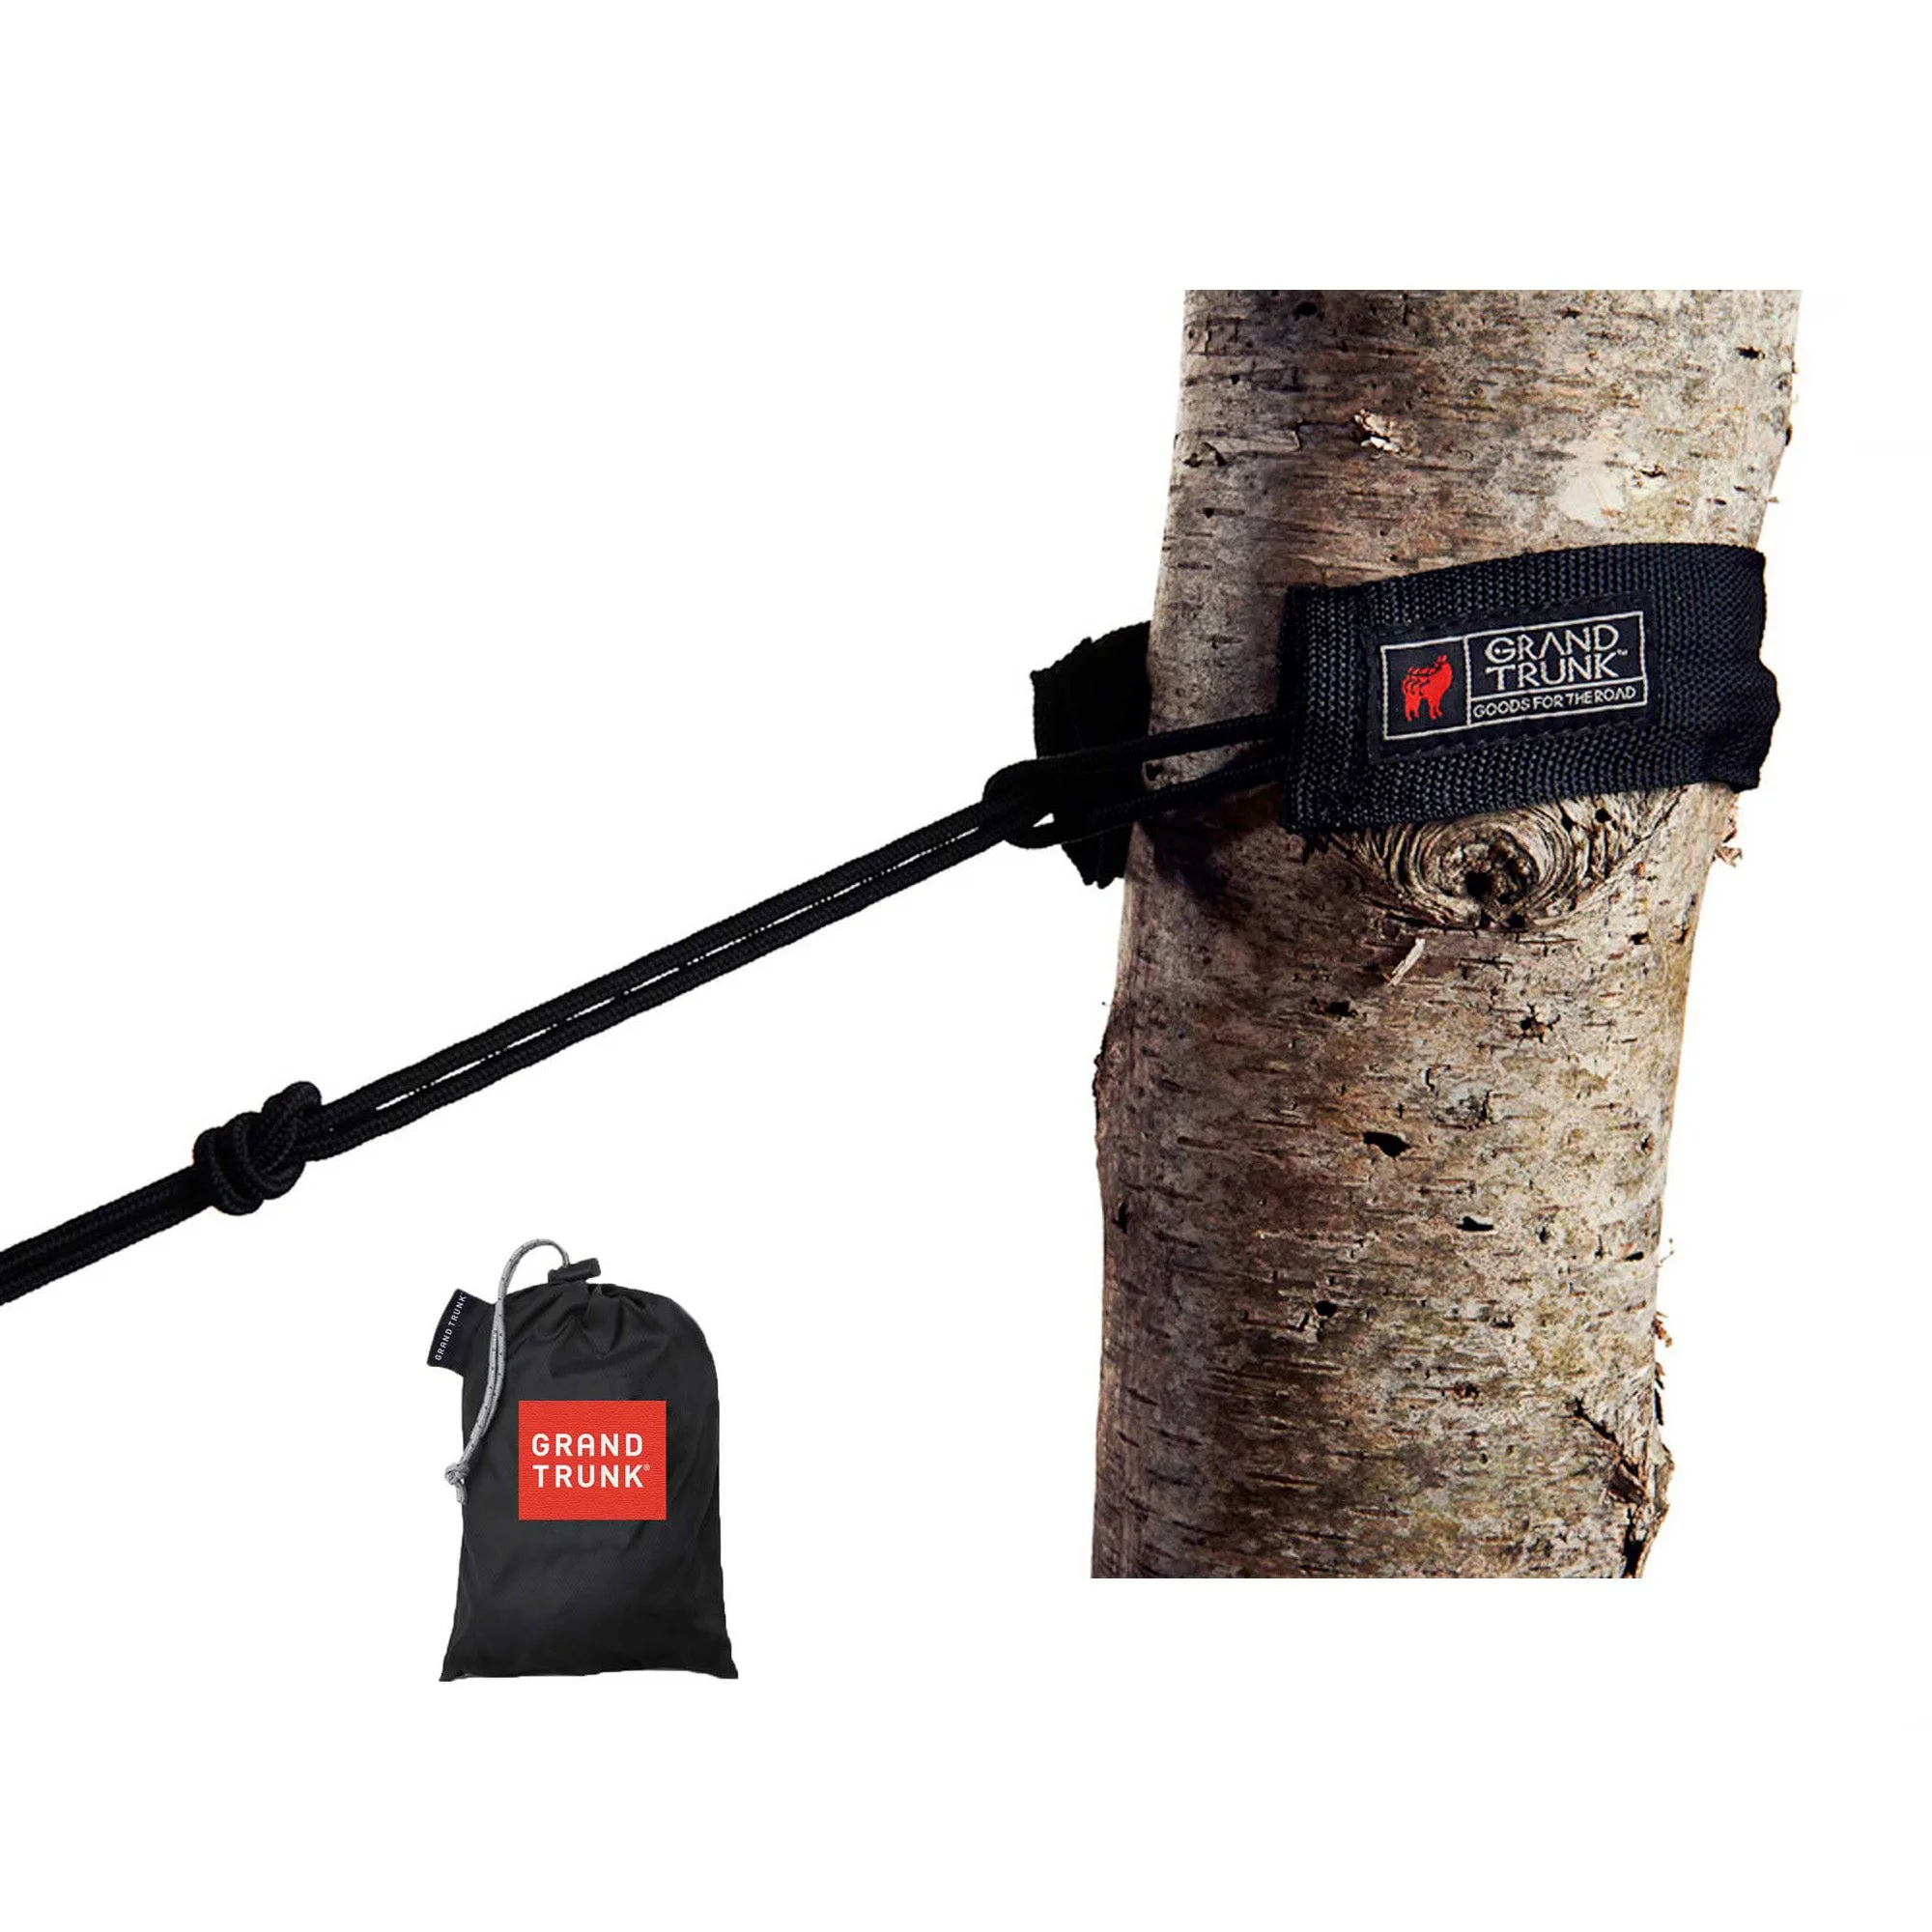
Tree Slings Hammock Hanging Kit
- Check your hammock box for included straps and carabiners before buying extras.
- Wear shoes you can stand in comfortably while you adjust height.
- Bring a friend the first time if you can. A second pair of hands makes clipping in easier.
Step 1: Choose Two Trees That Can Take the Load
Look for two living trees with trunks at least 6 to 8 inches across, ideally 12 to 15 feet apart. Dead branches overhead are the real hazard, so glance up before you wrap anything. Avoid trees with soft, peeling bark or obvious damage. If you are in a park, check local rules first. Some areas require wider straps, and some prohibit hanging from trees entirely.
Do not use signposts, railings, or thin saplings as anchors. They may hold for a minute and fail without warning. If no suitable trees exist, a hammock stand is the safer choice.
- Mistake to avoid: wrapping a tree that is too small. A flexible trunk will bend and drop you.
- Checkpoint: stand between your two trees and hold your arms out. If you can touch both trunks, they are too close.
Step 2: Wrap the Straps at the Right Height
Wrap each strap around its tree at roughly chest height, then pass the end through the loop or attachment point to secure it. Keep the strap flat against the bark rather than twisted, since a flat strap spreads load and protects the tree. On a pre-knotted kit like the Tree Slings Hammock Hanging Kit, you can hang and adjust height quickly without retying anything.
Chest height is a starting point, not a rule. If your trees are farther apart, you will need to wrap higher so the hammock does not bottom out. If they are closer, wrap lower.
- Mistake to avoid: wrapping too low. You will end up sitting on the ground.
- Checkpoint: both straps should sit at about the same height on their trees.
Step 3: Clip the Hammock In
Attach each end of your hammock to the strap using the carabiner or connection point your hammock came with. On the Double Deluxe Hammock with Suspension Straps | Prints, the included nautical-grade carabiners clip directly to the included straps, so there is no knot tying involved. If your hammock uses a starter rope kit, follow the instructions that came with it rather than improvising.
Clip both ends before you sit. It sounds obvious, but people often clip one side, climb in, and then reach for the other. That is how hammocks flip.
- Mistake to avoid: clipping to a strap that is twisted or bunched.
- Checkpoint: tug each carabiner firmly. It should not slide along the strap.
Step 4: Adjust the Hang Angle and Height
A comfortable hammock hangs with a gentle curve, not a tight line. Aim for roughly a 30-degree angle from each anchor point down to the hammock. If the hammock feels like a trampoline, it is too tight: loosen the straps or move your connection points. If it wraps around your shoulders like a taco, it is too loose or the trees are too close.
For height, sit in the hammock first with your feet still on the ground. Your seat should land around knee height. Adjust from there before you lie back.
- Mistake to avoid: pulling the hammock drum-tight. A tight hang puts more stress on trees and straps and is less comfortable.
- Checkpoint: when you sit, your feet should touch the ground and your backside should not scrape it.
Step 5: Test the Hang Before You Commit
Sit down slowly near the center, keep your feet on the ground, and shift your weight side to side. Listen and feel for slipping. If everything holds, swing your legs in and lie back at a slight diagonal. Lying diagonally is what lets you stretch out flat instead of curling up like a banana.
If you plan to sleep overnight, add insulation underneath. Air moving under a hammock pulls warmth away fast, even in mild weather. The 360° ThermaQuilt 3-in-1 Blanket, Sleeping Bag & Hammock Underquilt wraps around a hammock and cinches at the ends to keep warm air in and cold air out, or lays flat as a blanket or sleeping bag.
- Mistake to avoid: flopping in fast. A slow test catches a slipping strap before it becomes a fall.
- Checkpoint: nothing creaks, shifts, or slides after 30 seconds of gentle movement.
Beginner Mistakes That Cause Most Failures
The most common setup errors are hanging too high, hanging too tight, and using anchors that are too small or too far apart. A hammock hung above chest height is hard to enter and harder to exit. A hammock pulled tight loses the diagonal lay that makes it comfortable. Anchors that flex or move will eventually drop you.
The second most common problem is skipping insulation on cool nights. A hammock has no bottom insulation, so cold air circulates underneath. If you are camping in shoulder seasons, plan for an underquilt or a 3-in-1 option rather than hoping a top blanket is enough.
- Hang at a height you can sit into with your feet on the ground.
- Keep the hang loose enough to lie diagonally.
- Add bottom insulation any time overnight temperatures drop below comfortable.
Your First Hang, Step by Step
- Pick two trees 12 to 15 feet apart: Choose living trunks at least 6 to 8 inches across with no dead branches overhead. Too close and the hammock sags to the ground. Too far and you cannot reach both anchors comfortably.
- Wrap straps at chest height: Keep each strap flat against the bark and pass the end through the loop to secure it. Twisted straps concentrate load and can slip. Flat straps spread it.
- Clip the hammock to both straps: Use the carabiners or connection points your hammock came with, and tug each one to confirm it is seated. Clip both ends before you sit. Never climb in with one side loose.
- Adjust for a gentle sag: Aim for roughly a 30-degree angle from each anchor, then sit with your feet on the ground to check height. If it feels like a trampoline, loosen it. If it wraps your shoulders, tighten or move your anchors.
- Test slowly, then lie diagonally: Sit near the center, shift your weight side to side, then swing your legs in and lie at a slight diagonal. A 30-second test catches slipping straps before they become a fall.
Gear That Makes Beginner Setup Easier
- Double Deluxe Hammock with Suspension Straps | Prints: Includes two ready-to-hang hammock straps, two nautical-grade carabiners, and a stuff sack, with extra strength triple-lock stitched seams. You can hang it the day it arrives without buying separate straps or learning knots, which removes the most common beginner blocker.
- Tree Slings Hammock Hanging Kit: Pre-knotted for easy hanging and adjusting height, and the tree-protecting strap meets the width requirements for state and national parks. If your hammock came with a rope kit or you hang in parks with strap-width rules, this is the upgrade that keeps you compliant and protects bark.
- 360° ThermaQuilt 3-in-1 Blanket, Sleeping Bag & Hammock Underquilt: Wraps completely around any hammock and cinches at the ends to keep warm air in and cold air out, or lays flat as a tech blanket or traditional sleeping bag. It solves the cold-back problem that ruins first overnight hangs, and it doubles as a blanket when you are not in the hammock.
Setup gets faster every time you do it. Pick healthy trees, wrap flat at chest height, clip in both ends, adjust for a gentle sag, and test before you commit. Do that and the hardest part of your hang will be getting back out.