Setting up a tarp shelter is one of the most versatile and lightweight ways to stay protected in the outdoors. Whether you're an ultralight backpacker looking to save weight or a seasoned camper wanting a quick, weatherproof setup, mastering the art of tarp pitching can transform your camping experience. With just a tarp, some cordage, and a few stakes, you can create a reliable shelter in under five minutes.
In this guide, we'll walk you through the essential steps to set up a tarp shelter quickly and efficiently. We'll cover the gear you need, the best knots for the job, and a simple A-frame configuration that works in most conditions. By the end, you'll be ready to hit the trail with confidence, knowing you can set up a dry, comfortable camp in no time.
Why Choose a Tarp Shelter?
Tarp shelters have gained popularity among ultralight backpackers and minimalist campers for their weight savings and adaptability. Unlike traditional tents, a tarp can be pitched in countless configurations to suit the terrain and weather. A single tarp can serve as a sun shade, a rain fly, or a fully enclosed shelter when combined with a groundsheet.
For those new to tarp camping, the initial learning curve might seem steep, but once you master a few basic setups, you'll appreciate the freedom and simplicity. Tarps are also more affordable and easier to repair than tents, making them a smart choice for long-term adventures. Plus, they pack down smaller, leaving more space in your backpack for other essentials.
- Weighs significantly less than most tents, ideal for long-distance hikes.
- Versatile: can be pitched as an A-frame, lean-to, or diamond fly.
- Breathable design reduces condensation in humid conditions.
Essential Gear for a Quick Setup
To set up a tarp shelter in five minutes, you need the right gear. Start with a high-quality tarp that is large enough for you and your gear. A size like 8x10 feet works well for one person, while a 10x10 or larger gives extra coverage. Pair it with lightweight guylines and strong, lightweight stakes. Practice with your gear at home so you can replicate the setup quickly in the field.
For an all-in-one solution, consider the DAWN L Tarp from Heimplanet. This tarp is designed for quick deployment and offers excellent weather protection. Its reinforced corners and pre-attached guy points make it easy to tension, even in windy conditions. Having a dedicated tarp like this can shave minutes off your setup time.
- Tarp (e.g., DAWN L Tarp; Cairo Camo) with reinforced tie-out points.
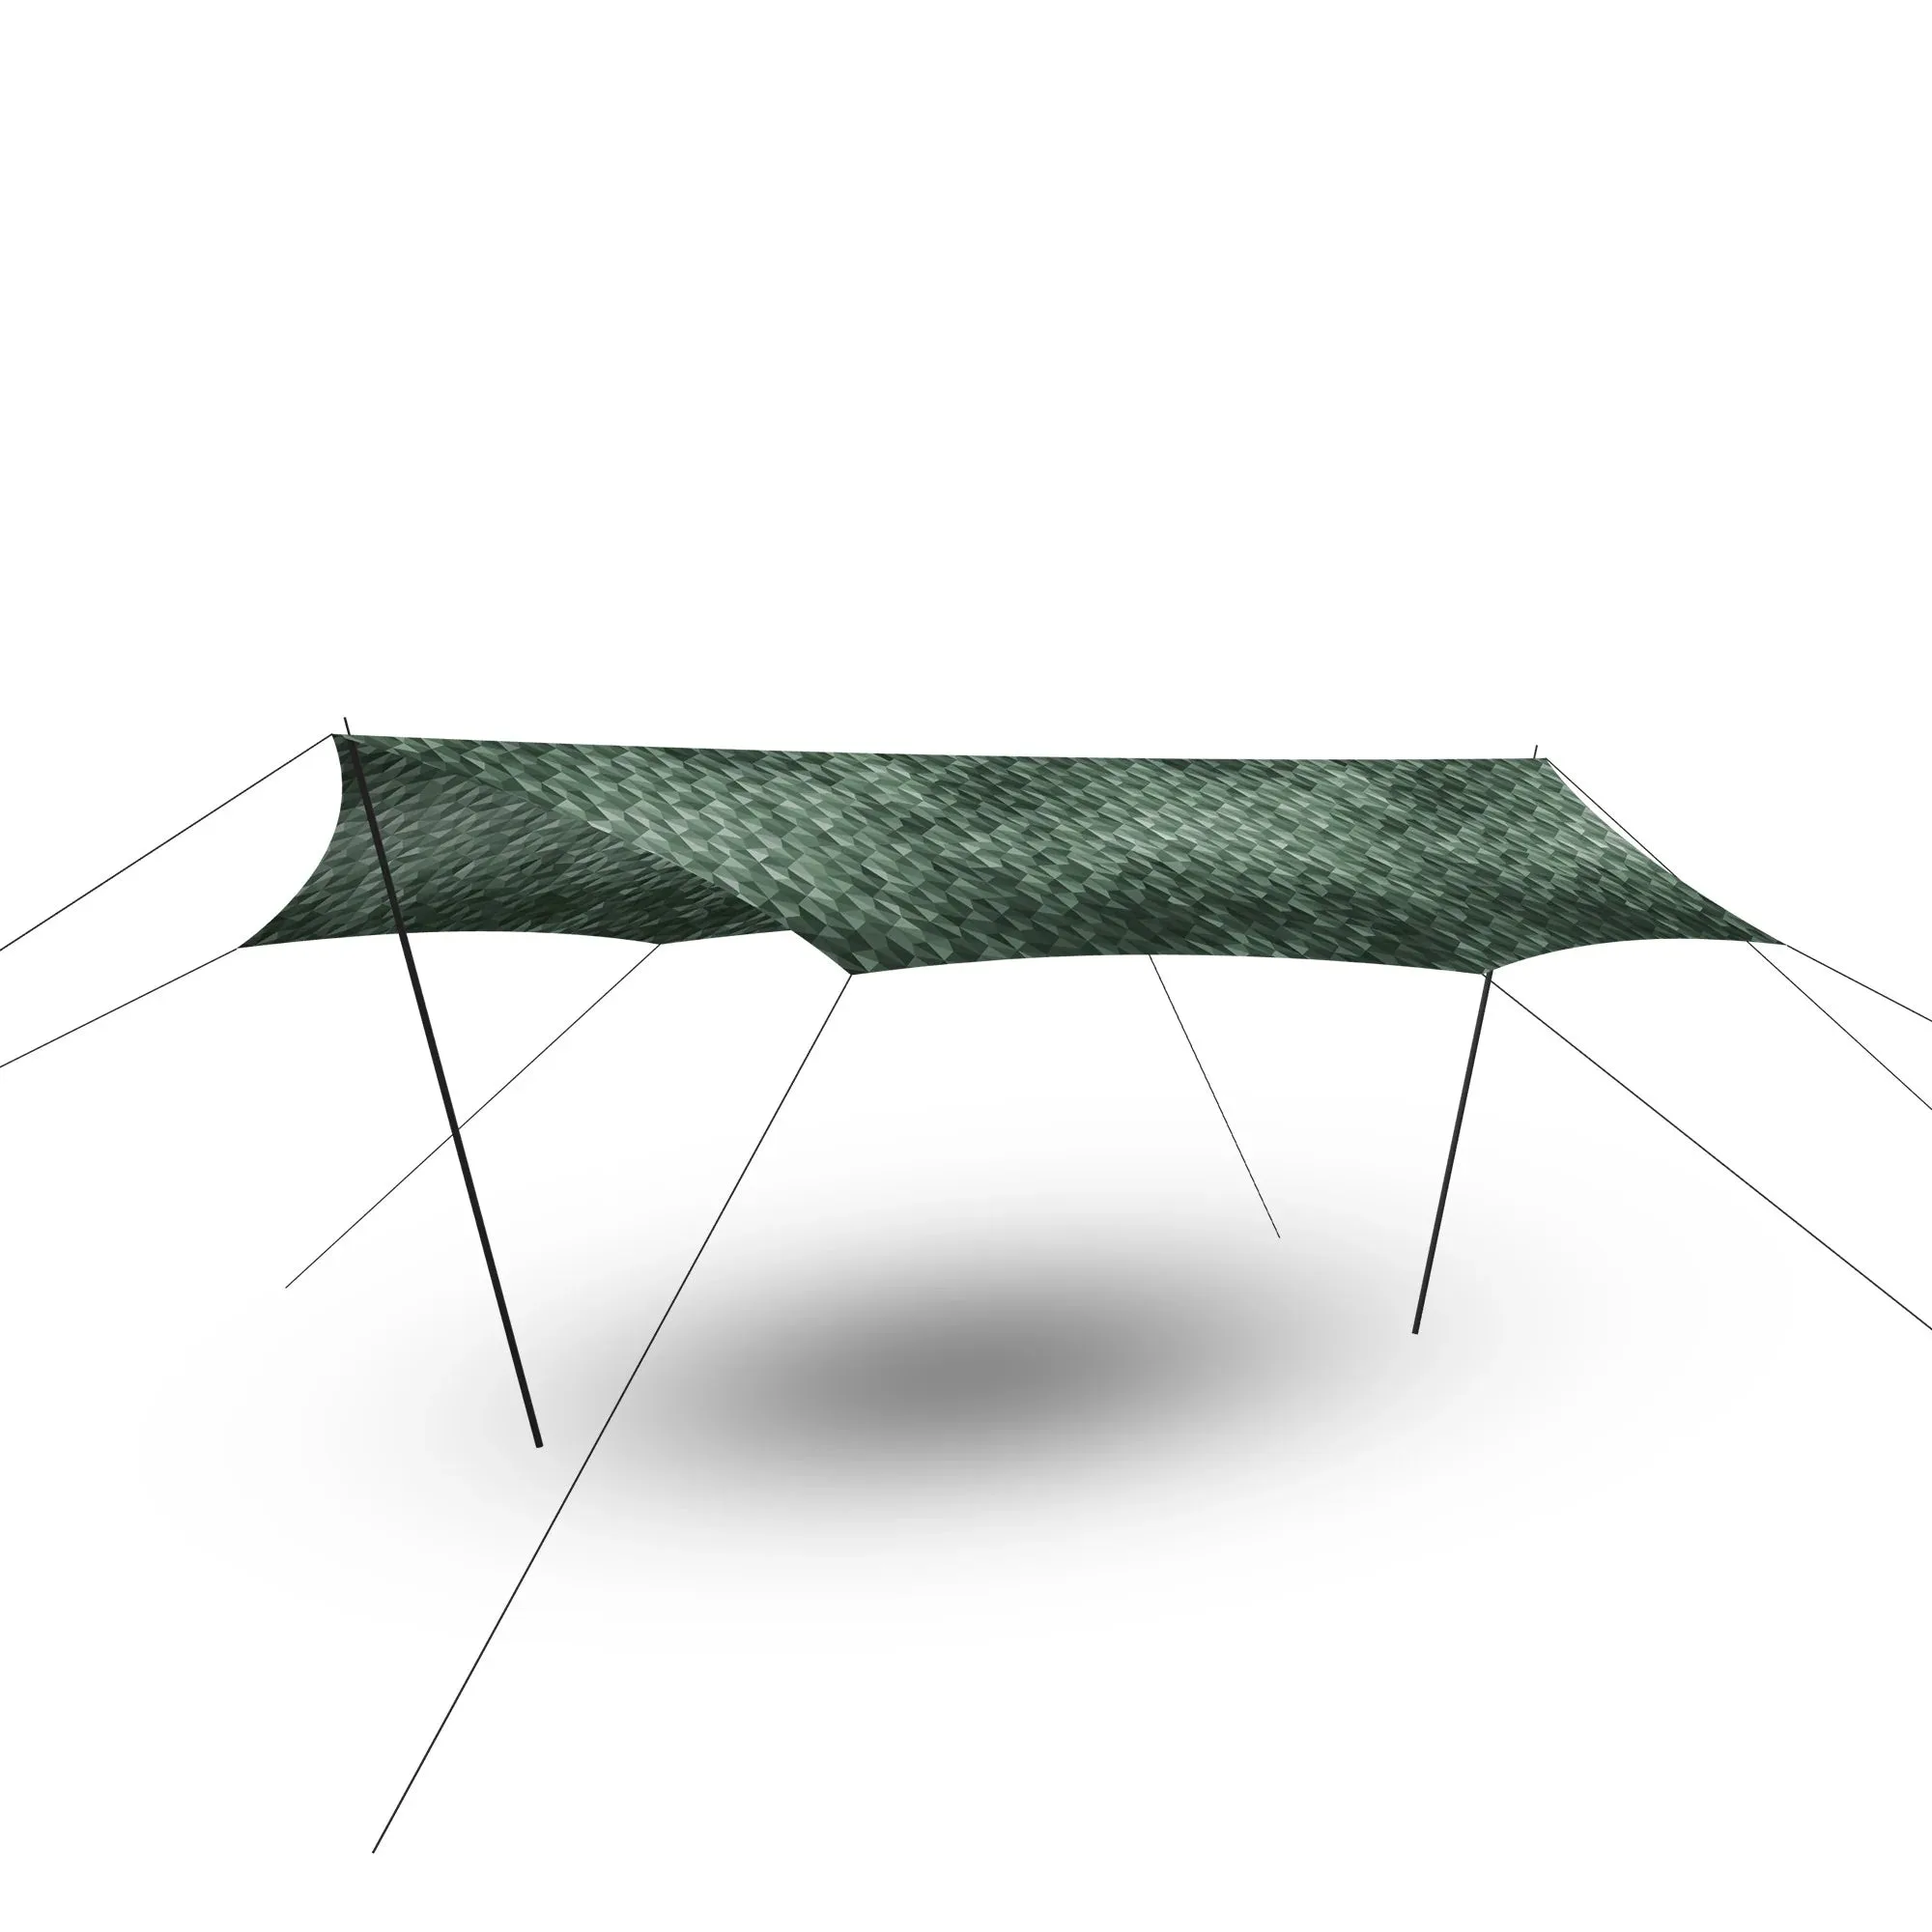
DAWN L Tarp; Cairo Camo
- 6-8 lightweight stakes and 4-6 meters of reflective guylines.
- A compact groundsheet to keep your sleeping area dry and clean.
Step 1: Choose Your Site and Layout
Before you start pitching, find a flat, well-drained spot free of rocks and roots. Look for natural windbreaks like trees or boulders, but avoid low areas where water might pool. Once you've chosen your site, lay out your tarp flat on the ground. Decide on your pitch style—the A-frame is the easiest for beginners and works well in most weather.
For the A-frame, orient the tarp so the ridgeline runs parallel to the prevailing wind. This reduces wind load and keeps the shelter stable. If you're using trekking poles, extend them to about 120-130 cm. If not, find a sturdy branch or use two poles to create the ridge. Practice this layout a few times to build muscle memory.
- Clear the ground of sharp objects to avoid damaging your tarp.
- Position the ridgeline perpendicular to the wind for maximum stability.
- Use trees or trekking poles as supports to save weight on poles.
Step 2: Set Up the Ridge Line
The ridge line is the backbone of your tarp shelter. Tie a taut line hitch on one end of your guylines and attach it to a tree or trekking pole at about head height. Walk to the other end and pull the line taut, then tie it off. The ridge line should be tight enough that it doesn't sag but not so tight that it pulls your supports inward.
If you're using trekking poles, place them under the tarp's center seam and extend them until the tarp is elevated. Secure the poles with a small loop of cord to prevent slipping. For a quick and reliable knot, the trucker's hitch works well for tensioning the ridge line. This step takes practice but is crucial for a stable shelter.
- Use a taut line hitch for adjustable tension on the ridge line.
- Ensure the ridge line is at least 150 cm above ground for headroom.
- Check that both ends are evenly tensioned to avoid a lopsided pitch.
Step 3: Stake the Corners and Adjust
With the ridge line in place, stake out the four corners of the tarp. Start with the two windward corners, pulling them out at a 45-degree angle from the ridge. Drive the stakes into the ground at a 45-degree angle away from the tarp for maximum holding power. Then stake the leeward corners, adjusting tension as needed.
For added stability in windy conditions, you can use a guylines system that allows you to fine-tune each corner independently. Some tarps, like the DAWN L Tarp, come with multiple tie-out points for this purpose. Once all corners are staked, walk around the shelter and check for sagging or loose sections. Adjust the stakes or guylines until the tarp is drum-tight.
- Stake corners at a 45-degree angle to the ground for better grip.
- Use a rock or log as a deadman anchor if the soil is loose or sandy.
- Leave a small gap at the bottom for ventilation to reduce condensation.
Step 4: Fine-Tune and Add a Groundsheet
Once the tarp is up, step inside and check for any low spots where water could collect. If the tarp is sagging, tighten the guylines. For extra protection, place a groundsheet inside the shelter. This keeps your sleeping bag dry and adds a layer of insulation from the cold ground. A simple footprint or a lightweight emergency blanket works well.
To keep your gear organized inside, use a compact organizer like the https://trailproof.shop/products/carry-essentials-dopp-kit-better-half-101095Carry Essentials Dopp Kit Better Half. This handy pouch can hold your toiletries, headlamp, and small essentials, keeping them off the ground and easy to find. With everything in its place, your tarp shelter becomes a cozy, efficient basecamp.
- Check the tarp's tension after 10 minutes, as materials can stretch.
- Store shoes and wet gear outside the shelter to keep the interior dry.
- Use a small bag like the Carry Essentials Dopp Kit Better Half to keep items tidy.
Common Mistakes to Avoid
One of the most common mistakes beginners make is pitching the tarp too low. While a low profile sheds wind better, it also reduces headroom and can make the shelter feel claustrophobic. Aim for a ridge height that allows you to sit upright. Another mistake is not staking the tarp tight enough—a loose tarp will flap in the wind and collect water.
Also, avoid setting up in a depression or near a water source. Even a small rain can turn your camp into a puddle. Finally, don't forget to practice at home before your trip. Setting up a tarp in the backyard under calm conditions builds confidence and speed for when you need it in the field.
- Don't pitch too low—leave enough headroom to sit comfortably.
- Avoid low spots where water can pool after rain.
- Always practice your setup at least once before heading out.
With a bit of practice, setting up a tarp shelter in five minutes is entirely achievable. The key is to have the right gear, know your knots, and choose a simple pitch like the A-frame. Whether you're using a dedicated tarp like the DAWN L Tarp or a lightweight alternative, this skill will make your camping trips more flexible and enjoyable. So grab your tarp, head outside, and start practicing—you'll be a tarp shelter pro in no time.